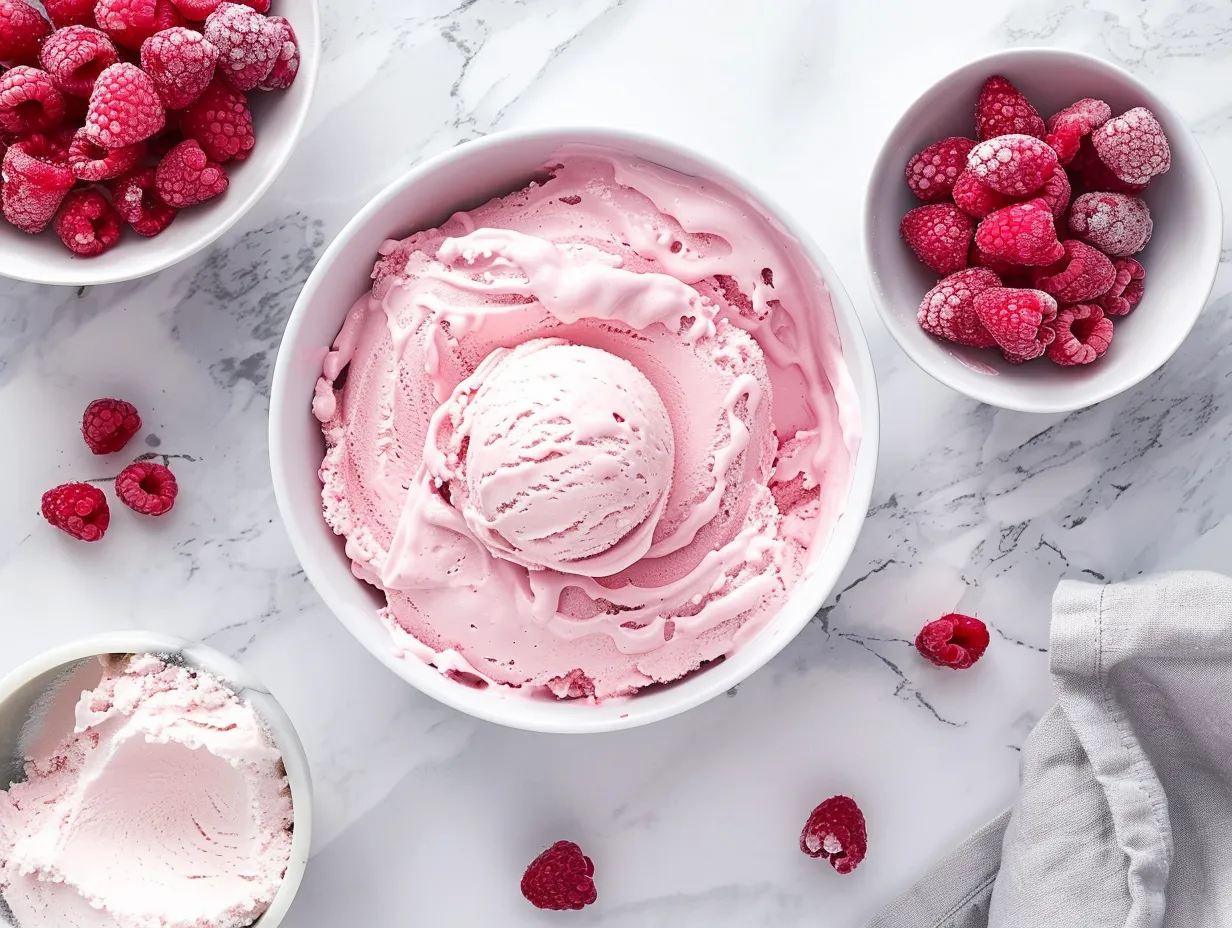
Oh, honey, let me tell you about my Raspberry Swirl Ice Cream. It’s more than just a dessert; it’s a sweet memory swirling with the laughter of my family. I remember the first time I tried making it. It was a summer afternoon, and the kids were begging for something cold and delicious. Store-bought just wouldn’t cut it, you know? They wanted something special. So, I thought, “Why not try making Raspberry Swirl Ice Cream?”
Well, let’s just say my first attempt was… a learning experience. The raspberry swirl ended up looking more like a raspberry blob! But the taste? Oh, even with its less-than-perfect appearance, the taste of that first batch of homemade raspberry ice cream was heavenly. It was so fresh and vibrant. It was then I was determined to perfect this recipe. And honestly, after a couple tweaks, I ended up with the most perfect creamy raspberry ice cream.
It’s funny, isn’t it? How sometimes the best recipes come from a little bit of trial and error. And let me tell you, this recipe is truly the easiest way to make amazing raspberry swirl ice cream. It’s a dish that perfectly fits into our busy family life. Whether it’s a summer barbecue, a birthday party, or just a regular Tuesday night, Raspberry Swirl Ice Cream always brings smiles to everyone’s faces. It’s one of those recipes that people always ask me to make. This raspberry ice cream recipe has been a constant source of joy.
It’s become a tradition, really. Making this Raspberry Swirl Ice Cream feels like bottling up sunshine and happiness, you know? I remember trying to make it a bit healthier once, and… well, let’s just say the family wasn’t impressed. They prefer the full-fat, creamy version – and honestly, so do I! So, don’t be shy with the cream when you’re making your raspberry ice cream ripple!
I can’t wait to share my Raspberry Swirl Ice Cream recipe with you. Trust me, if I can make it, you can too! Get ready for a treat that will quickly become a family favorite. Now, let’s get started, shall we?
Ingredients for Raspberry Swirl Ice Cream
Here’s what you’ll need to whip up a batch of this deliciousness:
- 2 cups heavy cream: I always use organic heavy cream for my Raspberry Swirl Ice Cream. It makes such a difference in the richness and flavor! The high fat content in heavy cream is crucial for that smooth, creamy texture we all crave in ice cream. Using organic ensures you’re getting the best quality, free from additives.
- 1 cup whole milk: Full-fat milk is the way to go here, trust me. Whole milk contributes to the overall creaminess of the ice cream. The fat helps prevent ice crystals from forming, resulting in a smoother final product. Skim or low-fat milk just won’t cut it!
- ¾ cup granulated sugar: You can adjust this slightly depending on how sweet you like your easy raspberry swirl ice cream. Sugar not only adds sweetness but also helps to lower the freezing point of the ice cream, preventing it from becoming too hard. Feel free to experiment with different types of sugar, like caster sugar, for a slightly different texture.
- ¼ teaspoon salt: Just a pinch to balance the sweetness. Salt enhances the flavors and balances the sweetness of the sugar. It might seem counterintuitive to add salt to ice cream, but trust me, it makes a difference!
- 1 teaspoon vanilla extract: Pure vanilla extract is a must! Vanilla extract adds a warm, aromatic note to the ice cream base, complementing the tartness of the raspberries. Opt for pure vanilla extract over imitation for the best flavor.
- 2 cups fresh raspberries: When making Raspberry Swirl Ice Cream, you can find the best raspberries at your local farmer’s market or grocery store. Frozen raspberries can work in a pinch, but fresh is best! Fresh raspberries provide the most vibrant flavor and color for the swirl. Look for plump, juicy berries that are deep red in color.
- ¼ cup water: For the raspberry swirl. Water helps to break down the raspberries and create a smooth, saucy consistency for the swirl.
- 2 tablespoons granulated sugar: For the raspberry swirl. Sugar sweetens the raspberry swirl and helps to thicken it slightly. You can adjust the amount of sugar depending on the tartness of the raspberries.
- 1 tablespoon lemon juice: This brightens up the raspberry flavor. Lemon juice adds a touch of acidity that balances the sweetness of the raspberries and enhances their natural flavor. Freshly squeezed lemon juice is always best!
Kitchen Wisdom
Here’s a Raspberry Swirl Ice Cream trick I learned from my mom: always chill your ice cream maker bowl overnight! It makes a HUGE difference in the freezing time. She always swore by it!
Ingredient Prep Shortcuts
For busy families making Raspberry Swirl Ice Cream, you can prep the raspberry swirl ahead of time and store it in the fridge for a day or two. It’s one less thing to do when you’re ready to make the ice cream base.
Cost-Saving Tips
Raspberries can be pricey, so look for them on sale or consider growing your own! And did you know that you can sometimes get a discount on dairy products that are close to their expiration date?
Storage Tips
For leftover Raspberry Swirl Ice Cream ingredients, make sure to keep your heavy cream and milk tightly sealed in the refrigerator. Fresh raspberries should be stored in a shallow container lined with paper towels.
How to Make Raspberry Swirl Ice Cream – Step-by-Step
Alright, let’s get down to the nitty-gritty of making this yummy Raspberry Swirl Ice Cream. I promise, it’s easier than you think!
- Make the Ice Cream Base: In a medium saucepan, whisk together the heavy cream, whole milk, sugar, and salt. Heat over medium heat, stirring constantly, until the sugar is dissolved and the mixture is warm but not boiling. Don’t worry if your Raspberry Swirl Ice Cream base looks a little thin at this point, it will thicken as it chills. Be patient and stir continuously to prevent scorching!
- Add Vanilla: Remove the saucepan from the heat and stir in the vanilla extract. This is where that lovely aroma starts to fill your kitchen!
- Chill the Base: Pour the ice cream base into a container and cover it with plastic wrap, pressing it directly onto the surface to prevent a skin from forming. Refrigerate for at least 4 hours, or preferably overnight. I learned the hard way with Raspberry Swirl Ice Cream that chilling the base is crucial for a creamy texture. Chilling allows the fat molecules to solidify, resulting in a smoother, less icy texture.
- Prepare the Raspberry Swirl: While the Raspberry Swirl Ice Cream base is chilling, let’s make the raspberry swirl! In a small saucepan, combine the raspberries, water, sugar, and lemon juice. Bring to a simmer over medium heat, stirring occasionally, until the raspberries have broken down and the mixture has thickened slightly – about 10-15 minutes. Your Raspberry Swirl Ice Cream should smell like sweet, tangy raspberries! The lemon juice is key to brightening the raspberry flavor!
- Strain the Swirl (Optional): For a smoother swirl, strain the raspberry mixture through a fine-mesh sieve to remove the seeds. I personally don’t mind the seeds, but it’s totally up to you! This helps achieve that classic raspberry ripple ice cream look. Straining is a matter of personal preference. Some people love the little bursts of flavor from the seeds!
- Cool the Swirl: Let the raspberry swirl cool completely. You can pop it in the fridge to speed up the process. Cooling prevents the warm swirl from melting the ice cream base when you layer it in.
- Churn the Ice Cream: Once the ice cream base is thoroughly chilled, pour it into your ice cream maker and churn according to the manufacturer’s instructions. In my kitchen, Raspberry Swirl Ice Cream usually takes about 20-25 minutes to reach a soft-serve consistency. Churning incorporates air into the mixture, creating a light and fluffy texture.
- Swirl It Up: Once the ice cream is churned, transfer about one-third of it to a freezer-safe container. Drizzle some of the cooled raspberry swirl over the ice cream. Repeat with the remaining ice cream and raspberry swirl, creating layers.
- Freeze: Gently swirl the raspberry through the ice cream with a knife or spoon. Be careful not to overmix, or the swirl will disappear! Freeze for at least 2-3 hours, or until firm. A gentle swirl preserves those beautiful ribbons of raspberry!
- Enjoy!: Scoop and serve! See, wasn’t that easy? You just made easy raspberry swirl ice cream!
While the Raspberry Swirl Ice Cream is cooking, I usually take the time to clean up the kitchen a bit. Or maybe sneak a little taste of the raspberry swirl… you know, for quality control purposes! It’s so important to monitor all stages of your Raspberry Swirl Ice Cream creation.
Family-Tested Tip: If you’re short on time, you can use store-bought raspberry jam or preserves for the swirl. Just make sure it’s a good quality jam! But homemade raspberry ice cream is so much better with a homemade ripple.
Serving Suggestions for your Raspberry Swirl Ice Cream
Okay, so you’ve got this amazing Raspberry Swirl Ice Cream – now what? Let me tell you how my family enjoys it (and how you can too!).
The kids love our Raspberry Swirl Ice Cream when I serve it in waffle cones with a sprinkle of chocolate chips. It’s a classic combination! But honestly, there are so many ways to enjoy this treat.
My go-to side dishes that pair with Raspberry Swirl Ice Cream are fresh berries and homemade cookies. The berries add a little extra freshness, and the cookies are just plain delicious with the creamy ice cream. Trust me, a warm chocolate chip cookie with a scoop of Raspberry Swirl Ice Cream is pure heaven!
Occasions when I make Raspberry Swirl Ice Cream are usually birthdays, summer parties, or just when we need a little pick-me-up. It’s the perfect dessert for any celebration! It’s also a great way to use up fresh raspberries when they’re in season. This creamy raspberry ice cream is so easy to make for even the smallest of occasions.
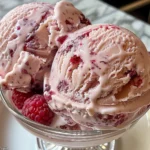
Presentation Tips: To make your Raspberry Swirl Ice Cream look extra fancy, try serving it in pretty glass bowls with a sprig of mint. Or, you can create a sundae bar with different toppings like sprinkles, whipped cream, and chopped nuts.
Leftover Ideas: If you have extra Raspberry Swirl Ice Cream (which is rare in my house!), you can use it to make milkshakes, ice cream sandwiches, or even a raspberry swirl ice cream pie!
Seasonal Variations: In the fall, I like to add a touch of cinnamon or nutmeg to the ice cream base. And in the winter, I sometimes mix in some crushed peppermint candies for a festive twist. You can even add a shot of creamy garlic butter lobster tails for a more luxurious experience.
My friends always ask for this Raspberry Swirl Ice Cream recipe when they come over. They say it’s the best ice cream they’ve ever had! And honestly, I think it’s pretty darn good too. Don’t be afraid to try different variations to the original Raspberry Swirl Ice Cream!
Frequently Asked Questions
Okay, let’s tackle some of the questions I get asked most often about my Raspberry Swirl Ice Cream.
- “My ice cream is icy, not creamy. What did I do wrong?”
Ah, the dreaded icy ice cream! You know what I do when my Raspberry Swirl Ice Cream turns out icy? It usually means the base wasn’t cold enough before churning, or it wasn’t churned long enough. Make sure to chill the base for at least 4 hours, or preferably overnight. And follow your ice cream maker’s instructions carefully. - “Can I use frozen raspberries instead of fresh?”
You can, but fresh raspberries will give you the best flavor and texture. If you use frozen, thaw them completely and drain off any excess liquid before making the raspberry swirl. Frozen will change the final texture of the homemade raspberry ice cream. - “My raspberry swirl sank to the bottom of the container. How can I prevent this?”
The raspberry swirl might have been too thin. Make sure to simmer it long enough so that it thickens slightly. Also, don’t swirl it in too much – a gentle swirl is all you need. - “Can I make this without an ice cream maker?”
While an ice cream maker will give you the best results, you can try making this without one. Pour the chilled ice cream base into a freezer-safe container and freeze for 30 minutes. Then, take it out and whisk it vigorously to break up the ice crystals. Repeat this process every 30 minutes for a few hours, until the ice cream is frozen but still soft. It’s not quite the same, but it works in a pinch! - “How long will this ice cream last in the freezer?”
Homemade ice cream is best enjoyed within a week or two. After that, it can start to develop ice crystals. Make sure to store it in an airtight container to prevent freezer burn. - “Can I use a different type of fruit for the swirl?”
Absolutely! This recipe works well with other berries like strawberries, blueberries, or blackberries. Just adjust the sugar and lemon juice to taste. Feel free to also check out creamy easy egg custard pie for other dessert inspirations. - “Is there a dairy-free version of this recipe?”
Yes! You can substitute the heavy cream and milk with coconut cream and almond milk. Just keep in mind that the texture and flavor will be slightly different.
My Final Thoughts on Raspberry Swirl Ice Cream
This Raspberry Swirl Ice Cream recipe holds a special place in my heart because it’s a reminder of those simple, happy moments we share as a family. There’s nothing quite like the taste of homemade raspberry ice cream, swirled to perfection. It’s a recipe I know I’ll be making for years to come.
My Raspberry Swirl Ice Cream Pro Tips:
- Always chill your ice cream maker bowl overnight for best results.
- Don’t overmix the raspberry swirl, or it will disappear into the ice cream.
- Use high-quality ingredients for the best flavor.
Some Raspberry Swirl Ice Cream variations I’ve tried with my family include adding chopped nuts, chocolate chips, or even a splash of liqueur to the ice cream base. The possibilities are endless!
My son loves the version with chocolate chips, while my daughter prefers it with a little bit of almond extract. As for me, I’m a purist – I love the simple, classic flavor of raspberry and cream.
I hope you’ll give this Raspberry Swirl Ice Cream recipe a try. It’s a labor of love, but trust me, it’s worth every single minute!

Don’t be afraid to make it your own, and most of all, have fun with it! Making this easy raspberry swirl ice cream is a great way to add some special moments to your life. The most important thing is to enjoy the process and share the delicious results with the people you love. So go ahead, get in the kitchen, and whip up a batch of this creamy, dreamy Raspberry Swirl Ice Cream! I can’t wait to hear what you think.
Raspberry Swirl Ice Cream
Indulge in the refreshing taste of summer with this homemade Raspberry Swirl Ice Cream. Creamy, sweet, and bursting with fresh raspberry flavor, it’s the perfect frozen treat for any occasion.
- Prep Time: 20 minutes
- Cook Time: 15 minutes
- Total Time: 35 minutes
- Yield: 6 servings
- Category: Dessert
- Method: No-Cook
- Cuisine: American
Ingredients
- 2 cups heavy cream
- 1 cup whole milk
- ¾ cup granulated sugar
- ⅛ teaspoon salt
- 1 teaspoon vanilla extract
- 1 cup fresh raspberries
- 2 tablespoons granulated sugar (for raspberries)
- 1 tablespoon lemon juice
Instructions
- In a medium saucepan, combine the heavy cream, whole milk, sugar, and salt. Heat over medium heat, stirring constantly, until the sugar is dissolved and the mixture is just simmering. Do not boil.
- Remove from heat and stir in the vanilla extract.
- Pour the mixture into a bowl, cover with plastic wrap (pressing directly onto the surface to prevent a skin from forming), and refrigerate for at least 4 hours, or preferably overnight.
- While the base is chilling, prepare the raspberry swirl. In a small saucepan, combine the raspberries, sugar, and lemon juice. Cook over medium heat, stirring occasionally, until the raspberries have broken down and the mixture has thickened slightly (about 5-7 minutes).
- Remove from heat and let the raspberry mixture cool completely. You can also strain it through a fine-mesh sieve to remove the seeds, if desired.
- Once the ice cream base is thoroughly chilled, pour it into your ice cream maker and churn according to the manufacturer’s instructions (usually about 20-25 minutes).
- During the last few minutes of churning, slowly drizzle the cooled raspberry swirl into the ice cream maker. Let it swirl gently; do not overmix.
- Transfer the ice cream to an airtight container and freeze for at least 2 hours to harden further before serving.
Notes
For a richer flavor, use pasteurized eggs in the base and make a custard first. Or, serve with fresh raspberries and a sprinkle of chopped pistachios.