Oh, you guys, let me tell you about my Pumpkin Lush. This recipe isn’t just a dessert; it’s a hug in a dish, a spoonful of autumn, and a tradition that’s been passed down through my family for years.
I still remember the first time I ever tried Pumpkin Lush. It was at a Thanksgiving dinner at my great aunt’s house. The table was overflowing with food, but this layered pumpkin dessert was the star. The creamy, dreamy layers of goodness just melted in my mouth. I knew I had to get my hands on the recipe, and after much begging, my aunt finally shared her secret.
Of course, my first attempt at making it was a total disaster. The crust was soggy, the filling was lumpy, and the whole thing looked like a hot mess. I almost gave up, but something told me to keep trying. And I’m so glad I did, because after a few tweaks and a lot of practice, I finally perfected my Pumpkin Lush. One of my first mistakes was not allowing the cream cheese layer to soften fully! It’s a silly mistake, but an honest one.
Now, this lush dessert recipe is a staple at every holiday gathering. It’s the perfect dessert for busy moms like me because it’s so easy to make. Plus, it can be made ahead of time, which is a huge lifesaver during the holidays. I always say it’s a real crowd-pleaser, because who doesn’t love pumpkin and cream cheese?!
This recipe is more than just a dessert; it’s a memory. Each time I make it, I think of my great aunt and all the wonderful Thanksgivings we shared together. It’s a taste of home, a reminder of family, and a whole lot of deliciousness. And you know what else? It’s a tradition that I am happy to pass down to my own kids. If you’re looking for more ideas, check out this No Bake Pumpkin Lush | 365 Days of Baking.
So, what are you waiting for? Let’s get in the kitchen and whip up this amazing Pumpkin Lush! You won’t regret it.
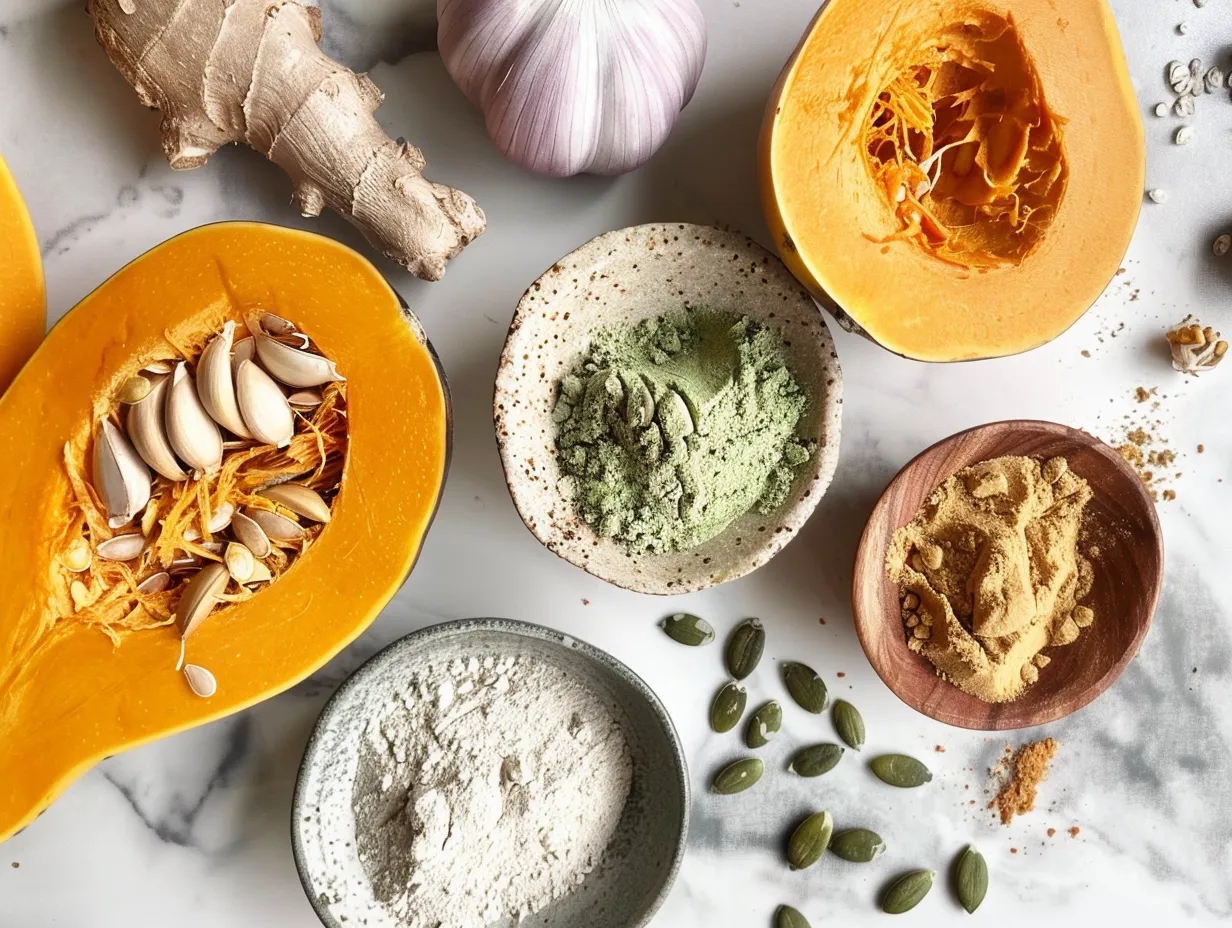
INGREDIENTS:
Here’s what you’ll need to make my famous Pumpkin Lush. Don’t worry, most of these ingredients are pantry staples, making this recipe super easy and convenient.
- 1 package (10.75 ounces) Oreo cookies, finely crushed
- 6 tablespoons butter, melted
- 1 package (8 ounces) cream cheese, softened
- 1 cup powdered sugar
- 1 teaspoon vanilla extract
- 1 container (8 ounces) frozen whipped topping, thawed, divided
- 1 can (15 ounces) pumpkin puree
- 1 package (3.4 ounces) instant vanilla pudding mix
- 1 1/2 cups milk
- 1 teaspoon pumpkin pie spice
- Optional: chopped pecans or walnuts, for garnish
I always use full-fat cream cheese for my Pumpkin Lush. It just gives it that extra creamy texture that I love. And when it comes to the whipped topping, I prefer the original Cool Whip brand. It holds its shape really well and doesn’t get watery. When making Pumpkin Lush, you can find pumpkin pie spice at most grocery stores in the spice aisle. You can also make your own blend by combining cinnamon, ginger, nutmeg, and cloves.
Here’s a Pumpkin Lush trick I learned from my mom: if you want to save time, you can use a pre-made graham cracker crust instead of making your own Oreo crust. It’s a great shortcut for busy families. For cost-saving tips, buy the store-brand cream cheese and whipped topping. They taste just as good as the name brands and can save you a few bucks. Speaking of tips, here’s another one: Make sure your butter has cooled down before pouring it into your oreo crumbs.
Leftover Pumpkin Lush ingredients can be stored in the fridge for up to a week. Just make sure to keep the cream cheese and whipped topping tightly sealed to prevent them from drying out. If you love a good crumb cake, this pumpkin-spice-crumb-cake-recipe might be for you!
HOW TO MAKE – STEP-BY-STEP:
Alright, let’s get down to business and make this incredible Pumpkin Lush! I promise, it’s easier than it looks. Just follow these step-by-step instructions, and you’ll be enjoying a slice of heaven in no time.
- Prepare the Oreo Crust: In a medium bowl, combine the crushed Oreo cookies and melted butter. Press the mixture evenly into the bottom of a 9×13 inch baking dish. Don’t worry if your Pumpkin Lush crust isn’t perfect. As long as it’s evenly distributed, it will taste amazing. I learned the hard way with Pumpkin Lush that a lumpy crust makes it hard to cut nice and even slices!
- Make the Cream Cheese Layer: In a large bowl, beat the softened cream cheese, powdered sugar, and vanilla extract until smooth and creamy. Gently fold in 1/2 of the thawed whipped topping. Spread the cream cheese mixture evenly over the Oreo crust. In my kitchen, Pumpkin Lush usually takes about 5 minutes to prepare the cream cheese layer. Getting the cream cheese smooth is key to that dreamy texture! Don’t rush this step.
- Prepare the Pumpkin Layer: In a separate bowl, whisk together the pumpkin puree, instant vanilla pudding mix, milk, and pumpkin pie spice until smooth. Let the mixture stand for 5 minutes to thicken slightly. This allows the pudding mix to fully dissolve and prevents the layered pumpkin dessert from being runny. Make sure your pudding mix is well incorporated to avoid any lumps.
- Assemble the Layers: Gently spread the pumpkin mixture over the cream cheese layer. Be careful not to mix the layers together. I learned the hard way with Pumpkin Lush that it’s best to use a light touch when spreading the pumpkin layer. Use the back of a spoon and a delicate hand to keep the layers distinct.
- Top with Whipped Topping: Spread the remaining whipped topping over the pumpkin layer. You can create swirls or simply spread it evenly. While the Pumpkin Lush is chilling, I usually clean up the kitchen and get the coffee brewing. Get creative with your topping! A piping bag can help you make beautiful designs.
- Chill: Cover the baking dish with plastic wrap and refrigerate for at least 4 hours, or preferably overnight. This allows the layers to set and the flavors to meld together. Your Pumpkin Lush should smell like pumpkin pie and vanilla. It’s heavenly! Chilling is essential! Don’t skip this step, or your lush will be, well, not so lush.
- Garnish (Optional): Before serving, sprinkle with chopped pecans or walnuts, if desired. Add a dusting of pumpkin pie spice for a pretty touch. I also love drizzling caramel sauce or chocolate syrup on top. A little garnish goes a long way to making this dessert look extra special.
If you are looking for shortcuts, try prepping this no-bake pumpkin lush the night before. I would even prep the oreo layer the day before as well! Looking for another pumpkin recipe? Try this perfect-pumpkin-coffee-cake recipe.
SERVING:
Now comes the best part – serving this delicious Pumpkin Lush! My family enjoys our Pumpkin Lush when I cut it into squares and serve it with a dollop of extra whipped cream and a sprinkle of cinnamon. It’s the perfect combination of creamy, crunchy, and spiced.
Some of my go-to side dishes that pair with Pumpkin Lush are spiced nuts and hot apple cider. The nuts add a nice crunch and the apple cider complements the pumpkin flavor perfectly. This Pumpkin Lush is perfect for Thanksgiving, Christmas, or any fall gathering. It’s also a great dessert to bring to potlucks or parties.
For presentation tips, I like to use a pretty glass baking dish so you can see all the beautiful layers of the layered pumpkin dessert. You can also garnish each slice with a sprig of mint or a few fresh raspberries for a pop of color. If you have extra Pumpkin Lush, you can store it in the fridge for up to 3 days. Just make sure to cover it tightly with plastic wrap to prevent it from drying out.
For seasonal variations, you can add a layer of gingersnap cookies to the crust for a festive holiday flavor. You can also add a sprinkle of cranberries to the topping for a tart and tangy twist. My friends always ask for this Pumpkin Lush recipe whenever I bring it to a party. It’s always a hit! For more tips, check out this Pumpkin Lush Pie – The Salty Cooker – Flavorful, Simple Recipes ….
FAQs:
Alright, let’s tackle some frequently asked questions about Pumpkin Lush. I’ve gathered these questions from my readers, family members, and my own experiences in the kitchen.
Q: Can I make Pumpkin Lush ahead of time?
A: Absolutely! In fact, I highly recommend making Pumpkin Lush at least 4 hours in advance, or even better, the night before. This allows the layers to set and the flavors to meld together. The longer it sits, the better it tastes! You know what I do when my Pumpkin Lush is chilling? I get the rest of the meal ready!
Q: Can I use a different type of cookie crust?
A: Of course! While I love the Oreo crust, you can definitely use graham crackers, gingersnaps, or even shortbread cookies. Just make sure to adjust the amount of butter accordingly. My family prefers Oreo, but I have made it with a gingersnap crust!
Q: Can I use sugar-free pudding mix?
A: Yes, you can use sugar-free vanilla pudding mix to make a lighter version of Pumpkin Lush. Just keep in mind that it may not be as sweet as the original recipe. You know what I do when my Pumpkin Lush isn’t sweet enough? I had a dollop of honey on top!
Q: Can I freeze Pumpkin Lush?
A: I don’t recommend freezing Pumpkin Lush, as the whipped topping can become watery when thawed. However, if you really want to freeze it, make sure to wrap it tightly in plastic wrap and then in foil. Keep in mind that the texture may change slightly. I actually tried to freeze this once, and it came out very soggy, so I learned my lesson.
Q: My Pumpkin Lush is too runny. What did I do wrong?
A: This is a common issue. Make sure you are using instant pudding mix and not cook-and-serve pudding. Also, make sure you let the pumpkin mixture stand for 5 minutes to thicken before spreading it over the cream cheese layer. You know what I do when my Pumpkin Lush is too runny? I let it sit in the freezer for about an hour before moving it to the fridge.
Q: Can I add nuts to the crust?
A: Absolutely! Adding chopped pecans or walnuts to the Oreo crust will give it a nice crunch and nutty flavor. Just mix the nuts in with the crushed cookies and melted butter before pressing it into the baking dish. My family likes to add nuts to the crust!
Q: Can I make this recipe dairy-free?
A: Yes, you can make a dairy-free version of Pumpkin Lush by using dairy-free cream cheese, whipped topping, and milk. Just keep in mind that the taste and texture may be slightly different. You know what I do when my Pumpkin Lush needs a dairy-free twist? I try to find oat-based products!
My Final Thoughts:
This Pumpkin Lush recipe holds a special place in my heart because it’s a reminder of family, tradition, and all the wonderful memories we’ve shared together. It’s a dessert that always brings a smile to my face, and I hope it does the same for you.
Here are some My Pumpkin Lush Pro Tips:
- Use high-quality ingredients: The better the ingredients, the better the dessert will taste.
- Don’t overmix the cream cheese layer: Overmixing can make the cream cheese watery.
- Chill the Pumpkin Lush for at least 4 hours: This allows the layers to set and the flavors to meld together.
Here are some Pumpkin Lush variations I’ve tried with my family:
- Chocolate Pumpkin Lush: Add chocolate chips to the Oreo crust and drizzle chocolate syrup over the whipped topping.
- Caramel Pumpkin Lush: Drizzle caramel sauce over the whipped topping.
- Gingerbread Pumpkin Lush: Use gingersnap cookies for the crust and add a teaspoon of ground ginger to the pumpkin mixture.
My son loves the chocolate version, while my daughter prefers the caramel version. As for me, I love them all! You know what else to try? This strawberry-cheesecake-lush recipe!
I hope you try this Pumpkin Lush recipe and make it your own. Don’t be afraid to experiment with different variations and find what you and your family love. Happy baking, and enjoy every bite of this delicious cream cheese pumpkin dessert! The best part is, it is a no-bake pumpkin lush.
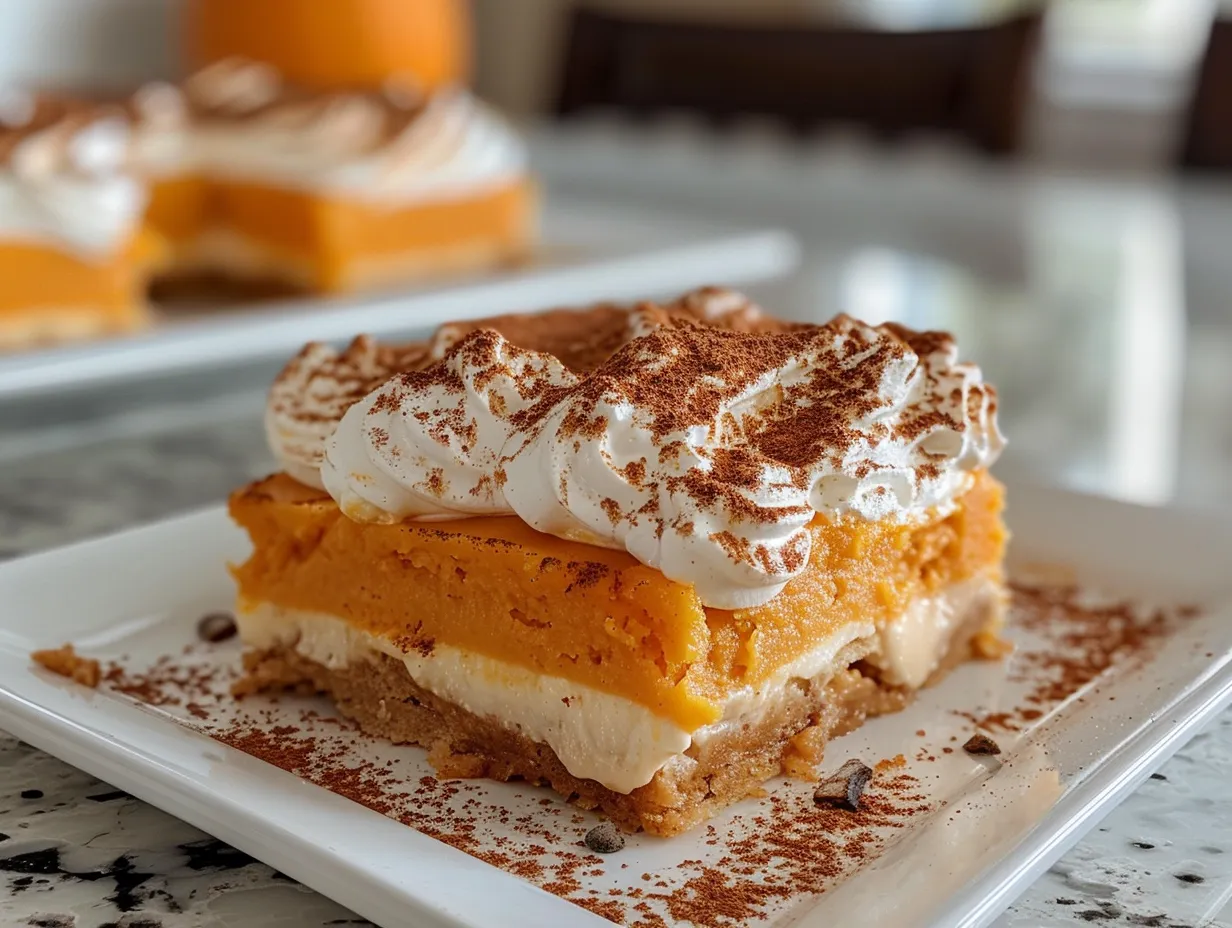
Pumpkin Lush
This Pumpkin Lush dessert is a layered delight, starting with a pecan crust, followed by a creamy cheese layer, a pumpkin spice filling, and topped with whipped cream and a sprinkle of cinnamon. It’s the perfect make-ahead dessert for Thanksgiving or any fall gathering!
- Prep Time: 25 minutes
- Cook Time: 20 minutes
- Total Time: 45 minutes
- Yield: 12 servings
- Category: Dessert
- Method: No-Cook
- Cuisine: American
Ingredients
- Crust:
- 1 cup all-purpose flour
- 1/2 cup chopped pecans
- 1/2 cup (1 stick) cold butter, cut into pieces
- 3 tablespoons cold water
- Cream Cheese Layer:
- 8 ounces cream cheese, softened
- 1 cup powdered sugar
- 1 teaspoon vanilla extract
- Pumpkin Layer:
- 1 (15 ounce) can pumpkin puree
- 1 (3.4 ounce) package instant vanilla pudding mix
- 1 teaspoon pumpkin pie spice
- 1 1/2 cups milk
- Topping:
- 1 cup heavy cream
- 2 tablespoons powdered sugar
- 1/2 teaspoon vanilla extract
- Ground cinnamon, for dusting
Instructions
- Prepare the Crust: In a medium bowl, combine the flour and pecans. Cut in the cold butter using a pastry blender or your fingers until the mixture resembles coarse crumbs.
- Add the cold water, one tablespoon at a time, until the dough comes together.
- Press the dough into the bottom of a 9×13 inch baking dish.
- Bake at 350°F (175°C) for 15-20 minutes, or until lightly golden brown. Let cool completely.
- Make the Cream Cheese Layer: In a large bowl, beat the softened cream cheese until smooth.
- Gradually add the powdered sugar and vanilla extract, and beat until well combined.
- Spread the cream cheese mixture evenly over the cooled crust.
- Prepare the Pumpkin Layer: In a separate large bowl, whisk together the pumpkin puree, instant vanilla pudding mix, pumpkin pie spice, and milk until smooth.
- Let the mixture stand for a few minutes to thicken slightly.
- Gently spread the pumpkin mixture over the cream cheese layer.
- Make the Topping: In a chilled bowl, beat the heavy cream with an electric mixer until soft peaks form.
- Add the powdered sugar and vanilla extract, and continue beating until stiff peaks form.
- Spread the whipped cream evenly over the pumpkin layer.
- Chill: Cover the dish and refrigerate for at least 4 hours, or preferably overnight, to allow the flavors to meld.
- Serve: Before serving, dust the top with ground cinnamon.
Notes
For an extra nutty flavor, toast the pecans before chopping them. You can also use a graham cracker crust instead of the pecan crust. Store leftovers in the refrigerator.