Oh, you guys, let me tell you about my Pear Custard Pie. It’s not just a recipe; it’s a hug in pie form, a little slice of autumn comfort that my family absolutely adores. I remember the first time I made it, my youngest was going through a super picky phase, and I was desperate for something – anything – she would actually eat. I had some pears sitting on the counter, practically begging to be used, and I thought, “Why not try a Pear Custard Pie?”
The smell alone while this Pear Custard Pie was baking… oh, it was heavenly! Warm cinnamon, sweet pears, and that creamy custard all mingling together. I peeked in the oven more times than I care to admit, just to get a whiff. Of course, the first attempt wasn’t perfect. The crust was a little soggy, and the custard was slightly too wobbly. But even with its flaws, it was delicious, and my little one devoured it! That’s when I knew I was onto something special with this Pear Custard Pie.
Over the years, I’ve tweaked and perfected the recipe, learning little tricks along the way. Like, did you know that pre-baking your pie crust can save you from soggy bottoms? Total game-changer! Or that a splash of vanilla extract can really bring out the pear flavor? It’s those little things that have made this Pear Custard Pie a true family favorite. And honestly, in our busy lives, having a go-to dessert that’s relatively easy and always a hit is a lifesaver. It’s become my signature easy pear dessert for potlucks and holiday gatherings. This Pear Custard Pie is also an amazing way to use up those end-of-season pears. I promise, you will absolutely love this pear pie recipe!
So, grab your apron, and let’s get baking! I’m so excited to share my Pear Custard Pie recipe with you. Trust me, it’s easier than you think, and the result is pure deliciousness. You will find yourself making this easy pear dessert over and over again. I swear!
INGREDIENTS:
Alright, let’s talk ingredients for our amazing Pear Custard Pie! Here’s what you’ll need:
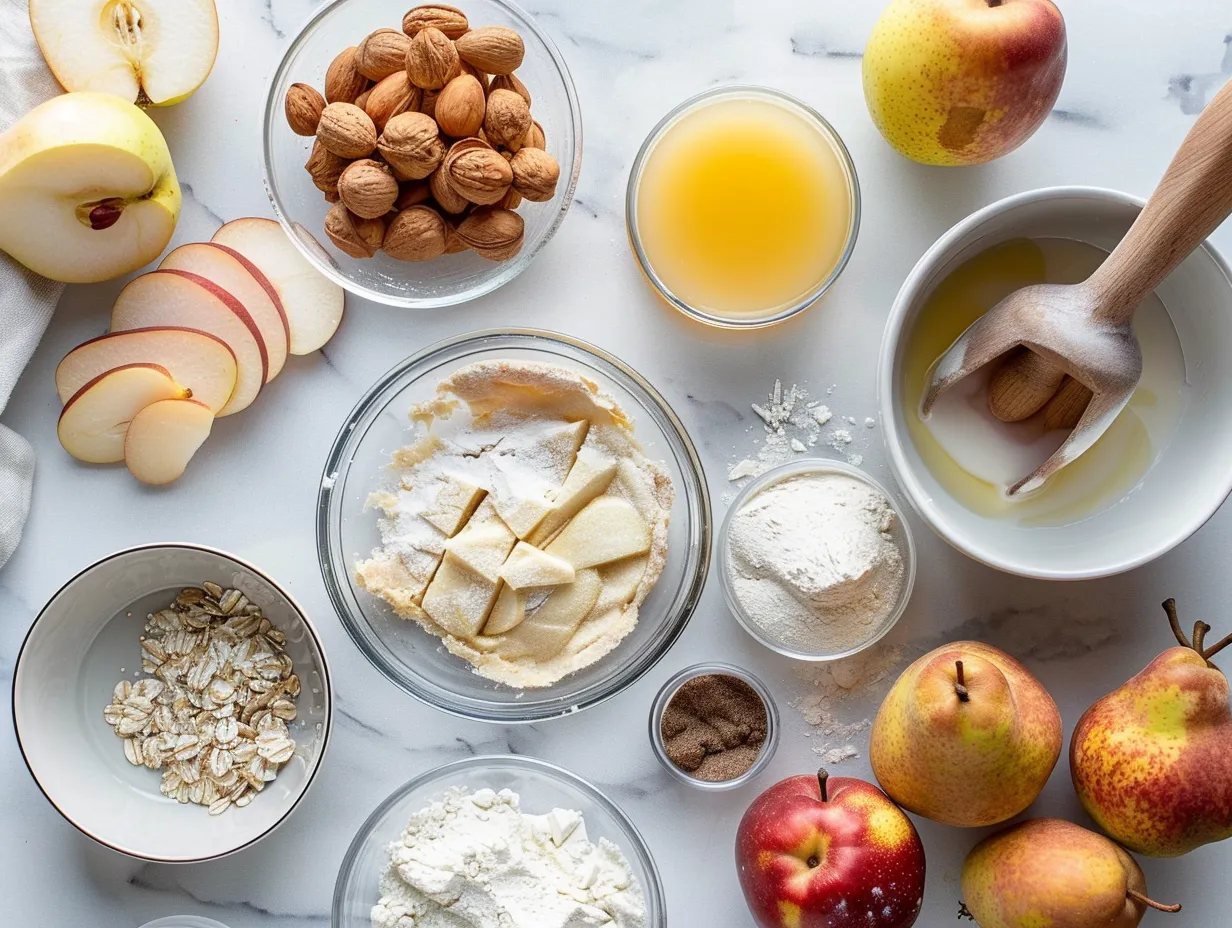
- Pie Crust: 1 pre-made or homemade (I love using my grandma’s recipe, but store-bought is perfectly fine for a quick Pear Custard Pie fix!)
- Pears: 4 medium, peeled, cored, and thinly sliced (I always use Bosc pears for my Pear Custard Pie; they hold their shape beautifully and have a wonderful flavor).
- Eggs: 3 large
- Heavy Cream: 1 1/2 cups (makes the custard extra rich and creamy – so worth it!)
- Milk: 1/2 cup
- Granulated Sugar: 1/2 cup
- Brown Sugar: 1/4 cup (adds a hint of caramel-y goodness to our Pear Custard Pie)
- All-Purpose Flour: 2 tablespoons
- Vanilla Extract: 1 teaspoon (the secret ingredient that elevates the pear flavor in this Pear Custard Pie)
- Cinnamon: 1/2 teaspoon
- Nutmeg: 1/4 teaspoon
- Salt: 1/4 teaspoon
- Butter: 2 tablespoons, cut into small pieces (to dot over the filling before baking – trust me on this one, it adds a beautiful richness to the Pear Custard Pie)
When making Pear Custard Pie, you can find great pears at your local farmers market, especially during the fall. They often have unique varieties you won’t find in the grocery store! For this pear pie recipe, you can substitute the heavy cream with half-and-half for a lighter option.
Here’s a Pear Custard Pie trick I learned from my mom: She always tossed the sliced pears with a little lemon juice to prevent browning. It works like a charm! Also, If you’re short on time, pre-sliced pears from the store will work in a pinch for making Pear Custard Pie.
To save some money, buy pears in bulk when they’re in season and freeze them for later use in this Pear Custard Pie. Just make sure to slice and freeze them properly to prevent freezer burn. Also, store leftover heavy cream tightly sealed in the refrigerator, and it should last for about a week.
HOW TO MAKE – STEP-BY-STEP:
Okay, let’s get down to the nitty-gritty of making this delicious Pear Custard Pie! Follow these step-by-step instructions, and you’ll be enjoying a slice of heaven in no time.
- Prepare the Pie Crust: Preheat your oven to 375°F (190°C). If you’re using a homemade pie crust, roll it out and fit it into a 9-inch pie plate. Crimp the edges decoratively. If using a store-bought crust, simply unroll it and place it in the pie plate. For a crisper crust, blind bake it for 15 minutes, using pie weights or dried beans to prevent it from puffing up. Blind baking involves pre-baking the crust to ensure it’s firm and doesn’t get soggy when the wet filling is added. This step is crucial for achieving the perfect texture in your final pie.
- Arrange the Pears: In the prepared pie crust, arrange the sliced pears in an even layer. I like to start from the outside and work my way in, slightly overlapping the slices for a pretty presentation for this Pear Custard Pie. This Pear Custard Pie reminds me of some custard tarts I love making!
- Make the Custard Filling: In a large bowl, whisk together the eggs, heavy cream, milk, granulated sugar, brown sugar, flour, vanilla extract, cinnamon, nutmeg, and salt until smooth. Make sure there are no lumps of flour remaining in the custard pie filling.
- Pour the Custard Over Pears: Carefully pour the custard mixture over the pears in the pie crust. Distribute the custard evenly, making sure it fills all the gaps between the pear slices. This step ensures that every bite is filled with the rich, creamy custard.
- Dot with Butter: Dot the top of the custard with the small pieces of butter. This will add extra richness and help the top brown beautifully when making Pear Custard Pie. The butter melts into the custard as it bakes, creating a luscious, golden-brown topping.
- Bake: Bake for 45-55 minutes, or until the custard is set and the crust is golden brown. The center of the Pear Custard Pie should be just slightly jiggly. “Don’t worry if your Pear Custard Pie crust starts to brown too quickly; just loosely cover the edges with foil.” Keep a close eye on the pie as it bakes to prevent the crust from burning.
- Cool: Let the Pear Custard Pie cool completely on a wire rack before slicing and serving. This is crucial for the custard to set properly. I usually let it cool for at least 2-3 hours, or even overnight in the refrigerator. I learned the hard way with Pear Custard Pie that trying to slice it while it’s still warm results in a messy, gooey disaster! Cooling allows the custard to firm up, making it easier to slice and serve neat, perfect portions.
In my kitchen, Pear Custard Pie usually takes about an hour to bake, but oven times can vary. So, keep an eye on it and adjust the baking time accordingly. The baking time can be affected by various factors, including the type of oven and the humidity in your kitchen. Always use your best judgment and rely on visual cues, such as the color of the crust and the jiggle of the custard, to determine when the pie is done.
While the Pear Custard Pie is cooking, I usually tidy up the kitchen and maybe read a book. The smell should be like warm pears and cinnamon. This pear pie recipe is so simple, it’s worth making!
I usually set a timer so I don’t burn the pie and every time the timer rings I feel excited because this easy pear dessert is soon going to be ready.
SERVING:
Okay, so your Pear Custard Pie is baked, cooled, and ready to be devoured! Now, let’s talk about serving this delicious masterpiece.
The kids love our Pear Custard Pie when I add a dollop of whipped cream or a scoop of vanilla ice cream on top. It adds an extra layer of sweetness and creaminess that they can’t resist. I also like to sprinkle a little extra cinnamon on top for a touch of warmth. Pear Custard Pie is a hit every time!
My go-to side dishes that pair with Pear Custard Pie are a simple green salad or a cheese platter. The lightness of the salad provides a nice contrast to the richness of the pie, while the cheese adds a savory element that complements the sweet pears and custard. This Pear Custard Pie is perfect for Thanksgiving, Christmas, or any special occasion where you want to impress your guests.
For presentation tips, I like to dust the Pear Custard Pie with powdered sugar before serving. It gives it a beautiful, elegant look. You can also garnish it with a few fresh pear slices or a sprig of mint. If you have extra Pear Custard Pie, you can store it in the refrigerator for up to 3 days. Make sure to cover it tightly to prevent it from drying out. I like to enjoy leftover slices cold, straight from the fridge, but you can also warm them up in the microwave for a few seconds.
For seasonal variations, try adding a splash of bourbon to the custard filling for a warm, boozy twist. You can also substitute the pears with apples or quince for a different flavor profile.
My friends always ask for this Pear Custard Pie recipe whenever I make it. They love the combination of the sweet pears, creamy custard, and flaky crust. I’m sure your friends and family will love it too! Check out this amazing Pear Custard Pie – Dinner at the Zoo recipe!
FAQs:
Alright, let’s tackle some frequently asked questions about Pear Custard Pie. I’ve gathered these from my own experiences and from questions I’ve received from friends and readers over the years. This is how I answer all your Pear Custard Pie questions!
Q: My Pear Custard Pie crust always gets soggy. What am I doing wrong?
A: Ah, the dreaded soggy bottom! We’ve all been there. You know what I do when my Pear Custard Pie crust is getting soggy? The trick is to blind bake your crust before adding the filling. This means baking the crust partially before adding the pears and custard. Use pie weights or dried beans to keep the crust from puffing up. Also, make sure your oven is at the correct temperature.
Q: Can I use canned pears instead of fresh pears?
A: While fresh pears are definitely the best for flavor and texture, you can use canned pears in a pinch when making Pear Custard Pie. Just make sure to drain them well and pat them dry before adding them to the pie. Canned pears tend to be softer than fresh pears, so your pie might have a slightly different texture.
Q: My custard filling is lumpy. How can I fix it?
A: Lumpy custard pie filling can be frustrating! The key is to whisk the ingredients together thoroughly, especially the flour. Make sure there are no lumps of flour remaining before adding the wet ingredients. If your custard is already lumpy, try straining it through a fine-mesh sieve to remove the lumps. This is a secret to making Pear Custard Pie!
Q: Can I make Pear Custard Pie ahead of time?
A: Absolutely! Pear Custard Pie is a great make-ahead dessert. You can bake it a day or two in advance and store it in the refrigerator. In fact, I think it tastes even better after it’s had a chance to chill and the flavors have melded together. Just make sure to cover it tightly to prevent it from drying out.
Q: What kind of pears are best for Pear Custard Pie?
A: I personally love using Bosc pears for my Pear Custard Pie. They hold their shape well during baking and have a wonderful flavor. Anjou pears are also a good choice. You can even use a combination of different pear varieties for a more complex flavor. I always try to pick pears that are firm but not too hard.
Q: Can I freeze Pear Custard Pie?
A: While you can freeze Pear Custard Pie, the texture of the custard might change slightly. It might become a little grainy after thawing. To freeze, wrap the pie tightly in plastic wrap and then in aluminum foil. Thaw it overnight in the refrigerator before serving.
Q: Can I make this Pear Custard Pie recipe gluten-free?
A: Yes, you can! Simply use a gluten-free pie crust and substitute the all-purpose flour in the custard filling with a gluten-free all-purpose flour blend. Make sure to choose a gluten-free flour blend that contains xanthan gum for best results. Here’s another custard recipe I think you might like.
My Final Thoughts:
This Pear Custard Pie recipe holds a special place in my heart because it represents so many happy memories with my family. It’s a dish that always brings us together, whether it’s for a holiday celebration or just a simple weeknight dessert.
My Pear Custard Pie Pro Tips:
- Use a good quality vanilla extract: It really makes a difference in the overall flavor of the pie.
- Don’t overbake the custard: It should be just slightly jiggly in the center when it’s done.
- Let the pie cool completely before slicing: This will ensure that the custard sets properly.
Over the years, I’ve tried a few variations of this Pear Custard Pie recipe. I’ve added a layer of caramel sauce to the bottom of the crust, which was a huge hit with the kids. I’ve also tried adding a sprinkle of chopped walnuts to the top for some added crunch. My oldest loves it when I add a splash of bourbon to the custard filling, while my youngest prefers it plain. My husband likes this Pear Custard Pie – Most Delicious Life | Sharing Generations of … recipe!
I encourage you to make this Pear Custard Pie your own. Don’t be afraid to experiment with different flavors and ingredients. Add a pinch of ginger to the custard, or use a different type of fruit altogether. The possibilities are endless! I hope you have as much fun making this Pear Custard Pie as I do. I truly think this easy pear dessert recipe will become one of your favorites. Check out Pear Custard Pie – Art of Natural Living for more ideas.
Remember, cooking is all about experimentation and having fun. So, don’t worry if your Pear Custard Pie isn’t perfect the first time. Just keep practicing, and you’ll eventually create a masterpiece that your family will love. Also, don’t get discouraged if the homemade pie crust isn’t working for you. Feel free to try a pre-made pie crust.
Happy baking, and enjoy every delicious slice of your homemade Pear Custard Pie!
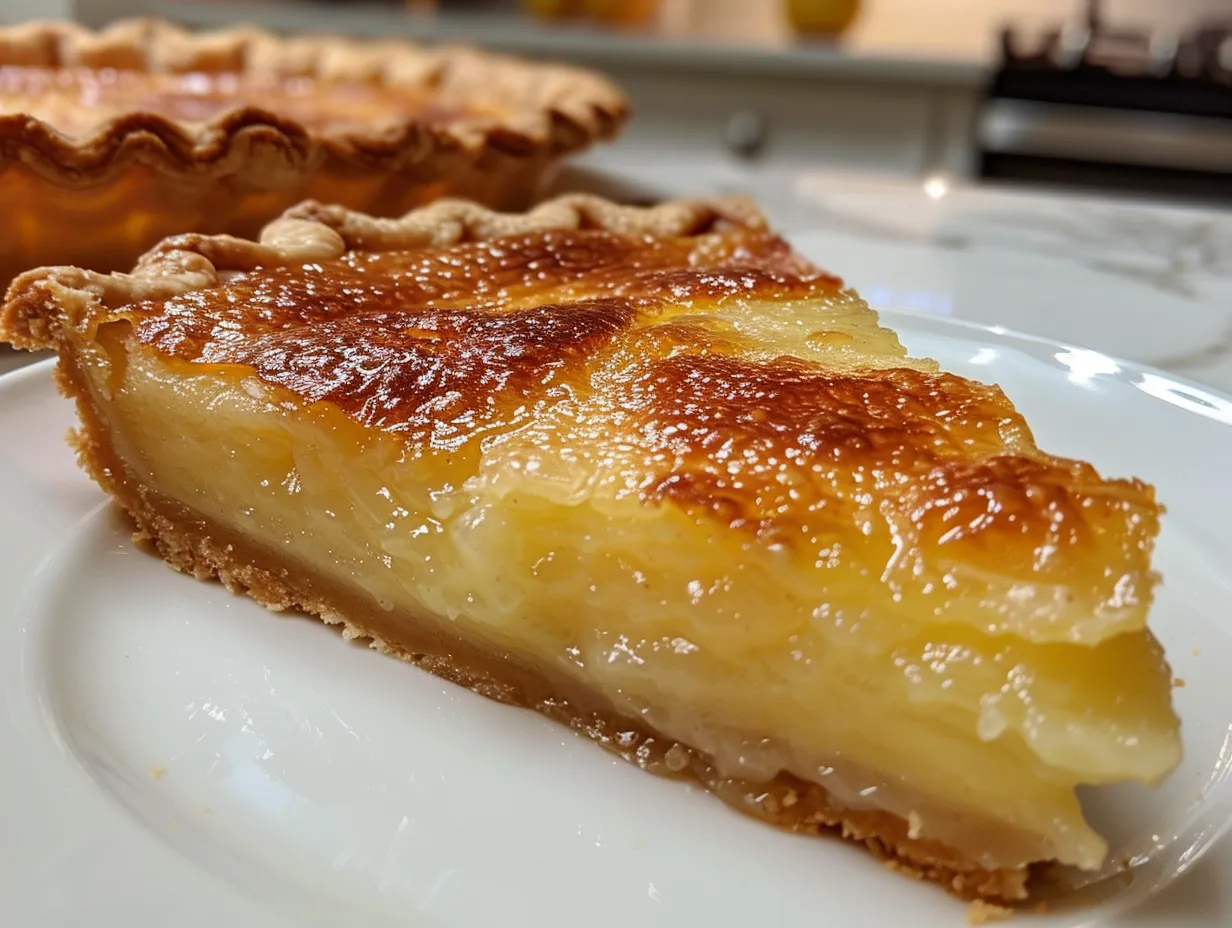
Pear Custard Pie
This Pear Custard Pie is a delightful combination of sweet, juicy pears baked in a creamy, comforting custard filling. It’s the perfect dessert for any occasion, especially during the fall season.
- Prep Time: 20 minutes
- Cook Time: 50 minutes
- Total Time: 70 minutes
- Yield: 8 servings
- Category: Dessert
- Method: Baked
- Cuisine: American
Ingredients
- 1 pre-made pie crust
- 3 ripe pears, peeled, cored, and sliced
- 1 1/2 cups heavy cream
- 1/2 cup granulated sugar
- 3 large eggs
- 1/4 teaspoon ground nutmeg
- 1/4 teaspoon ground cinnamon
- 1 teaspoon vanilla extract
- 2 tablespoons butter, cut into small pieces
Instructions
- Preheat oven to 375°F (190°C).
- Place pear slices evenly in the pre-made pie crust.
- In a bowl, whisk together heavy cream, sugar, eggs, nutmeg, cinnamon, and vanilla extract until well combined.
- Pour the custard mixture over the pears in the pie crust.
- Dot the top of the custard with small pieces of butter.
- Bake for 45-55 minutes, or until the crust is golden brown and the custard is set. If the crust starts to brown too quickly, cover the edges with foil.
- Let cool completely on a wire rack before slicing and serving.
Notes
Serve warm or cold, with a dollop of whipped cream or a scoop of vanilla ice cream.