Oh, honey, let me tell you about my key lime cheesecake recipe! It’s one of those recipes that just screams sunshine and happiness, you know? I can practically feel the Florida breeze on my face every time I make it. I still remember the first time I tried key lime pie – it was at a little roadside diner on a family vacation. That tart, creamy filling was just… magical. I knew I had to recreate that flavor at home.
It took me a few tries to get this key lime cheesecake recipe just right. My first attempt was a total disaster – the filling was too runny, and the crust was soggy. But hey, we all have those kitchen mishaps, right? I learned the hard way that using fresh key lime juice makes ALL the difference. The bottled stuff just doesn’t have the same zing. Now, this key lime cheesecake recipe is a staple at our family gatherings. Birthdays, summer barbecues, potlucks – you name it, this cheesecake is there.
Honestly, with my busy schedule – you know, the kids, the house, the never-ending laundry pile – I need recipes that are easy and reliable. And this key lime cheesecake recipe fits the bill perfectly. It’s become a beloved dessert because it’s both incredibly delicious and surprisingly simple to make. I mean, who doesn’t love a good cheesecake?
Ready to bring a little sunshine into your kitchen? Let’s get baking this key lime cheesecake recipe! I promise, you won’t regret it. It’s a guaranteed crowd-pleaser, and I’m here to guide you every step of the way.
Ingredients for Key Lime Perfection
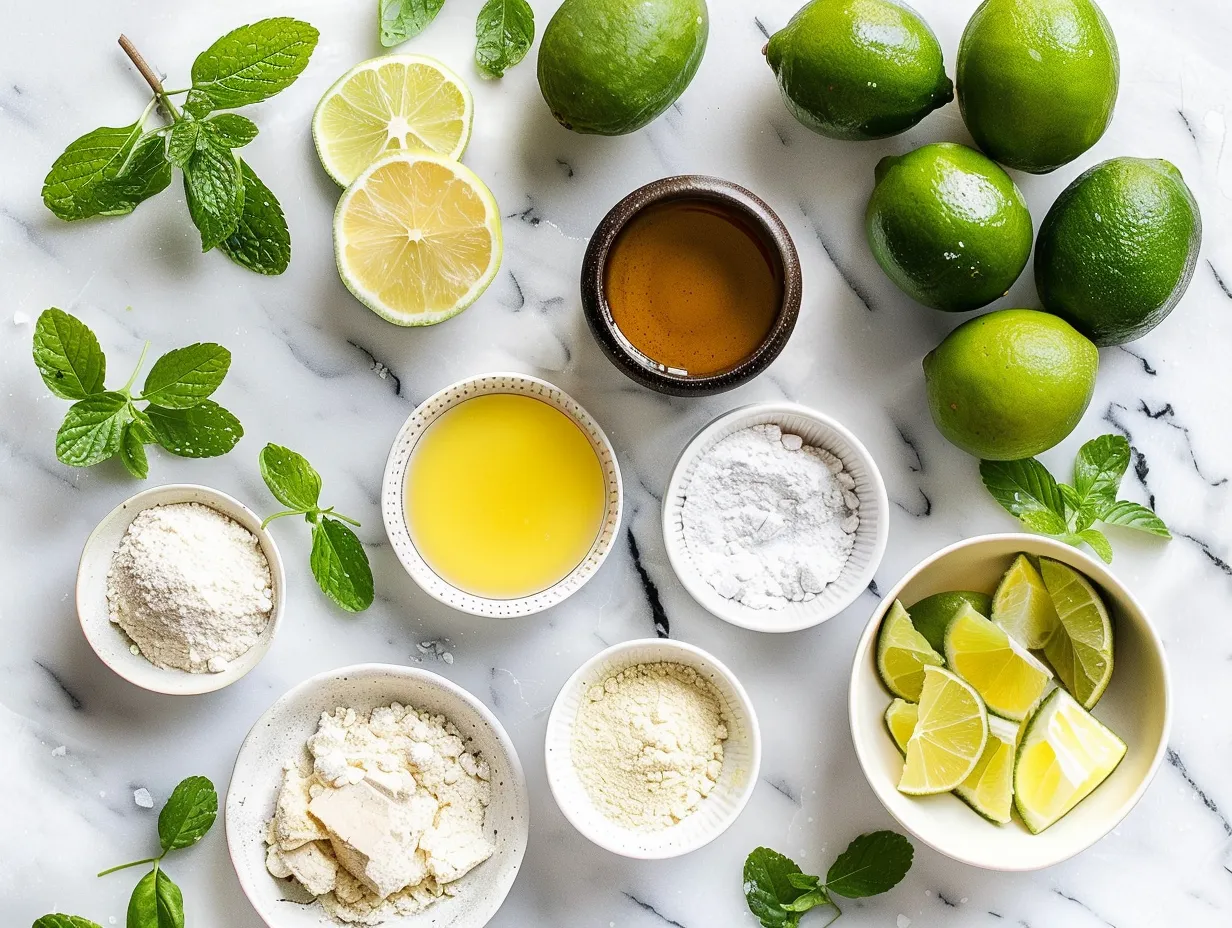
Here’s what you’ll need to make this amazing key lime cheesecake recipe. Remember, using fresh, high-quality ingredients makes all the difference!
For the Crust:
- 1 ½ cups graham cracker crumbs
- 5 tablespoons unsalted butter, melted
- ¼ cup granulated sugar
When it comes to the graham crackers for the crust, I always use the regular ones, not the honey-flavored. I find they give the key lime cheesecake recipe the best balance.
For the Filling:
- 32 ounces cream cheese, softened
- 1 ⅓ cups granulated sugar
- ⅓ cup key lime juice (freshly squeezed is best!)
- 2 teaspoons key lime zest
- 4 large eggs
- ½ cup sour cream
- 1 teaspoon vanilla extract
You can find key limes at most well-stocked grocery stores, usually in the produce section. If you can’t find them, regular limes will work in a pinch for this key lime cheesecake recipe, but the flavor won’t be quite as authentic.
Here’s a key lime cheesecake recipe trick I learned from my mom: let your cream cheese come to room temperature for at least an hour before you start. It will make your filling so much smoother! To save time, I sometimes microwave the butter for a few seconds, but be careful not to melt it completely! I always keep extra cream cheese on hand just in case!
And a little storage tip: if you have any leftover key lime juice, you can freeze it in ice cube trays for later use. This is especially helpful if you’re making mini key lime cheesecakes. This way you always have key lime on hand to make key lime cheesecake bars.
How to Make Key Lime Cheesecake – Step-by-Step
Follow these simple steps, and you’ll be enjoying a slice of heaven in no time! I’ve broken it down to make it as easy as possible.

- Preheat your oven to 350°F (175°C). This is crucial for even baking. I always double-check my oven temperature with an oven thermometer just to be sure.
- Make the Crust: In a medium bowl, combine the graham cracker crumbs, melted butter, and sugar. Mix well until everything is evenly moistened. I like to use a fork to make sure there are no clumps. Press the mixture firmly into the bottom of a 9-inch springform pan. You can use the bottom of a measuring cup to really pack it down. This ensures a sturdy crust.
- Bake the Crust: Bake the crust for 8-10 minutes, or until lightly golden. Remove from the oven and let it cool completely. I usually pop it in the fridge to speed up the cooling process. This helps the crust set nicely for the key lime cheesecake recipe filling.
- Make the Filling: In a large bowl, beat the softened cream cheese and sugar together until smooth and creamy. Don’t overbeat it, or you’ll incorporate too much air. I learned the hard way that overbeating can lead to cracks!
- Add the Key Lime Juice and Zest: Gradually add the key lime juice and zest, mixing until just combined. Be careful not to overmix at this stage. The key lime is what gives the key lime cheesecake recipe that zing.
- Incorporate the Eggs: Add the eggs one at a time, mixing well after each addition. Again, don’t overmix! I know, I sound like a broken record, but trust me, it’s important for a smooth key lime cheesecake recipe filling.
- Add Sour Cream and Vanilla: Stir in the sour cream and vanilla extract until just combined. The sour cream adds a lovely tang, complementing the key lime perfectly.
- Pour Filling into Crust: Pour the filling over the cooled crust, spreading it evenly.
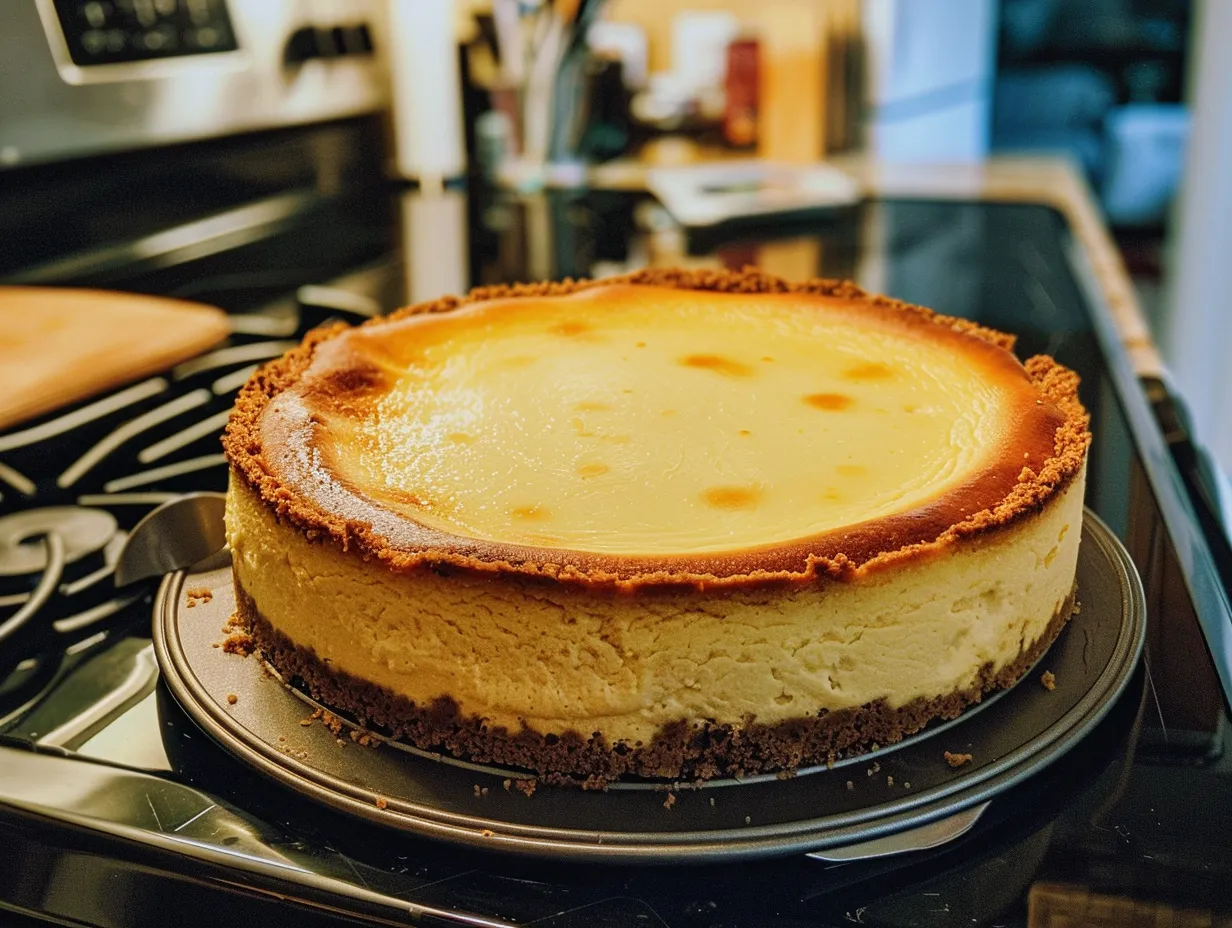
- Bake the Cheesecake: Bake for 55-65 minutes, or until the edges are set but the center still has a slight jiggle. In my kitchen, it usually takes about an hour. I always peek through the oven door after about 50 minutes to check.
- Cooling is Key!: Turn off the oven and let the cheesecake cool in the oven with the door slightly ajar for 1 hour. This helps prevent cracking. Then, remove the cheesecake from the oven and let it cool completely at room temperature.
- Chill: Cover the cheesecake and chill in the refrigerator for at least 4 hours, or preferably overnight. This is essential for the key lime cheesecake recipe to set properly.
While the cheesecake is cooking, I usually tidy up the kitchen or catch up on a little reading. Your key lime cheesecake recipe should smell like tangy citrus and creamy goodness. Don’t worry if your key lime cheesecake recipe has a few cracks on top. It happens to the best of us! You can always cover them with whipped cream or fruit. For a quicker version of key lime cheesecake bars, you can consider a no bake key lime cheesecake recipe!
Serving Suggestions
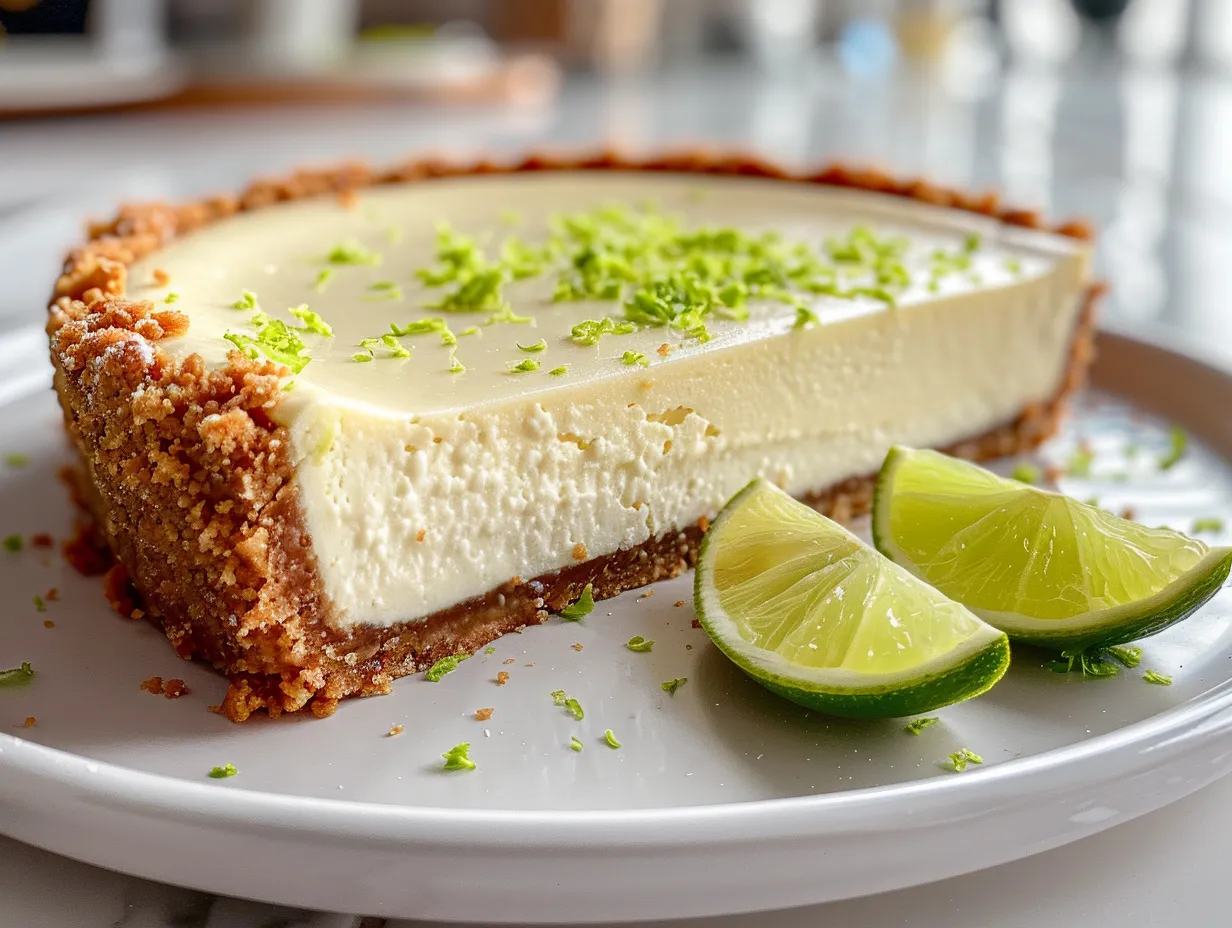
Oh, this is the fun part! The kids love our key lime cheesecake recipe when I top it with whipped cream and a few extra lime slices. It looks so pretty! My go-to side dish to pair with this is a simple fruit salad. The fresh, juicy fruit complements the tartness of the key lime perfectly. This key lime cheesecake recipe is perfect for summer barbecues, birthday parties, or even just a special weeknight treat.
I like to present the key lime cheesecake recipe on a pretty cake stand, dusted with a little powdered sugar. It just makes it feel extra special. If you have extra, it keeps well in the refrigerator for up to 3 days. Just make sure to cover it tightly. For a festive seasonal variation, try adding a sprinkle of toasted coconut on top during the holidays. My friends always ask for this recipe. I always tell them it is really easy.
Once, I made a batch of mini key lime cheesecakes for a party. They were a huge hit! Everyone loved having their own little individual cheesecakes.
FAQs About Key Lime Cheesecake
Got questions? I’ve got answers! Here are some of the most common questions I get asked about this key lime cheesecake recipe.
- Why did my key lime cheesecake recipe crack? Oh, honey, we’ve all been there! Cracking usually happens when the cheesecake cools too quickly. Make sure you cool it slowly in the oven with the door ajar. You know what I do? I just cover it with whipped cream! Problem solved!
- Can I use bottled key lime juice? You can, but I don’t recommend it. Freshly squeezed key lime juice makes a HUGE difference in the flavor. It’s so much brighter and more vibrant.
- How do I know when the key lime cheesecake recipe is done? The edges should be set, but the center should still have a slight jiggle. It will continue to set as it cools.
- Can I make this ahead of time? Absolutely! In fact, it’s best to make it a day in advance to give it plenty of time to chill.
- My crust is soggy, what did I do wrong? Make sure you press the crust firmly into the pan and bake it before adding the filling. This will help it stay nice and crisp.
- Can I freeze this? Yes, you can! Wrap it tightly in plastic wrap and then in foil. It will keep in the freezer for up to 2 months. I made that mistake once, thinking it was the same as key lime pie cheesecake. Let it thaw overnight in the refrigerator before serving.
- Can I make this into key lime cheesecake bars? Yes! Press the crust into a lined 9×13 inch pan and pour the filling over the top. Bake as directed, then chill and cut into bars.
- Can I substitute regular limes for key limes? Yes, you can, but the flavor won’t be quite the same. Key limes have a unique floral aroma and a slightly more tart flavor. However, if key limes are unavailable, regular limes are a fine substitute.
My Final Thoughts on Key Lime Cheesecake
This key lime cheesecake recipe holds a special place in my heart because it reminds me of happy memories with my family. It’s a dessert that everyone loves, and it’s always a hit at parties and gatherings. Plus, it’s just so darn easy to make!
Key Lime Cheesecake Pro Tips:
- Use the best quality cream cheese you can find. It really makes a difference in the texture of the cheesecake.
- Don’t overbake the cheesecake! A slight jiggle in the center is a good thing.
- Be patient and let the cheesecake cool completely before chilling. This will help prevent cracking and ensure a smooth, creamy texture.
I’ve tried a few variations of this over the years. One time, I added a layer of mango puree to the top. It was delicious! I have also tried a no bake key lime cheesecake recipe version, which is perfect for those hot summer days when you don’t want to turn on the oven. My daughter loves it with a sprinkle of toasted coconut, while my son prefers it plain. Another time, I added some ginger snaps to the crust for a spicy twist.
I really hope you give this key lime cheesecake recipe a try. It’s a recipe that’s sure to become a family favorite in your home, just like it is in mine. And remember, don’t be afraid to make it your own! Add your own personal touch and create a masterpiece that you and your family will love. Don’t forget that you can also make key lime cheesecake bars using this recipe. Now, go on and spread some sunshine with this key lime cheesecake recipe! You won’t be disappointed.
Here are some recipes you might like too: No bake Key Lime Pie, Peppermint Cheesecake Mousse Pie
All About Key Limes
History of Cheesecake
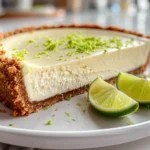
Key Lime Cheesecake
This easy key lime cheesecake is a tangy and refreshing dessert perfect for any occasion. With a creamy texture and zesty lime flavor, it’s a guaranteed crowd-pleaser.
- Prep Time: 20 minutes
- Cook Time: 60 minutes
- Total Time: 80 minutes
- Yield: 12 servings
- Category: Dessert
- Method: Baked
- Cuisine: American
Ingredients
- 1 1/2 cups graham cracker crumbs
- 1/4 cup granulated sugar
- 6 tablespoons unsalted butter, melted
- 3 (8 ounce) packages cream cheese, softened
- 1 1/4 cups granulated sugar
- 1/4 cup all-purpose flour
- 1 teaspoon vanilla extract
- 1/4 cup Key lime juice
- 3 large eggs
- Key lime slices, for garnish (optional)
Instructions
- Preheat oven to 350 degrees F (175 degrees C).
- In a medium bowl, combine graham cracker crumbs, 1/4 cup sugar, and melted butter. Press mixture into the bottom of a 9-inch springform pan.
- In a large bowl, beat cream cheese and 1 1/4 cups sugar until smooth. Beat in flour and vanilla extract.
- Stir in Key lime juice, then beat in eggs one at a time. Pour batter over crust.
- Bake for 55-65 minutes, or until center is almost set. Let cool completely in pan.
- Refrigerate for at least 4 hours, or overnight, before serving.
- Garnish with Key lime slices, if desired.
Notes
For an extra touch, top with a dollop of whipped cream or a sprinkle of lime zest before serving.