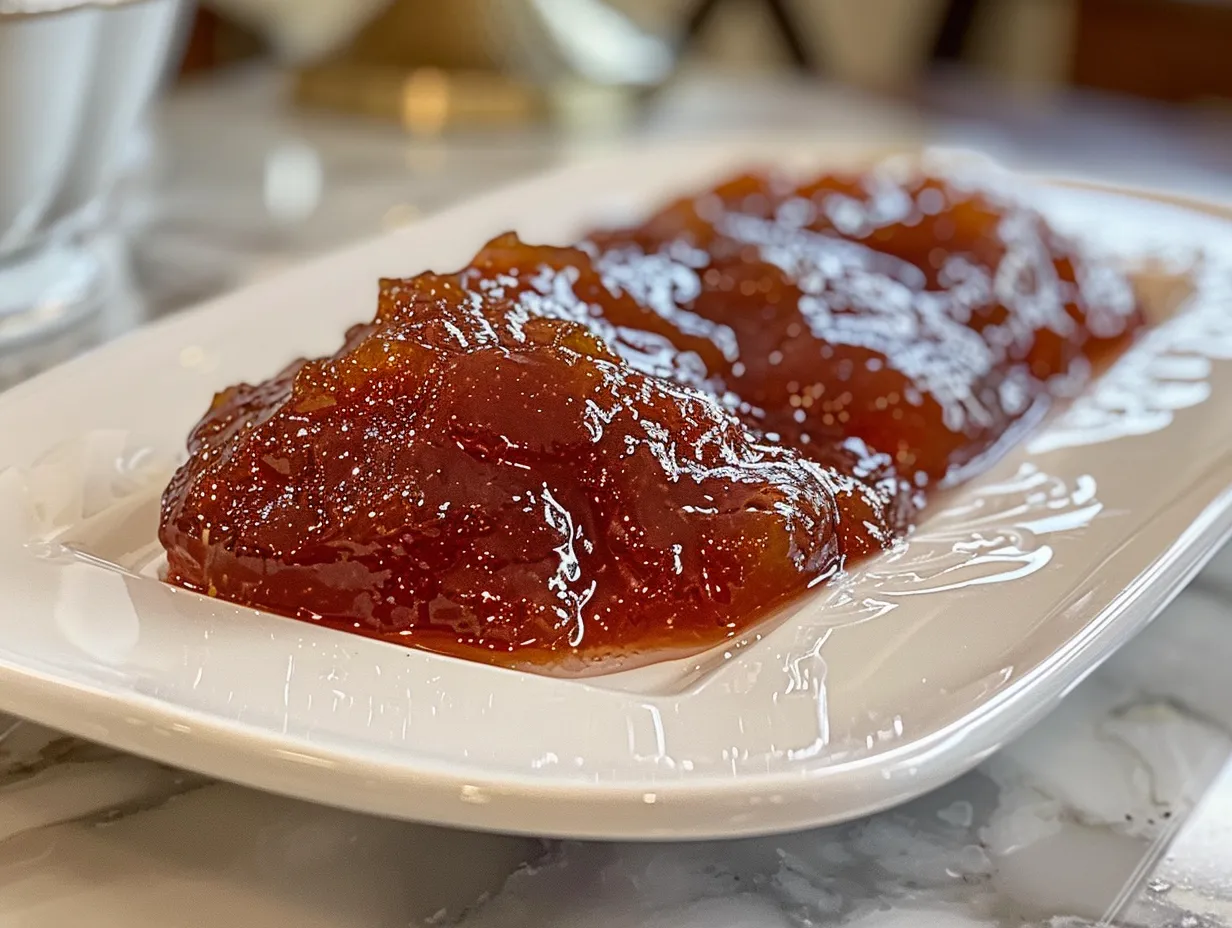
Okay, grab a cup of coffee, pull up a chair, and let’s chat about something near and dear to my heart (and my pantry!): homemade nectarine jam. There’s just something so satisfying about transforming a basket of ripe, juicy nectarines into a vibrant, sweet spread.
I remember the first time I attempted homemade nectarine jam. It was a sweltering August afternoon, the kids were (relatively) quiet, and I had grand visions of perfectly preserved summer in a jar. What I didn’t have was any real experience with jam making. Let’s just say it involved a scorched pot, a near-miss sticky explosion, and jam that resembled more of a nectarine-flavored brick than a delectable spread. But, hey, we all start somewhere, right? I eventually got the hang of it and now, I’m so excited to share this homemade nectarine jam recipe with you that has become a family favorite.
This homemade nectarine jam recipe has been tweaked and perfected over the years. It’s the perfect blend of sweet and tangy, with a bright nectarine flavor that just screams summer. It’s become a staple in our house, and not just on toast. We use it in yogurt, as a glaze for grilled chicken (trust me!), and even as a filling for thumbprint cookies. Plus, it makes the most adorable little gifts for neighbors and friends. Honestly, making homemade nectarine jam fills my soul!
The best part? It’s easier than you think! I know, I know, canning can seem intimidating, but I promise, with this nectarine jam recipe, you’ll be a pro in no time. And even if you just want to make a small batch, this recipe is perfect for that too! Trust me, once you try this homemade nectarine jam, you’ll never go back to the store-bought stuff again. It’s just that good.
INGREDIENTS FOR homemade nectarine jam:
Alright, let’s gather our supplies! Here’s what you’ll need to make a batch of this liquid gold:
- 4 pounds ripe nectarines, pitted and chopped: I always use freestone nectarines for my homemade nectarine jam because they’re easier to pit.
- 4 cups granulated sugar: Regular white sugar works best, but you can experiment with others if you’re feeling adventurous!
- 1/4 cup lemon juice: Freshly squeezed is always best for my homemade nectarine jam, it adds a beautiful brightness and helps with the setting.
- 1 box (1.75 ounces) powdered pectin: I always use nectarine jam with pectin to ensure a good set.
- 1/2 teaspoon butter or margarine (optional): This helps to reduce foaming during cooking.

When making homemade nectarine jam, you can find pectin in the baking aisle of most grocery stores. Sometimes it’s near the canning supplies! When it comes to nectarines, local farmer’s markets are where it’s at! You get the freshest, ripest fruit for the best price. Here’s a homemade nectarine jam trick I learned from my mom: to easily peel the nectarines, score an “X” on the bottom and dunk them in boiling water for 30 seconds, then transfer them to an ice bath. The skins will slip right off!
Here’s a cost-saving tip for homemade nectarine jam ingredients: Buy nectarines in bulk when they’re in season and on sale. Chop them up and freeze them in freezer bags until you’re ready to make jam. Just be sure to thaw them completely before using them. And, if you have leftover lemon juice, freeze it in ice cube trays for future use. Waste not, want not!
Store any unused pectin in a cool, dry place. I keep mine in the refrigerator to extend its shelf life. That way, it’s always fresh and ready for my next batch of homemade nectarine jam or other fruity canning adventure!
HOW TO MAKE homemade nectarine jam – STEP-BY-STEP:
Now for the fun part! Let’s get our hands sticky and make some homemade nectarine jam!
- Prepare the Jars: Wash your canning jars, lids, and bands in hot, soapy water. Rinse well. Sterilize the jars by boiling them in a large pot of water for 10 minutes. Keep the jars hot until ready to fill. I usually use a water bath canner for this canning nectarine jam. The importance of sterilization cannot be overstated. Sterilizing eliminates bacteria, yeasts, and molds that can cause spoilage. Ensuring that your jars and lids are properly sterilized dramatically increases the shelf life of your homemade jam, keeping it safe and delicious for months to come.
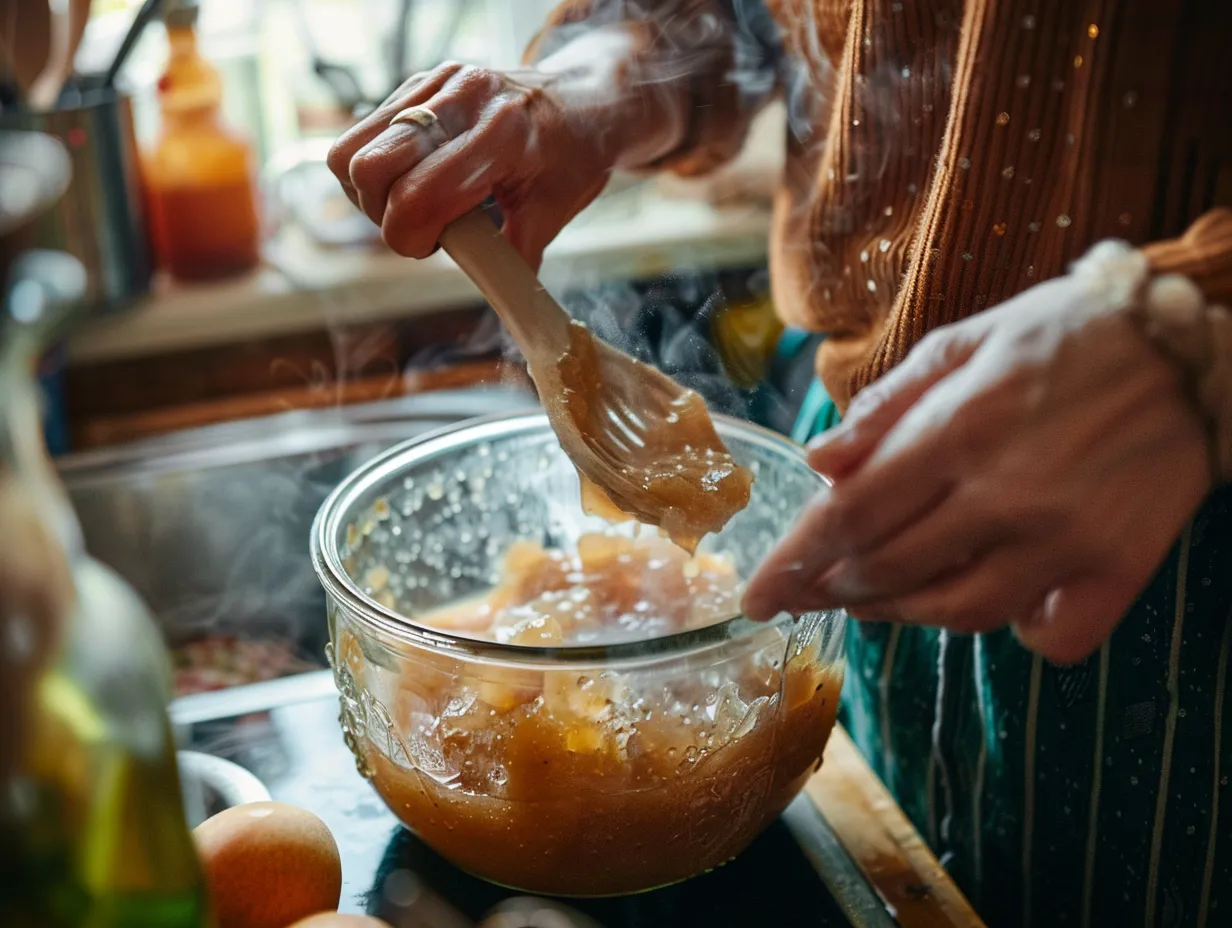
- Combine Ingredients: In a large, heavy-bottomed pot, combine the chopped nectarines, sugar, lemon juice, and butter (if using). Using a heavy-bottomed pot is crucial to prevent scorching. The thicker base distributes heat more evenly, reducing the likelihood of the jam sticking and burning to the bottom. This is especially important during the long cooking process, where consistent heat is essential for proper setting and flavor development. The size of the pot also matters; ensure it’s large enough to accommodate the ingredients without overflowing during boiling.
- Cook the Mixture: Bring the mixture to a full rolling boil over high heat, stirring constantly. A full rolling boil means the mixture continues to boil even when you stir it. Don’t worry if your homemade nectarine jam looks a little foamy at this point, that’s what the butter is for! Achieving a full rolling boil is key for activating the pectin and ensuring the jam sets correctly. This stage involves vigorous bubbling that persists even with continuous stirring. It’s important to monitor the mixture closely, as it can easily boil over. Constant stirring not only prevents sticking but also helps to distribute the heat evenly, promoting consistent cooking and pectin activation.
- Add Pectin: Quickly stir in the pectin and continue stirring constantly. Return to a full rolling boil and boil hard for 1 minute, stirring constantly. I learned the hard way with homemade nectarine jam that undercooking it will result in runny jam. So, don’t skimp on the boiling time! Pectin is the magic ingredient that gives jam its signature gel-like consistency. When adding pectin, it’s crucial to do so quickly and stir continuously to prevent clumping. Returning the mixture to a full rolling boil after adding pectin is essential for activating it properly. Boiling hard for the specified time ensures that the pectin molecules bond together, creating the desired set. Undercooking at this stage can lead to runny jam, so precision is key.
- Test for Set: Remove the pot from the heat. To test if the jam is ready, place a small spoonful on a chilled plate. Let it cool for a minute. If it wrinkles when you push it with your finger, it’s ready. If not, return the jam to the heat and boil for another minute, then test again. In my kitchen, homemade nectarine jam usually takes around 15-20 minutes to reach the setting point, but it depends on the ripeness of the fruit and the humidity. The chilled plate test is a reliable method for determining if your jam has reached the setting point. By placing a small amount of jam on a cold surface, you can quickly assess its consistency as it cools. The wrinkle test indicates that the pectin has properly bonded, and the jam will set correctly in the jars. If the jam remains runny, continue boiling for short intervals, testing after each, until the desired consistency is achieved.
- Fill the Jars: Ladle the hot jam into the hot sterilized jars, leaving 1/4 inch headspace. Wipe the jar rims clean with a damp cloth. Place the lids on the jars and screw on the bands fingertip tight. Leaving the correct headspace is vital for creating a proper vacuum seal during the canning process. This space allows the contents to expand during heating and contract during cooling, which is necessary for the lid to seal correctly. Wipe the jar rims thoroughly to remove any jam residue, as this can interfere with the sealing process. Ensure the lids are properly aligned and the bands are tightened to “fingertip tight,” meaning snug but not overly tight, to allow air to escape during processing.
- Process in a Water Bath: Place the filled jars in the boiling water bath canner. The water should cover the jars by at least 1 inch. Bring the water to a boil and process for 10 minutes for half-pint jars (adjust processing time for altitude). Processing the filled jars in a boiling water bath is essential for creating a long-lasting, shelf-stable product. The boiling water ensures that any remaining bacteria, yeasts, or molds are destroyed, and a vacuum seal is formed. The jars should be fully submerged in water, with at least 1 inch of water above the tops of the jars, to ensure even heat distribution. Adjust the processing time based on your altitude, as higher altitudes require longer processing times to achieve the same level of safety.
- Cool and Check Seals: Remove the jars from the canner and place them on a towel-lined surface to cool completely. As the jars cool, you should hear a “pop” sound as the lids seal. After the jars have cooled for 12-24 hours, check the seals by pressing down on the center of the lid. If the lid doesn’t flex, it’s sealed. If it flexes, the jar is not sealed and should be refrigerated and used immediately, or reprocessed with a new lid. The cooling period is crucial for the jars to fully seal. Placing the jars on a towel-lined surface prevents thermal shock and reduces the risk of breakage. The “pop” sound indicates that the vacuum seal has formed correctly. After cooling, checking the seals is a critical step to ensure the jam is safe for long-term storage. Properly sealed jars can be stored in a cool, dark place for up to a year.
While the homemade nectarine jam is cooking, I usually tidy up the kitchen or catch up on a podcast. I also make sure the kids stay out of the way – hot jam is not something you want little fingers near! Your homemade nectarine jam should smell like a sweet, summery dream! The aroma of ripe nectarines and sugar is just intoxicating.
SERVING YOUR homemade nectarine jam:
Now that you’ve created this beautiful homemade nectarine jam, let’s talk about how to enjoy it!
The kids love our homemade nectarine jam when I spread it on their toast in the morning, or on a simple peanut butter and nectarine jam sandwich for lunch. It is a great upgrade from the traditional grape. It’s also amazing swirled into yogurt or oatmeal. For a grown-up treat, try it with a slice of brie or goat cheese on crackers. The sweet and tangy flavor of the homemade nectarine jam pairs perfectly with the creamy cheese.
One of my go-to side dishes that pair with homemade nectarine jam is grilled pork tenderloin. I brush the pork with the jam during the last few minutes of grilling for a beautiful glaze. The sweetness of the nectarine jam recipe complements the savory pork perfectly. This homemade nectarine jam is perfect for summer picnics, potlucks, or as a homemade gift for friends and family. I often make a batch around the holidays to give as little hostess gifts.
For presentation, I like to tie a pretty ribbon around the jar and add a handwritten label. It just adds a personal touch! If you have extra homemade nectarine jam, you can use it as a filling for pastries, tarts, or even cakes. It’s also delicious stirred into cocktails or mocktails. The versatility of homemade nectarine jam extends beyond the usual breakfast table. Its unique flavor profile makes it an excellent addition to a variety of dishes, both sweet and savory. The jam’s ability to act as a glaze, filling, or flavor enhancer showcases its adaptability in the culinary world.
One seasonal homemade nectarine jam variation I’ve tried is adding a pinch of cinnamon or nutmeg to the jam while it’s cooking. It gives it a warm, cozy flavor that’s perfect for fall. My friends always ask for this homemade nectarine jam recipe whenever I make it. They can’t believe how easy and delicious it is!
homemade nectarine jam FAQs
Okay, let’s tackle some of the most common questions I get about making homemade nectarine jam.
- “My jam didn’t set! What did I do wrong?” This is probably the most common question! There are a few reasons why your homemade nectarine jam might not have set. It could be that you didn’t cook it long enough, or that your fruit wasn’t ripe enough (underripe fruit has less pectin). Also, make sure you’re using the correct amount of pectin. You know what I do when my homemade nectarine jam is runny? I re-cook it! Add a little more pectin and boil it again for a few minutes.
- “Can I use frozen nectarines?” Yes, you can use frozen nectarines for nectarine jam recipe, but be sure to thaw them completely and drain off any excess liquid before using them. The jam might take a little longer to set with frozen fruit.
- “Can I reduce the amount of sugar?” You can reduce the sugar slightly, but be aware that sugar is important for both flavor and preservation. Reducing the sugar too much can affect the set of the jam and its shelf life.
- “How long does homemade nectarine jam last?” Properly canned homemade nectarine jam will last for at least a year in a cool, dark place. Once opened, store it in the refrigerator.
- “Can I make this without pectin?” Yes, you can make easy nectarine jam without pectin, but it will take longer to set and may not have as firm a consistency. You’ll need to cook it for a longer period of time, and you’ll need to test it frequently for doneness.
- “My jam is too sweet! How can I fix it?” If your homemade nectarine jam is too sweet, you can try adding a little more lemon juice to balance out the sweetness.
- “Do I have to use a water bath canner?” While a water bath canner is the safest way to preserve homemade nectarine jam for long-term storage, you can also store it in the refrigerator for a few weeks without canning.
My Final Thoughts on homemade nectarine jam
This homemade nectarine jam recipe holds a special place in my heart because it represents the joy of summer and the simple pleasure of creating something delicious from scratch. It’s a taste of sunshine in a jar!
Here are some My homemade nectarine jam Pro Tips:
- Use a candy thermometer: To ensure your jam reaches the correct setting point (220°F or 104°C), use a candy thermometer.
- Warm the jars: Warm jars are less likely to crack when filled with hot jam.
- Don’t overfill the jars: Leaving the correct headspace is crucial for proper sealing.
Here are a few homemade nectarine jam variations we’ve tried:
- Spiced Nectarine Jam: Add a pinch of cinnamon, nutmeg, or cloves for a warm, cozy flavor.
- Nectarine Ginger Jam: Add a tablespoon of grated fresh ginger for a spicy kick.
- Nectarine Vanilla Jam: Add a teaspoon of vanilla extract after removing the jam from the heat.
My son, Liam, loves the spiced nectarine jam, while my daughter, Chloe, prefers the plain version. And my husband, well, he’ll eat it any way he can get it! So versatile for this nectarine jam recipe!

I hope you’ll give this homemade nectarine jam a try. Don’t be afraid to experiment and make it your own! Whether you’re a seasoned canner or a complete beginner, I promise you can do this! And most importantly, have fun!You won’t regret spending the time and effort making homemade nectarine jam because the flavor is simply unmatched. So, grab some nectarines, and let’s get jamming!
PrintHomemade Nectarine Jam: 7 Simple Steps
This nectarine jam recipe is perfect for beginners. With just a few simple ingredients, you can create a delicious and vibrant jam that captures the sweet taste of summer.
- Prep Time: 20 minutes
- Cook Time: 30 minutes
- Total Time: 50 minutes
- Yield: 4-5 half-pint jars
- Category: Jam
- Method: Boiling
- Cuisine: American
Ingredients
- 2 pounds ripe nectarines, pitted and chopped
- 4 cups granulated sugar
- 1/4 cup lemon juice
- 1/2 teaspoon butter (optional, to reduce foaming)
- Pinch of salt
Instructions
- Prepare the Nectarines: Wash, pit, and chop the nectarines into small pieces.
- Combine Ingredients: In a large, heavy-bottomed pot, combine the chopped nectarines, sugar, lemon juice, butter (if using), and salt.
- Cook the Mixture: Bring the mixture to a rolling boil over medium-high heat, stirring constantly to prevent sticking.
- Test for Set: Place a small spoonful of jam on a chilled plate. Let it cool for a few seconds, then push it with your finger. If it wrinkles, it’s ready. If not, continue cooking and testing every few minutes.
- Process Jars: Ladle the hot jam into sterilized jars, leaving 1/4 inch headspace. Wipe the rims clean, place the lids on, and screw on the bands.
- Cool and Store: Let the jars cool completely on the counter. You should hear a popping sound as the jars seal. Check the seals by pressing on the center of the lid. If it doesn’t flex, it’s sealed.
- Store the jam in a cool, dark place for up to a year. Refrigerate after opening.
Notes
For a smoother jam, you can use an immersion blender to puree the nectarines slightly after they have cooked for about 15 minutes. Be careful when blending hot jam. Sterilize jars and lids by boiling them in water for 10 minutes before filling.