Now, making homemade blackberry jam is a family tradition. Every summer, we head out to our local berry farm, kids in tow, and pick buckets and buckets of plump, juicy blackberries. The stickiness, the scratches, the purple-stained fingers – it’s all part of the fun! And then, the kitchen transforms into jam central. It can get a little chaotic with everyone pitching in, but honestly, I wouldn’t trade it for anything.
This blackberry jam recipe has been tweaked and perfected over the years, becoming a staple in our busy family life. Quick breakfasts, PB&Js for school lunches, even a sneaky spoonful straight from the jar (don’t judge!). There is nothing like the fresh taste of homemade blackberry jam.
One thing I love about this homemade blackberry jam is that it’s relatively easy. I know “canning” can sound intimidating, but trust me, once you try this homemade blackberry jam, you’ll be hooked. It’s SO worth it, and you’ll feel such a sense of accomplishment. Plus, you’ll know exactly what’s going into your food – no weird additives or preservatives.
Ingredients
Here’s what you’ll need to whip up a batch of this delicious homemade blackberry jam. I always try to buy the freshest, ripest blackberries I can find. It makes a huge difference in the flavor of the finished product.
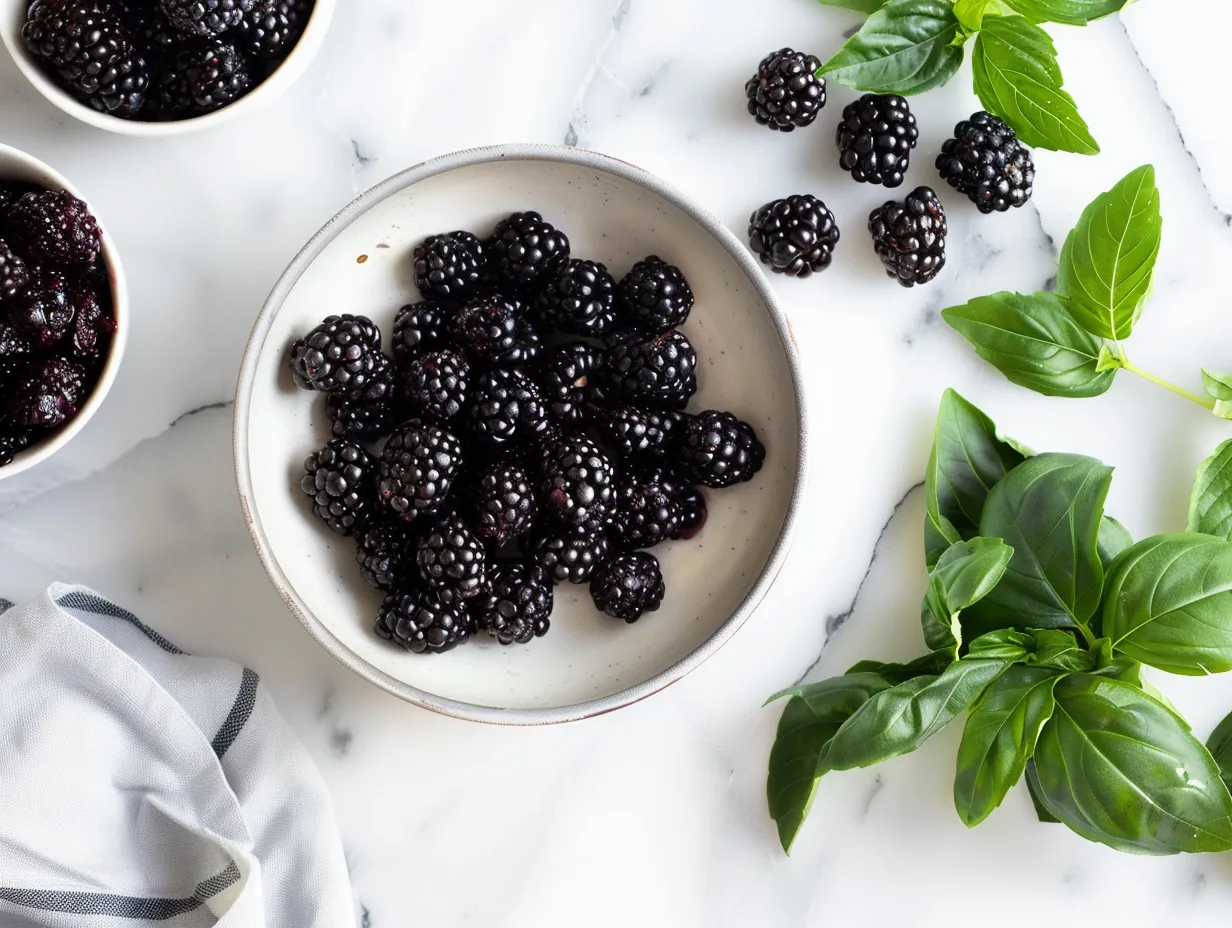
- 6 cups fresh blackberries: Make sure they are ripe and plump. You can use frozen in a pinch (thaw them first, of course), but fresh is best for homemade blackberry jam.
- 4 cups granulated sugar: The sugar not only sweetens the jam but also acts as a preservative, so don’t skimp!
- 1/4 cup lemon juice: This is key! The lemon juice helps with the setting process and adds a bright, tangy flavor that balances the sweetness.
- 1/4 teaspoon butter or margarine: I know this sounds weird, but trust me! This helps reduce foaming while the jam is cooking.
When making homemade blackberry jam, you can find the best deals on sugar at big box stores or warehouse clubs. And if you’re lucky enough to have a blackberry bush in your backyard, well, you’re already halfway there! For lemon juice, I usually just use the bottled kind for convenience, but fresh-squeezed is always a plus if you have the time.
Here’s a homemade blackberry jam trick I learned from my mom: gently crush about one cup of the blackberries before adding them to the pot. This helps release their juices and gets the jam-making process started. Just don’t overdo it – you still want some whole berries in your finished jam!
And for a cost-saving tip: if you find blackberries on sale at the end of the season, buy a bunch and freeze them! They’ll be perfect for making homemade blackberry jam later in the year. To freeze, spread them out in a single layer on a baking sheet, freeze until solid, then transfer them to a freezer bag.
As for storage tips for leftover homemade blackberry jam ingredients, make sure to keep your sugar in an airtight container to prevent it from clumping. And lemon juice should be refrigerated after opening.
How to – Step-by-Step
Alright, let’s get down to the nitty-gritty and walk through how to make this amazing homemade blackberry jam, step-by-step. I promise, it’s easier than you think!
- Prepare Your Jars: First things first, you’ll need to sterilize your canning jars. This is super important to prevent spoilage. You can do this by boiling the jars in a large pot of water for 10 minutes. Keep the jars hot until you’re ready to fill them. You also need to boil the lids in a separate saucepan to soften the sealing compound.
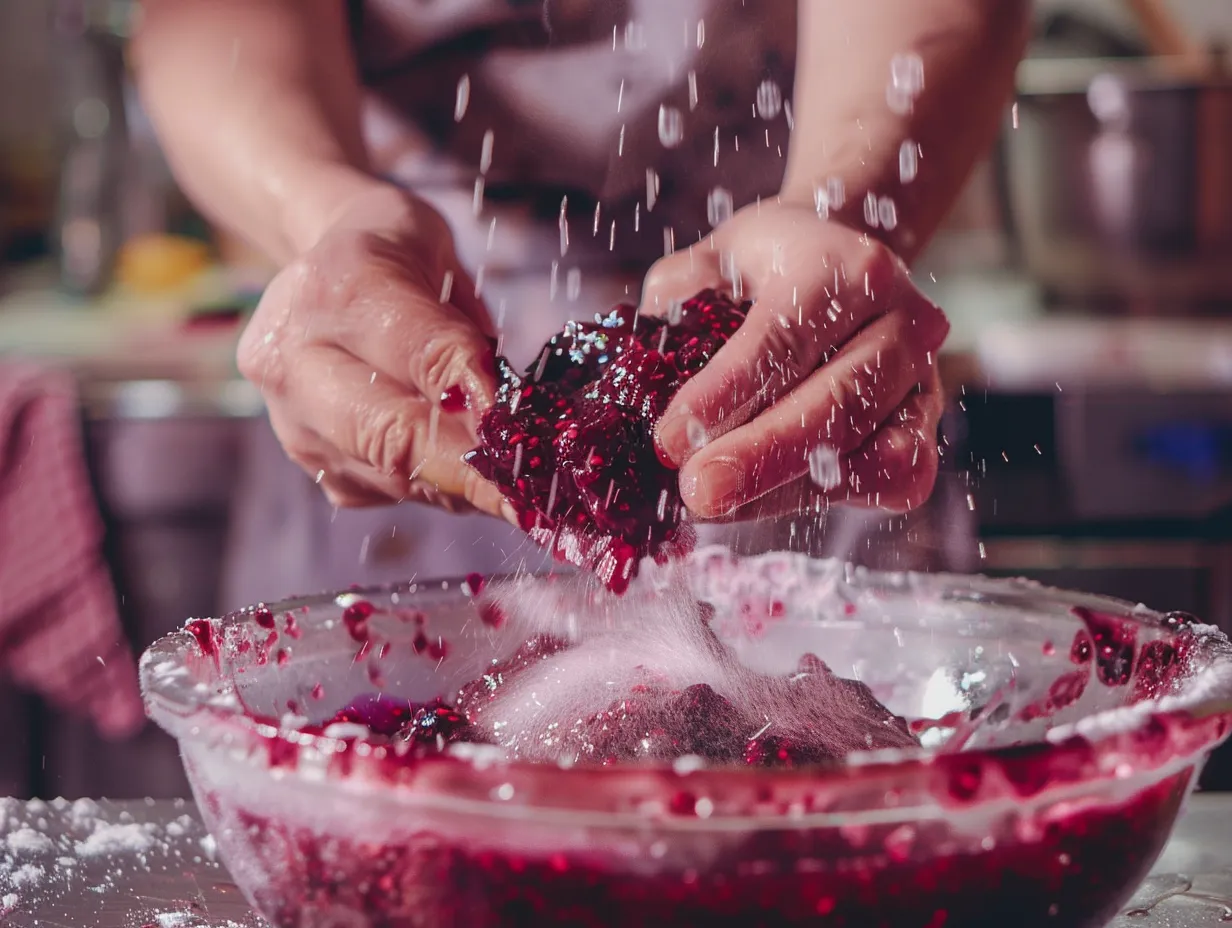
- Combine Ingredients: In a large, heavy-bottomed pot (stainless steel or enamel-coated is best), combine the blackberries, sugar, and lemon juice. Stir everything together well.
- Bring to a Boil: Place the pot over medium-high heat and bring the mixture to a full rolling boil that you can’t stir down. This is where that heavy-bottomed pot comes in handy – it helps prevent scorching.
- Add Butter (Optional): If you’re using butter or margarine, stir it in now. This will help reduce foaming.
- Cook to Setting Point: Continue to boil the jam, stirring frequently, until it reaches the setting point. This can take anywhere from 15 to 30 minutes, depending on your stove and the size of your batch. I learned the hard way with homemade blackberry jam that patience is key! Don’t rush this step, or you’ll end up with syrup again (trust me, I’ve been there!).
- Test for Setting: There are a couple of ways to test if your jam is ready. One way is to use a candy thermometer. The jam should reach 220°F (104°C). Another way is the “cold plate test.” Place a small plate in the freezer before you start making the jam. When you think the jam is ready, drop a spoonful onto the cold plate. Let it sit for a minute, then push it with your finger. If it wrinkles, it’s ready!
- Remove from Heat: Once the jam has reached the setting point, remove it from the heat. Skim off any foam that has formed on the surface.
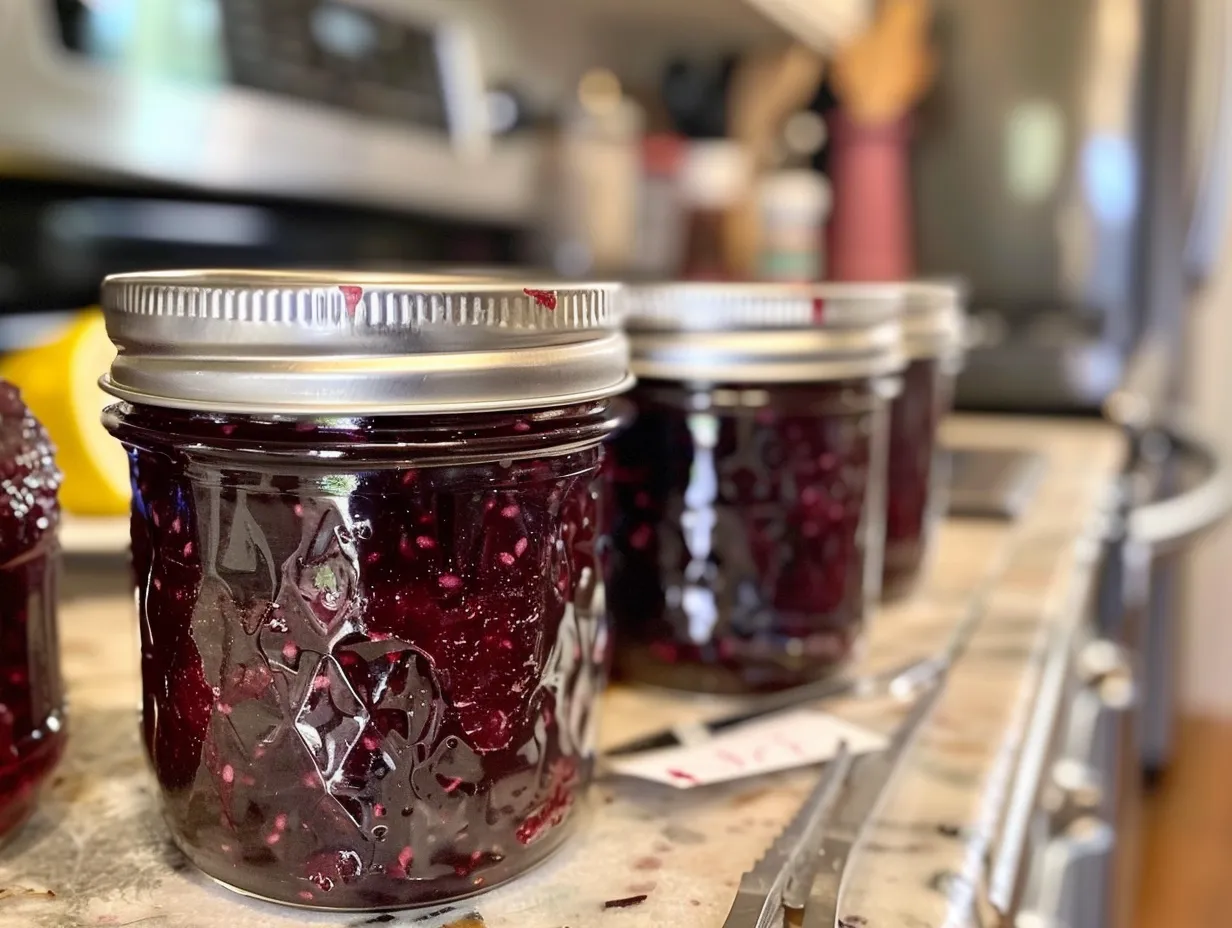
- Fill the Jars: Carefully ladle the hot jam into the sterilized jars, leaving about 1/4 inch of headspace at the top. Wipe the rims of the jars with a clean, damp cloth.
- Process in a Boiling Water Bath: Place the filled jars in a boiling water bath canner. Make sure the water covers the jars by at least an inch. Bring the water to a rolling boil and process for 10 minutes. Adjust processing time for altitude using this guide from the Home Food Preservation: Making Jams and Jellies. I always double check with the USDA Complete Guide to Home Canning, too!
- Cool and Check Seals: Carefully remove the jars from the canner and place them on a towel-lined surface to cool completely. As the jars cool, you should hear a “popping” sound as the lids seal. After 24 hours, check the seals by pressing down on the center of each lid. If the lid doesn’t flex, it’s sealed. If it flexes, the jar didn’t seal properly and should be refrigerated and used within a few weeks.
Don’t worry if your homemade blackberry jam looks a little runny while it’s still hot. It will thicken as it cools. In my kitchen, homemade blackberry jam usually takes about 20 minutes to reach the setting point, but it can vary. While the homemade blackberry jam is cooking, I usually tidy up the kitchen or start thinking about what I’m going to serve it with.
Your homemade blackberry jam should smell like sweet, ripe blackberries with a hint of lemon. It’s truly heavenly! And a family-tested homemade blackberry jam shortcut: Use a jam-making pot if you have one! They are designed to help prevent scorching and make the process even easier.
Serving Suggestions
Now comes the best part: enjoying your homemade blackberry jam! There are so many ways to savor this sweet treat.
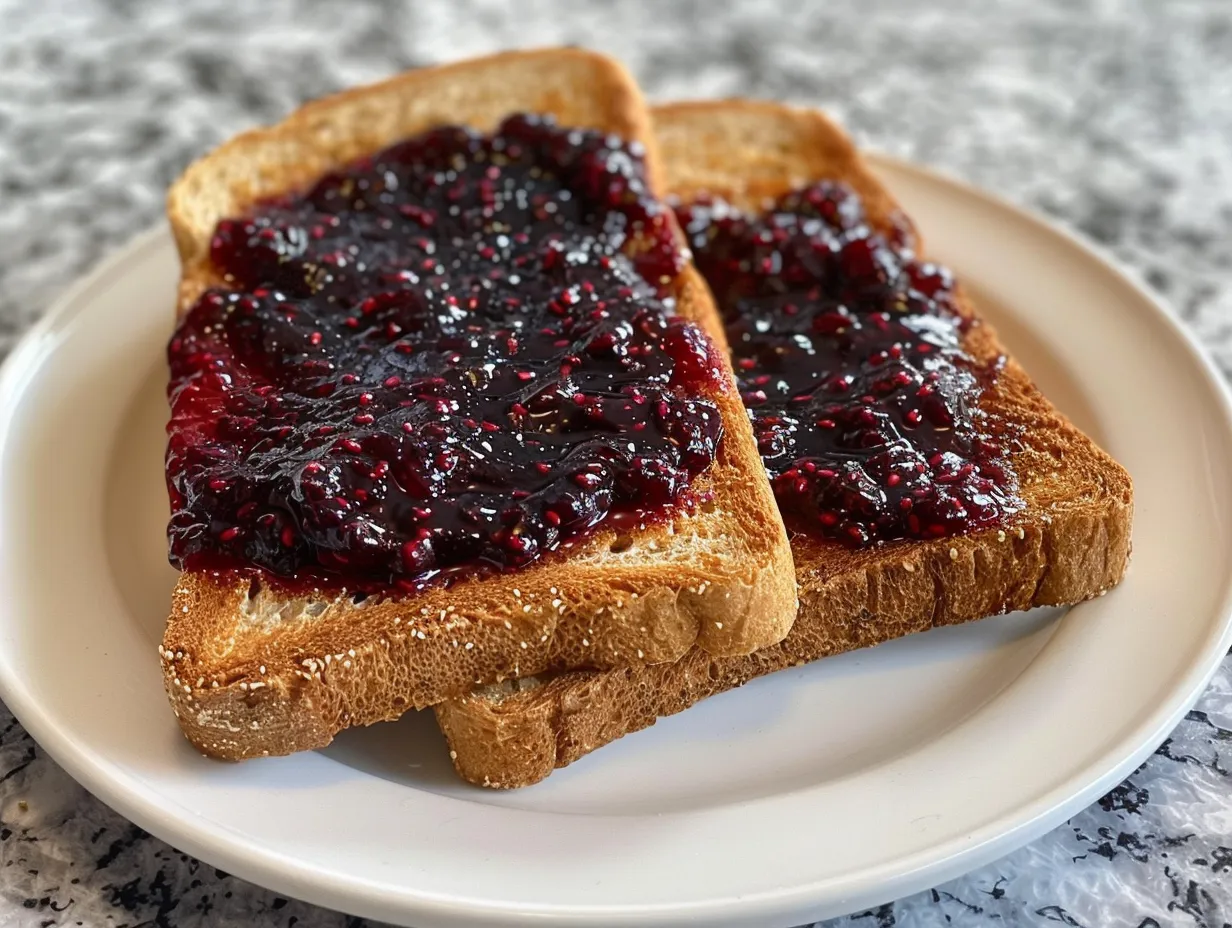
The kids love our homemade blackberry jam when I spread it on toast, bagels, or pancakes. It’s also a delicious addition to yogurt or oatmeal. And of course, nothing beats a classic PB&J with homemade blackberry jam.
My go-to side dishes that pair with homemade blackberry jam are buttery biscuits or scones. The sweetness of the jam perfectly complements the richness of the baked goods. And for a more savory option, try it with grilled cheese! The sweet and savory combination is surprisingly delicious.
This homemade blackberry jam is perfect for special occasions like brunches, holidays, or even just a weekend breakfast treat. I also love to give jars of homemade blackberry jam as gifts to friends and neighbors. It’s a thoughtful and delicious way to show you care.
For homemade blackberry jam presentation tips, I like to serve it in a pretty little dish with a small spoon. A sprig of fresh mint adds a touch of elegance.
If you have extra homemade blackberry jam, you can use it to make a blackberry cobbler. Or, you can add a spoonful to your favorite smoothie for a burst of fruity flavor. You could even try it as a glaze for roasted chicken or pork!
My friends always ask for this homemade blackberry jam recipe, and I’m always happy to share it. It’s a recipe that’s meant to be passed down and enjoyed by generations. And for a seasonal homemade blackberry jam variation, try adding a pinch of cinnamon or nutmeg in the fall. It adds a warm and cozy flavor.
FAQs
Okay, let’s tackle some frequently asked questions about homemade blackberry jam. I’ve gotten these questions from friends, family, and even blog readers, so I know they’re on your mind!
Q: My jam didn’t set. What did I do wrong?
A: Ah, the dreaded unset jam! This is a common problem, but don’t worry, it’s fixable. There are a few reasons why your homemade blackberry jam might not have set. First, you might not have cooked it long enough. Remember that setting point? It’s crucial! You can re-cook the jam, adding a little more lemon juice, and test it again. You know what I do when my homemade blackberry jam doesn’t set? I call it blackberry syrup and use it on pancakes!
Q: Can I use frozen blackberries?
A: Yes, you can use frozen blackberries, but fresh is always best. Thaw them completely before using, and be aware that they might release more liquid, so you might need to cook the jam a little longer.
Q: Do I really need to sterilize the jars?
A: Yes, absolutely! Sterilizing the jars is essential for preventing spoilage and ensuring that your jam is safe to eat.
Q: Can I make this without pectin?
A: Yes, this is a blackberry jam without pectin recipe! That’s why the lemon juice is so important – it helps the jam to set naturally.
Q: How long will the jam last?
A: Properly canned and sealed homemade blackberry jam can last for up to two years in a cool, dark place. Once opened, it should be refrigerated and used within a few weeks.
Q: I don’t have a water bath canner. Can I still make this?
A: While a water bath canner is the safest and recommended method for preserving jam, you can freeze the jam in freezer-safe containers instead. It won’t have the same shelf life, but it will still be delicious!
Q: Can I reduce the amount of sugar?
A: Reducing the amount of sugar can affect the setting and preservation of the jam. If you want to reduce the sugar, I recommend using a low-sugar pectin and following a recipe specifically designed for low-sugar jams. My family likes the sweetness so I stick to the recipe.
Final Thoughts
This homemade blackberry jam recipe holds a special place in my heart because it’s more than just a recipe; it’s a symbol of family, tradition, and love. Every time I make a batch, I’m reminded of those summer days picking berries with my kids, the sweet smell of jam simmering on the stove, and the smiles on everyone’s faces when they taste the finished product. There is nothing more satisfying than a jar of homemade blackberry jam.
Here are my homemade blackberry jam Pro Tips:
- Always use ripe blackberries – they have the best flavor and pectin content.
- Don’t overcook the jam – it will become too thick and sticky.
- Be patient! Making jam takes time and attention, but it’s worth it.
I’ve tried a few homemade blackberry jam variations over the years. One of my favorites is adding a splash of balsamic vinegar for a tangy twist. Another is adding a handful of fresh mint leaves for a refreshing flavor. And for a spicy kick, try adding a pinch of chili flakes! My husband loves the balsamic version, the kids are partial to the mint, and I enjoy the chili flakes.
I really hope you try this homemade blackberry jam recipe and make it your own. Don’t be afraid to experiment with different flavors and variations. The most important thing is to have fun and enjoy the process! Remember to serve it with blackberry cobbler or blackberry pie for the ultimate blackberry experience. And don’t forget to check out the Home Food Preservation: Making Jams and Jellies for more tips and information!
Trust me, once you make your own homemade blackberry jam, you’ll never go back to store-bought again. It’s just so much fresher, more flavorful, and made with love. So go ahead, give it a try! You might just start a new family tradition.
PrintEasy Homemade Blackberry Jam Recipe: Amazing Results!

This easy homemade blackberry jam recipe is simple to make and yields incredible results! Perfect for toast, scones, or desserts.
- Prep Time: 15 minutes
- Cook Time: 20 minutes
- Total Time: 35 minutes
- Yield: 4-6 half-pint jars
- Category: Jam & Jelly
- Method: Boiling
- Cuisine: American
Ingredients
- 4 cups fresh blackberries
- 4 cups granulated sugar
- 1/4 cup lemon juice
Instructions
- Wash and crush the blackberries.
- Combine blackberries, sugar, and lemon juice in a large pot.
- Bring to a rolling boil, stirring constantly.
- Continue boiling until jam reaches setting point (about 15-20 minutes).
- Ladle hot jam into sterilized jars.
- Process in a boiling water bath for 10 minutes.
Notes
For best results, use a candy thermometer to ensure the jam reaches 220°F (104°C). Store in a cool, dark place.