Okay, gather ’round, you guys! Let’s talk about something near and dear to my heart (and my family’s bellies!) – Halloween Chocolate Chip Cookies. I swear, October hits, and it’s like a switch flips in my brain. I go from sane, reasonable adult to cookie-baking madwoman. These aren’t just any cookies, though. These are special Halloween Chocolate Chip Cookies.
I remember the first time I made these Halloween Chocolate Chip Cookies. It was a total disaster! I tried to get all fancy and use black cocoa powder, thinking it would make them extra spooky. Turns out, it just made them taste like burnt dirt. The kids took one bite and their faces were priceless. I learned a valuable lesson that day: sometimes, simple is best. Now, my Halloween Chocolate Chip Cookies are a family tradition. The kids help decorate them with Halloween-themed sprinkles, and we always make a big batch to share with friends. There’s just something so comforting about a warm Halloween Chocolate Chip Cookie on a chilly October evening.
It fits perfectly into our busy lives because you can prep the dough ahead of time. I usually make it the night before, that way I can just bake them off whenever we need a little Halloween cheer. Seriously, these Halloween Chocolate Chip Cookies are a lifesaver when you need a quick and easy treat. I originally tweaked a classic recipe I found years ago, and it has evolved over time to become the perfect, foolproof Halloween cookie.
So, if you’re looking for a fun, festive, and totally delicious way to celebrate Halloween, give these Halloween Chocolate Chip Cookies a try. I promise, they’re so good they’re scary (pun intended!). Come on, let’s bake some cookies together!
INGREDIENTS:
Alright, let’s get down to business. Here’s what you’ll need to whip up a batch of these spooktacular Halloween Chocolate Chip Cookies. Don’t worry, nothing too scary here!
- 1 cup (2 sticks) unsalted butter, softened: I always use real butter for my Halloween Chocolate Chip Cookies. It just gives them that rich, melt-in-your-mouth goodness that you can’t get with margarine.
- ¾ cup granulated sugar: For that classic sweetness.
- ¾ cup packed brown sugar: This is key for the chewy texture that makes these Halloween Chocolate Chip Cookies so addictive.
- 2 large eggs: Make sure they’re at room temperature. It helps them incorporate into the batter more smoothly.
- 1 teaspoon vanilla extract: I splurge on good quality vanilla. It makes a world of difference in the flavor.
- 2 ¼ cups all-purpose flour: Nothing fancy here, just plain old all-purpose flour will do.
- 1 teaspoon baking soda: For that perfect rise.
- 1 teaspoon salt: Balances out the sweetness and enhances the other flavors.
- 2 cups semi-sweet chocolate chips: I am partial to semi-sweet chips in these Halloween Chocolate Chip Cookies. You could also use milk chocolate or dark chocolate, depending on your preference.
- Halloween sprinkles: Because what’s a Halloween cookie without sprinkles? You can find these at just about any grocery store or craft store this time of year.

Here’s a trick I learned from my mom: if you’re short on time, you can buy pre-made cookie dough. I get it. Life gets busy, and sometimes you just need a shortcut. I will suggest, though, that the homemade Halloween Chocolate Chip Cookies taste better. When making Halloween cookies, you can usually find all sorts of Halloween-themed sprinkles and candy at stores like Target or Walmart.
And here is a cost-saving tip. Buy your butter when it’s on sale, and stock up! It freezes really well, so you’ll always have some on hand for baking these Halloween Chocolate Chip Cookies. Unsalted butter can typically be frozen for up to four to six months without a significant change in quality or taste, making it a handy ingredient to keep in reserve for all your baking needs.
For storage tips, I recommend keeping your flour, sugar, and baking soda in airtight containers in a cool, dry place. This will keep them protected from moisture, pests, and temperature fluctuations, ensuring that they remain fresh and effective for longer. Properly stored baking soda, for instance, can last for up to two years, ready to give your cookies that perfect lift whenever you decide to bake these Halloween Chocolate Chip Cookies.
HOW TO MAKE – STEP-BY-STEP:
Okay, now for the fun part! Let’s get baking these Halloween Chocolate Chip Cookies! Don’t worry, it’s easier than you think. Just follow these simple steps, and you’ll be enjoying warm, gooey cookies in no time.
- Preheat your oven to 375°F (190°C). Line baking sheets with parchment paper. This will prevent the cookies from sticking and make cleanup a breeze. Parchment paper is also heat-resistant, non-stick, and can withstand oven temperatures up to 450°F, making it perfect for baking.
- In a large bowl, cream together the softened butter, granulated sugar, and brown sugar. Beat until light and fluffy. This usually takes about 3-5 minutes with an electric mixer. You want the mixture to be nice and smooth. Creaming together the butter and sugars not only creates a smooth base but also incorporates air into the mixture, which contributes to the cookies’ light and airy texture.
- Beat in the eggs one at a time, then stir in the vanilla extract. Make sure each egg is fully incorporated before adding the next. Adding eggs one at a time ensures they emulsify properly into the batter, creating a stable and well-mixed foundation for your Halloween Chocolate Chip Cookies.
- In a separate bowl, whisk together the flour, baking soda, and salt. This ensures that the baking soda and salt are evenly distributed throughout the flour. Whisking these dry ingredients together ensures that the baking soda is evenly distributed, preventing clumps and ensuring that your cookies rise uniformly and have a consistent texture.
- Gradually add the dry ingredients to the wet ingredients, mixing until just combined. Be careful not to overmix! Overmixing can lead to tough cookies. For more tips on getting the perfect cookie texture, check out this helpful article.
- Stir in the chocolate chips and Halloween sprinkles. I like to reserve a few sprinkles to press into the tops of the cookies before baking. It makes them look extra festive.
- Drop by rounded tablespoons onto the prepared baking sheets. Leave a little space between each cookie. This ensures that they have enough room to spread without sticking together, resulting in perfectly shaped Halloween Chocolate Chip Cookies.
- Bake for 9-11 minutes, or until the edges are golden brown and the centers are still slightly soft. Don’t worry if your Halloween Chocolate Chip Cookies look a little underdone when you take them out of the oven. They’ll continue to bake on the hot baking sheet.
- Let the cookies cool on the baking sheets for a few minutes before transferring them to a wire rack to cool completely. I learned the hard way with Halloween Chocolate Chip Cookies that if you try to move them too soon, they’ll fall apart!
In my kitchen, these Halloween Chocolate Chip Cookies usually take about 10 minutes to bake. But every oven is different, so keep an eye on them and adjust the baking time as needed. Knowing your oven is key; factors like its age, calibration, and even its position in your kitchen can affect baking times. A simple oven thermometer can help you ensure your oven is heating accurately, leading to consistently perfect Halloween Chocolate Chip Cookies every time.
Your Halloween Chocolate Chip Cookies should smell like warm vanilla, melted chocolate, and a hint of Halloween magic. It’s the best smell in the world!
And here’s a family-tested Halloween Chocolate Chip Cookies shortcut: If you’re really short on time, you can chill the dough for just 30 minutes before baking. It helps prevent the cookies from spreading too much.
Don’t be afraid to experiment with different kinds of chocolate chips or Halloween candies in these Halloween Chocolate Chip Cookies. Get creative and have fun!
SERVING:
Okay, the cookies are baked, cooled, and ready to be devoured. Now, let’s talk about serving these delicious Halloween Chocolate Chip Cookies!
The kids love our Halloween Chocolate Chip Cookies when I pack them in their lunchboxes for a special Halloween treat. It makes their day!
These Halloween Chocolate Chip Cookies are perfect for Halloween parties, bake sales, or just a cozy night in with the family. Elevate your Halloween parties and bake sales by presenting your cookies in creative ways—think cookie bouquets or individual cellophane bags tied with festive ribbons. These small touches can make a big impact, enticing everyone to grab a Halloween Chocolate Chip Cookie.
Here’s a presentation tip I’ve discovered: Arrange the Halloween Chocolate Chip Cookies on a spooky platter and dust them with powdered sugar for an extra touch of Halloween magic. It looks so festive!
If you have extra Halloween Chocolate Chip Cookies, you can store them in an airtight container at room temperature for up to 3 days. Or, you can freeze them for up to 2 months. Just make sure they’re completely cooled before you freeze them. To prevent freezer burn and maintain their taste and texture, wrap each cookie individually in plastic wrap before placing them in a freezer-safe bag or container. When you’re ready to enjoy them, simply thaw them at room temperature for about 20-30 minutes.
As far as side dishes go, I love serving these Halloween Chocolate Chip Cookies with a cold glass of milk or a warm cup of hot chocolate. It’s the perfect combination! If you want to get really fancy, you could even serve them with a scoop of vanilla ice cream.
For seasonal Halloween Chocolate Chip Cookies variations, you can add pumpkin puree or pumpkin spice to the dough for a fall-inspired twist. Or, you can use white chocolate chips and cranberries for a festive holiday cookie. You can even dip these easy Halloween cookies into melted white chocolate or milk chocolate and top them with Halloween sprinkles or crushed Halloween candy.
My friends always ask for this Halloween Chocolate Chip Cookies recipe whenever I make them for a party. They’re always a hit! And for more party ideas check out Easiest Halloween Cookies Ever #HalloweenTreatsWeek – Semi.
FAQs:
Alright, let’s tackle some of those burning questions you might have about these Halloween Chocolate Chip Cookies. I’ve been there, I’ve done that, and I’ve learned a thing or two along the way.
Q: My cookies are spreading too thin. What am I doing wrong?
A: Ah, the dreaded spreading cookie dilemma! You know what I do when my Halloween Chocolate Chip Cookies are spreading too thin? I pop the dough in the fridge for 30 minutes before baking. Chilling the dough helps the butter solidify, which prevents the cookies from spreading too much in the oven. Also, make sure your oven is at the correct temperature.
Q: Can I use margarine instead of butter?
A: You can, but I wouldn’t recommend it. I always use real butter for my Halloween Chocolate Chip Cookies because it gives them a richer flavor and a better texture. Margarine can sometimes make the cookies greasy.
Q: My cookies are too dry. What can I do?
A: If your Halloween Chocolate Chip Cookies are coming out dry, it could be because you’re overbaking them. Try reducing the baking time by a minute or two. Also, make sure you’re not using too much flour.
Q: Can I freeze the cookie dough?
A: Absolutely! Freezing cookie dough is a great way to have Halloween Chocolate Chip Cookies on hand whenever you want them. Just scoop the dough into balls and freeze them on a baking sheet. Once they’re frozen, you can transfer them to a freezer bag. When you’re ready to bake them, just add a few minutes to the baking time.
Q: Can I add nuts to the dough?
A: Of course! Feel free to add chopped nuts to the dough if you like. Pecans, walnuts, or almonds would all be delicious in these Halloween Chocolate Chip Cookies. Consider toasting your nuts before adding them to the dough. Toasting enhances their natural flavors and gives them a satisfying crunch, adding an extra layer of deliciousness to your Halloween Chocolate Chip Cookies.
Q: My cookies are burning on the bottom. Help!
A: Oh no! Burning cookies are the worst. If your Halloween Chocolate Chip Cookies are burning on the bottom, try double-stacking your baking sheets. The extra layer will help insulate the cookies from the heat. You can also try lowering the oven temperature by 25 degrees.
Q: Can I make these cookies gluten-free?
A: You can definitely try making these Halloween Chocolate Chip Cookies gluten-free. Just substitute a gluten-free all-purpose flour blend for the regular flour. You may need to experiment with the amount of flour to get the right consistency. If you like pumpkin flavor, try my Pumpkin Chocolate Chip Oatmeal Bars
My Final Thoughts:
These Halloween Chocolate Chip Cookies hold a special place in my heart because they’re a reminder of all the fun memories I’ve made with my family over the years. From decorating them with spooky sprinkles to sharing them with friends and neighbors, these cookies are a symbol of Halloween joy. These Halloween Chocolate Chip Cookies remind me of a similar recipe, Chocolate Chip Rice Krispie Cookies.
My Halloween Chocolate Chip Cookies Pro Tips:
- Don’t overmix the dough! Overmixing can lead to tough cookies.
- Chill the dough for at least 30 minutes before baking. This will help prevent the cookies from spreading too much.
- Use high-quality chocolate chips for the best flavor.
I’ve tried a few different Halloween Chocolate Chip Cookies variations over the years. One of my favorites is adding peanut butter chips to the dough. Another variation is to use different kinds of Halloween candies instead of sprinkles. And you can even check out more variations at Easy Halloween Chocolate Chip Cookies – Partylicious.
My youngest loves the classic version of these Halloween Chocolate Chip Cookies, while my oldest prefers the peanut butter chip version. My husband is just happy to eat them all!
I hope you’ll give this Halloween Chocolate Chip Cookies recipe a try. It’s a simple, delicious, and festive way to celebrate Halloween. Don’t be afraid to get creative and make them your own!
I hope your Halloween Chocolate Chip Cookies cooking experience is filled with laughter, fun, and delicious treats. Happy baking!
And don’t forget, practice makes perfect. So, even if your first batch of Halloween Chocolate Chip Cookies isn’t perfect, don’t give up! Keep trying, and you’ll be a cookie-baking pro in no time.
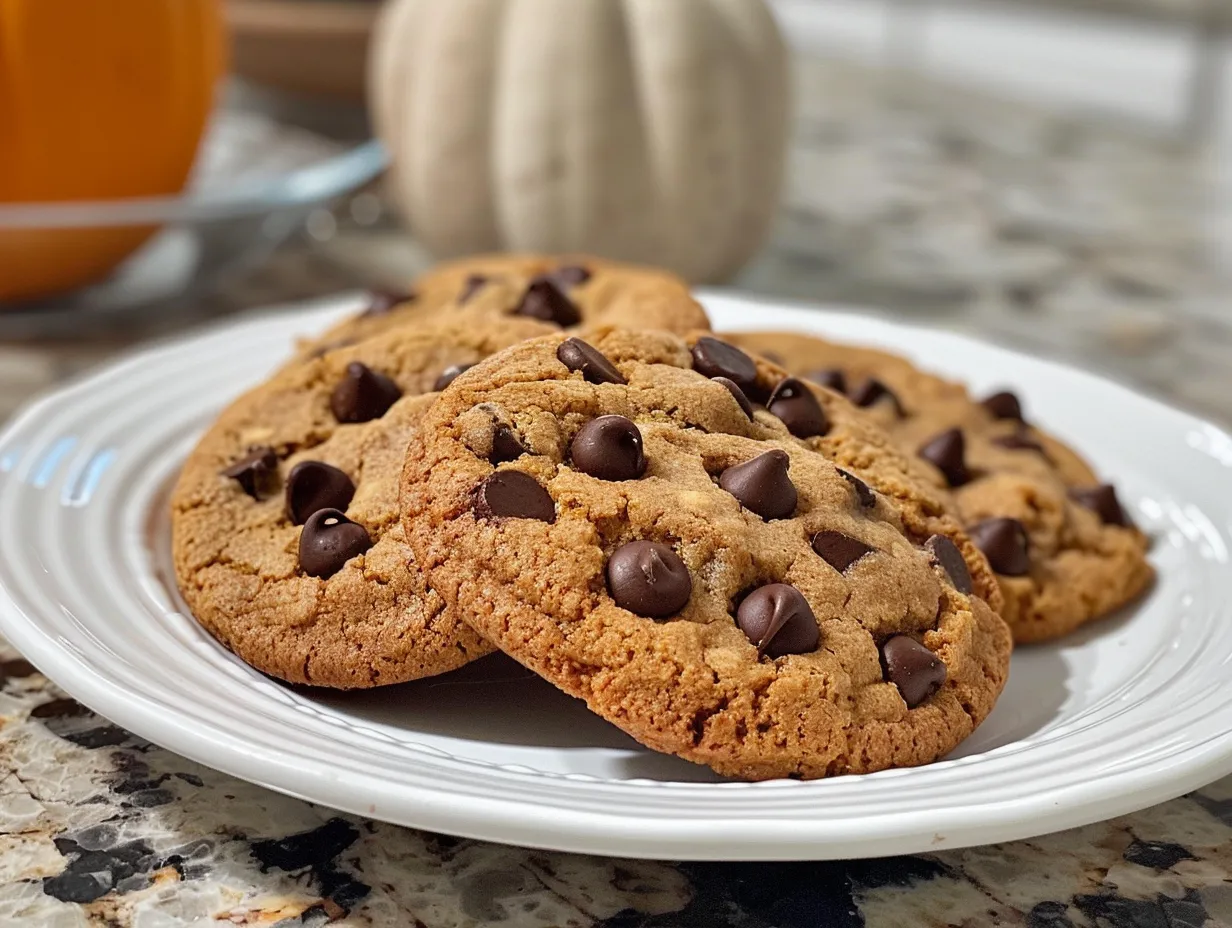
Halloween Chocolate Chip Cookies
These spooky and delicious Halloween chocolate chip cookies are the perfect treat for your Halloween party or a fun family baking activity. Packed with chocolate chips and decorated with festive sprinkles, they’re sure to be a hit!
- Prep Time: 15 minutes
- Cook Time: 10 minutes
- Total Time: 25 minutes
- Yield: 24 cookies
- Category: Dessert
- Method: Baked
- Cuisine: American
Ingredients
- 1 cup (2 sticks) unsalted butter, softened
- 3/4 cup granulated sugar
- 3/4 cup packed brown sugar
- 2 large eggs
- 1 teaspoon vanilla extract
- 2 1/4 cups all-purpose flour
- 1 teaspoon baking soda
- 1 teaspoon salt
- 2 cups semi-sweet chocolate chips
- Halloween sprinkles, for decoration
Instructions
- Preheat oven to 375°F (190°C).
- In a large bowl, cream together the butter, granulated sugar, and brown sugar until light and fluffy.
- Beat in the eggs one at a time, then stir in the vanilla extract.
- In a separate bowl, whisk together the flour, baking soda, and salt.
- Gradually add the dry ingredients to the wet ingredients, mixing until just combined.
- Stir in the chocolate chips.
- Drop by rounded tablespoons onto ungreased baking sheets.
- Bake for 9-11 minutes, or until the edges are golden brown.
- Let cool on baking sheets for a few minutes before transferring to a wire rack to cool completely.
- Decorate with Halloween sprinkles.
Notes
For extra spooky fun, use different colored chocolate chips or add candy eyeballs to the tops of the cookies before baking.