

I still remember the very first time I tried making a French Croissant at home—it was a crazy, sleep-deprived weekend, and my kitchen looked like a buttery snowstorm had exploded all over the counter. The smell of that buttery pastry dough and the anticipation of biting into flaky layers kept me going, even though the laminated dough was pretty stubborn at first. It’s a breakfast pastry that feels so fancy and special, but honestly, getting it right was more about patience and a few kitchen mishaps than perfection. Over time, this French Croissant recipe transformed from just a weekend project to a beloved family favorite, perfect for busy mornings when I want something delicious but also meaningful.
What I love most about French Croissant is how its laminated dough creates those magical flaky layers that literally melt in your mouth. It’s such a classic viennoiserie, but making it from scratch felt like bringing a piece of France right into our hectic home. I’ll admit, the first few tries involved a few too many butter drips and dough that just didn’t want to roll out properly—but then came the aha moment when I learned the right way to chill the dough and roll it out slowly. That little trick made all the difference and saved me from giving up.
Now, French Croissant has become a kind of weekend ritual in our house, a way to slow down a bit amidst the chaos. Sometimes the kids and I fold the dough together, laughing as flour dust settles in the air. It’s that buttery pastry comfort that can brighten any morning, whether served with jam or rolled with cheese. Whether you’re a seasoned baker or just thinking about trying this breakfast pastry, trust me—it’s worth every buttery, flaky layer. If you’re ready to dive in, I’d love to walk you through my favorite way to make a French Croissant that’s heartfelt and delicious. Oh, and if you want to peek at some other breakfast ideas that pair beautifully with croissants, check out these cinnamon-sugar French toast muffins—they’re a perfect treat to keep on your radar!
Ingredients:
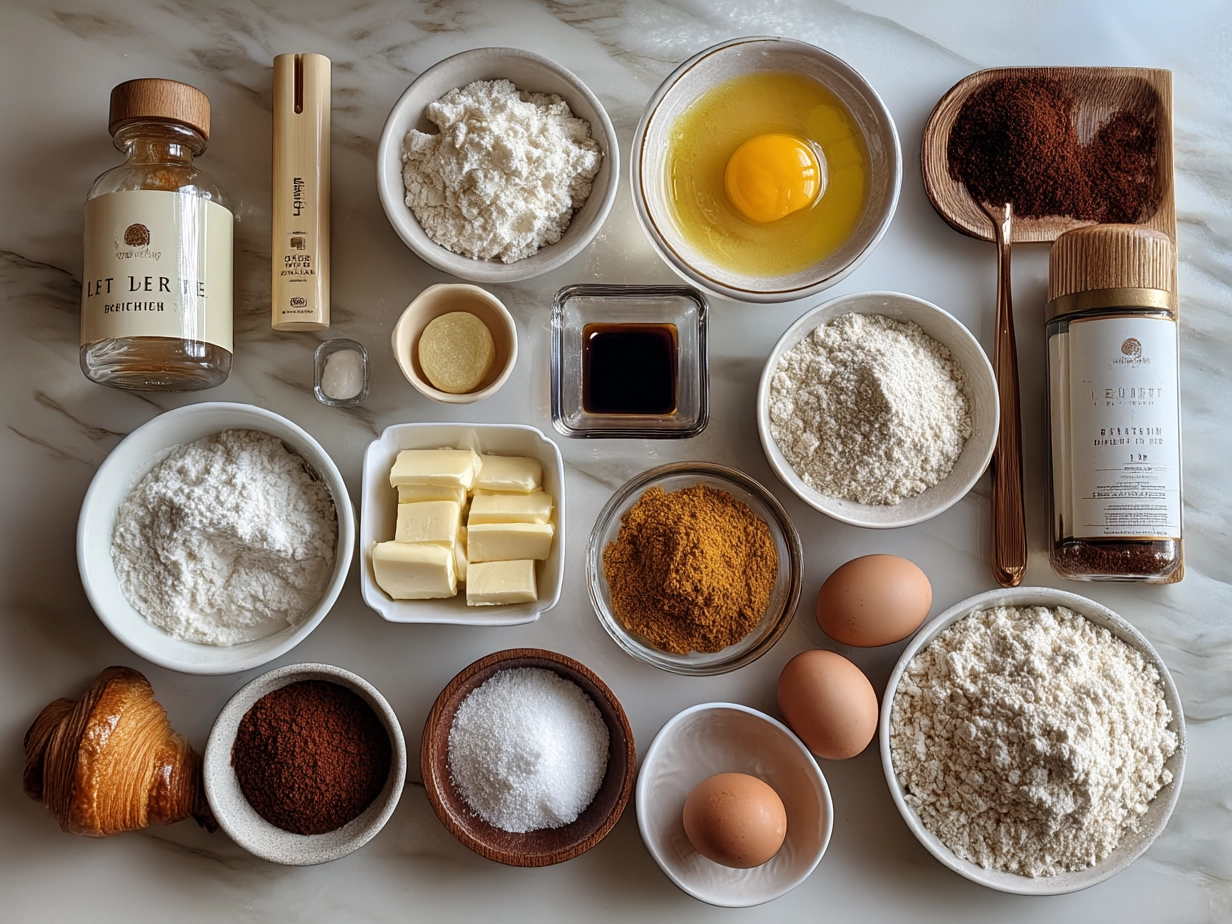
- 3 ½ cups (440g) all-purpose flour – I always use unbleached flour because it gives the French Croissant dough such a lovely texture.
- 1/4 cup (50g) granulated sugar – Just enough sweetness to complement the buttery pastry.
- 2 teaspoons kosher salt – Salt brings out the flavor in the laminated dough.
- 1 tablespoon (10g) instant yeast – You can find this easily at most grocery stores near the bread-making aisle.
- 1 ¼ cups (300ml) cold whole milk – It’s important to use cold milk to keep the dough cool as you start forming those flaky layers.
- 1 cup (225g) unsalted butter, cold – This is the star of the French Croissant. I prefer European-style butter for its richness.
- 1 egg, for egg wash – Gives that gorgeous golden finish on top.
Here’s a little trick I learned from my mom when making French Croissant: make sure your butter block is firm but still pliable before laminating it into the dough. It keeps the flaky layers consistent. Also, buying the best butter you can find might cost a bit more upfront, but trust me, it’s a game-changer for this breakfast pastry. If you’re looking to save a bit, keep an eye out for sales or buy in bulk—the leftover butter freezes beautifully for future French Croissant batches.
For busy families, prepping the ingredients ahead helps a lot. I often measure and chill my flour and butter blocks overnight so that all the ingredients are perfectly cold for the laminated dough step. This way, when the weekend hits, I’m not scrambling to find what I need. Also, I swing by specialty German or French markets sometimes to grab authentic yeast—it’s a great find and really complements the traditional viennoiserie feel of French Croissant. If you want to get a closer look at a pros’ butter lamination technique, this video on making buttery, flaky homemade croissants is an excellent resource to check out.
How to Make – Step-by-Step:
- Mixing the Dough: In a large bowl, combine the flour, sugar, yeast, and salt. Add the cold milk gradually and mix until the dough just comes together. Don’t overwork it—this French Croissant dough needs rest. I learned the hard way that over-kneading ruins the tender crumb.
- Rest the Dough: Wrap your dough in plastic wrap and pop it in the fridge for at least an hour. This chilling step is crucial to maintaining the cold temperature your laminated dough requires for flaky layers.
- Prepare the Butter Block: While the dough chills, take your cold butter and form it into a rectangle about 8×5 inches, wrapping it in parchment. Then refrigerate it alongside the dough.
- Lamination Time: Roll out the chilled dough into a rectangle roughly twice the size of your butter block. Place the butter in the center, fold the dough over it, and seal the edges. This process can be a bit messy, but stick with it!
- Rolling and Folding: Roll out your dough-butter package into a long rectangle and fold it into thirds like a letter. This is the first fold in your laminated dough. Chill for 30 minutes, then repeat this folding step two more times (three folds total). Don’t worry if your edges aren’t perfect; every French Croissant turns out uniquely buttery!
- Shaping the Croissants: After the last chill, roll the dough out one final time, about ¼-inch thick. Cut into triangles, roll each from the base to the tip, and curve them into a crescent shape.
- Proofing: Let your croissants rise in a warm place until doubled in size, usually about 2 hours. Your kitchen will smell like a bakery—oh, that buttery aroma! If you want to learn more about the proofing process and how to troubleshoot slow-rise issues, Emily’s French viennoiserie guide is so helpful.
- Egg Wash & Bake: Brush each croissant with egg wash and bake at 375°F (190°C) for about 20 minutes or until golden and puffed with flaky layers. Your French Croissant should smell rich and buttery—the perfect sign!
While the croissants bake, I usually tidy up and start thinking about breakfast sides. You can also peek at this beautiful purple lamination technique for a fun twist to keep your laminated dough creative.
Remember, don’t stress if your first batch looks imperfect—every French Croissant I’ve made had a few cracked edges or too-buttery spots at first. Practice and patience are part of this viennoiserie adventure.
Serving:

The magic of this French Croissant really shines at our family breakfast table. The kids love when I slice them open and fill with jam or honey, while I’m partial to a simple slice with fresh butter. Pairing these flaky breakfast pastries with a fresh fruit salad or scrambled eggs makes a lovely, balanced weekend treat.
French Croissant also steals the show at brunch gatherings. I usually serve them alongside savory options—like ham and cheese or smoked salmon—because that buttery pastry complements rich flavors beautifully. Presentation-wise, I like to arrange them in a basket lined with a checked cloth napkin—that little rustic touch makes guests feel like they’re at a Parisian café! For a seasonal twist, try adding chocolate chips inside before rolling the dough—it’s a family favorite variation.
Leftover French Croissant? No worries; they reheat beautifully. A quick toast brings back those flaky layers and buttery aroma. Sometimes, I even turn the leftovers into croissant French toast bites, which the kids gobble up fast. If that sounds tasty, you’ll love this recipe for some cinnamon roll-inspired French toast bites to remix your breakfast pastries.
I also like to whip up a batch when friends stop by—my guests often ask for this French Croissant recipe, especially when served with a pot of coffee and fresh berries. It’s that warm, inviting viennoiserie feel that keeps everyone coming back.
FAQs:
- Q: Why did my French Croissant dough shrink while baking?
- Oh, this happens when the dough isn’t relaxed enough after rolling. You know what I do? I always let my laminated dough rest properly between folds, which helps stop that shrinkage. Also, make sure your dough isn’t too warm when shaped—cool laminated dough behaves much better!
- Q: Can I use a stand mixer for making French Croissant dough?
- Yes, a stand mixer works great for combining the initial ingredients. I keep the kneading gentle to avoid activating the gluten too much, which keeps those flaky layers tender. For more tips on mixing, check out this Facebook guide on croissant techniques.
- Q: How important is the butter temperature?
- Crucial! I’ve learned that if the butter is too soft, it’ll just absorb into the dough and won’t create those flaky layers. Cold, slightly pliable butter is your best bet for perfect laminated dough.
- Q: Can I freeze French Croissant dough?
- Absolutely! Freezing after shaping but before the final proof works well. Defrost overnight in the fridge, then proof and bake the next day. It’s a lifesaver for busy weeks.
- Q: My croissants didn’t rise well—what’s the fix?
- Make sure your yeast is fresh, and your proofing environment is warm enough (around 75°F works). I also cover mine with a damp towel to keep the dough moist.
- Q: Can I make French Croissant without yeast?
- Traditional French Croissant relies on yeast for that airy rise, so skipping it changes the texture completely. If you’re in a pinch, maybe consider a different breakfast pastry like cinnamon sugar French toast muffins, which are quick and just as comforting.
- Q: How do I get that perfect golden color on top?
- Egg wash is your friend! Brush the tops before baking, and if you want extra shine, add a small amount of milk to the egg wash.
If you’re curious about more troubleshooting or want to share your own croissant tales, Emily’s blog on the best viennoiseries has an incredible set of tips and community stories.
My Final Thoughts:
This French Croissant recipe holds such a special place in my heart because it reminds me of those early mornings filled with effort, flour dust, and finally, shared smiles over warm, flaky croissants. My French Croissant Pro Tips:
- Always keep your dough and butter cold—this is key for flaky layers.
- Patience is everything; don’t rush the folding and chilling steps.
- Invest in good butter—it’s the heart of the buttery pastry flavor.
Over the years, I’ve experimented with classic butter croissants, chocolate-filled versions, and even almond croissants, each beloved by different family members. The kids can’t get enough of the chocolate variety, while my partner prefers the simplicity of classic buttery layers. We even tried a savory ham and cheese version—talk about a perfect brunch!
If you decide to make this French Croissant your own, just remember it doesn’t have to be perfect; the joy is in learning and sharing. Happy baking, and if you want more cozy breakfast ideas to go with your croissants, don’t forget to check these fantastic crockpot French dip recipe and those irresistible cinnamon-roll French toast bites for a wonderful mix of breakfast and comfort food inspiration.
Here’s to buttery, flaky mornings filled with that unbeatable French Croissant aroma. You’ve got this!
French Croissant

Experience the flaky, buttery layers of a classic French croissant, perfect for breakfast or a delightful snack any time of day.
- Prep Time: 60 minutes
- Cook Time: 20 minutes
- Total Time: 1 hour 20 minutes
- Yield: 12 croissants
- Category: Breakfast
- Method: Baked
- Cuisine: French
Ingredients
- 4 cups (500g) all-purpose flour
- 1/2 cup (120ml) whole milk, warm
- 1/2 cup (120ml) water, warm
- 1/4 cup (50g) granulated sugar
- 2 1/4 tsp (7g) active dry yeast
- 1 1/2 tsp salt
- 3 tbsp (45g) unsalted butter, softened
- 1 1/4 cups (285g) cold unsalted butter (for laminating)
- 1 egg (for egg wash)
Instructions
- In a bowl, combine warm milk, water, sugar, and yeast. Let it sit for 5 minutes until frothy.
- Add flour, salt, and softened butter to the yeast mixture. Mix and knead until a smooth dough forms.
- Cover the dough and refrigerate for at least 2 hours.
- Prepare the cold butter block by pounding and shaping it into a rectangle approximately 7×10 inches.
- Roll out the chilled dough into a rectangle twice the size of the butter block.
- Place the butter block in the center of the dough and fold the dough over it, sealing the edges.
- Roll out the dough into a large rectangle and perform a letter fold (fold into thirds). Wrap and chill for 30 minutes.
- Repeat the rolling and folding process two more times, chilling between each fold.
- After the final chill, roll out the dough into a large rectangle and cut into triangles.
- Roll each triangle from base to tip to form the croissant shape and place on a baking tray.
- Let croissants proof in a warm place until doubled in size, about 1.5 to 2 hours.
- Brush with beaten egg for a golden crust.
- Bake at 400°F (200°C) for 15-20 minutes or until golden brown and flaky.
Notes
For an extra special treat, try filling the croissants with chocolate or almond cream before baking.