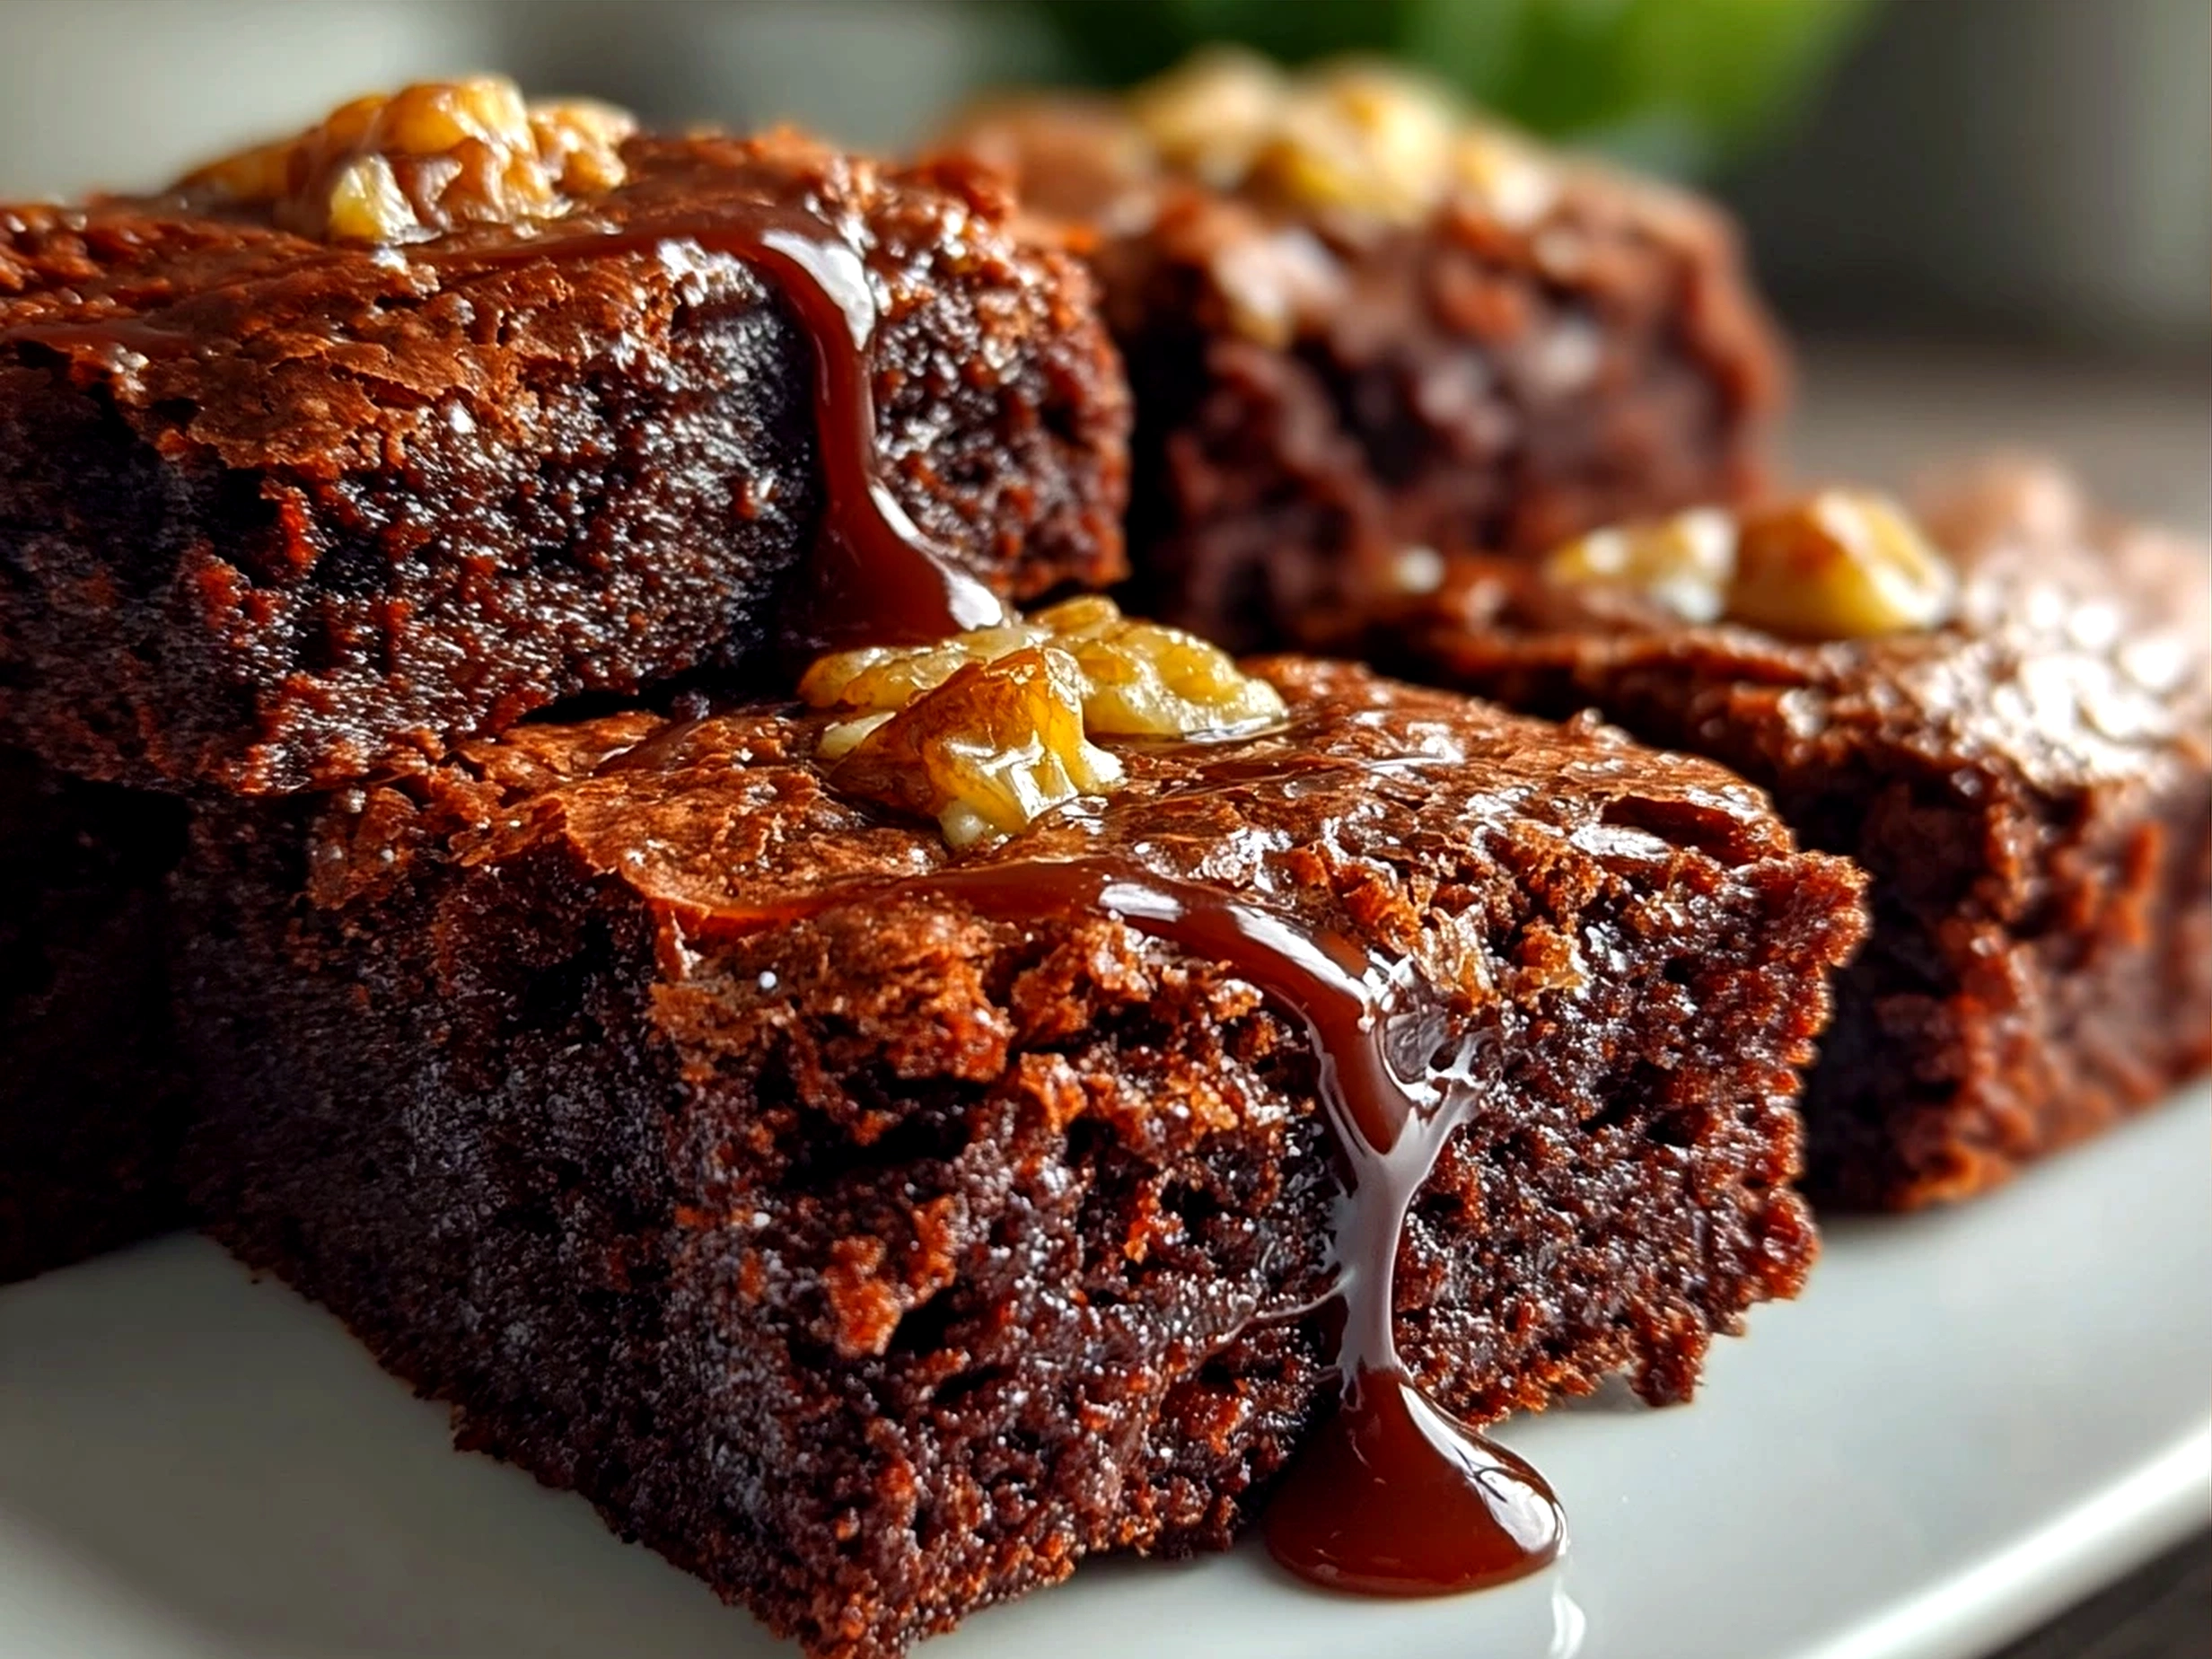
Oh, I just have to tell you about the moment I first made these Date Brownies—it was one of those little kitchen victories that sticks in your mind. I remember the sweet scent that filled the house, that warm, caramel-like aroma from the dates mingling with rich cocoa, the baking tray heating everything up just so. These Date Brownies quickly became a staple in my family’s dessert rotation because they offer this perfect combination of moist, chewy, and naturally sweet goodness that everyone can feel good about eating.
I’ll be honest, though—it took a few tries before I nailed the texture I was after. The first batch was a bit dry, and the dates weren’t fully blended, making them chunky in a way that threw off the whole chewy date chocolate brownies vibe I was aiming for. But once I figured out the right balance of soaked dates and whole wheat flour, it was like magic. Now, these brownies offer that delicate chewiness on the outside with a moist, tender crumb inside. Plus, since they’re packed with natural sweetness from dates, they double as a healthy date dessert that my kids happily snack on without any fuss.
Balancing a busy family life with healthy cooking isn’t always easy. Days are packed, so I needed a recipe that was straightforward but still felt homemade and nourishing—and these Date Brownies fit that bill perfectly. They’re my go-to when I want something comforting but wholesome, whether for a lunchbox treat or a last-minute dessert for visiting friends. I first stumbled upon the concept when browsing an old blog about natural sweetener brownies, and it felt like a little lightbulb went off—why not swap refined sugar for the natural caramel sweetness of dates? Since then, I’ve tried adapting other recipes, including more traditional brown butter brownies and chocolate cherry brownies, but the date version remains a family favorite.
If you’ve struggled with finding a dessert that hits the sweet spot between indulgent and wholesome, I think you’ll really appreciate these Date Brownies. They blend smoky cocoa richness with the natural sugar of dates, umm—and that contrast just sings. Don’t be scared if you’re new to cooking with dates; I’ll walk you through everything from ingredients to baking. By the time we’re done, you’ll have a tray of moist date brownies ready to delight your family, and maybe even some to share with your closest friends! Plus, if you want to see a similar angle on naturally sweet whole wheat baking, The Conscious Plant Kitchen has a lovely version of Date Brownies without added sugar that I had to bookmark.
INGREDIENTS:
Gathering your ingredients for these Date Brownies is pretty simple, but getting the right kind and quality makes all the difference in creating those moist date brownies we love. Here’s what I always keep on hand:
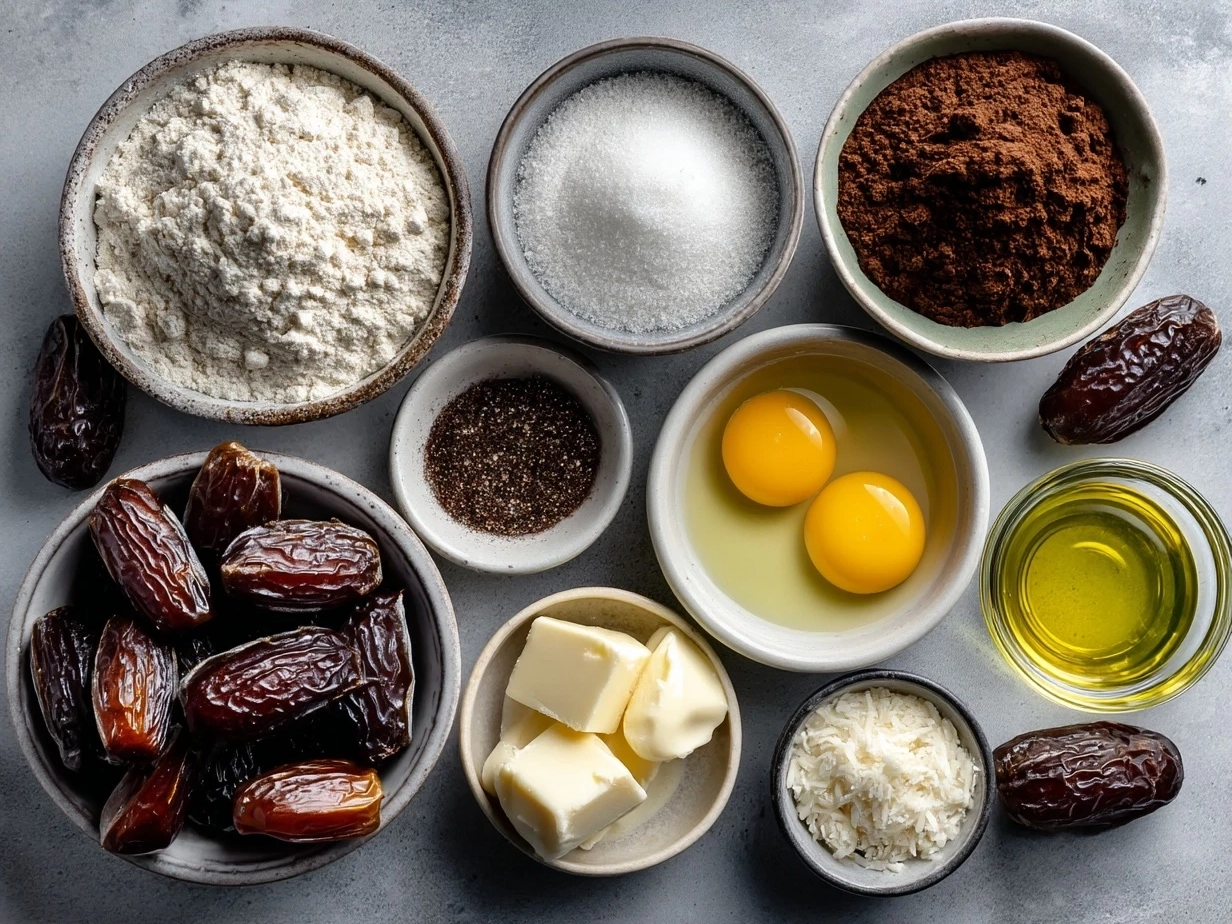
- 1 ¼ cups pitted dates (Medjool dates work best for soft texture and natural sweetness)
- ¾ cup whole wheat flour (I prefer freshly milled if possible for a nice nutty flavor in my whole wheat brownies)
- ¼ cup unsweetened cocoa powder (Dutch-processed cocoa if you want a milder, richer chocolate taste)
- ½ cup melted coconut oil (adds moisture and richness; you can use unsalted butter if you prefer)
- 2 large eggs (room temperature—their protein helps bind the brownies)
- 1 teaspoon baking soda (helps the brownies rise and get fluffy enough)
- 1 teaspoon vanilla extract
- ¼ teaspoon salt (balances the sweetness)
When making Date Brownies, I always soak the dates in hot water for about 10 minutes if they’re slightly dry—this softens them perfectly and makes blending easier. You can often find these dates in the dried fruit aisle of your grocery store or health food section. The cocoa can be a bit pricey, so I suggest buying in bulk or at stores with a good organic section. For cost-saving, whole wheat flour is affordable and packs more nutrition compared to white flour.
Here’s a little Date Brownies trick I learned from my mom: blend the soaked dates with a bit of the coconut oil before mixing the dry ingredients. This turns the mixture into a luscious paste that keeps the brownies wonderfully moist and chewy. Also, if you’re short on time, you can swap the soaking step for a quick blitz in a food processor with a splash of hot water—works like a charm and pairs beautifully with the chocolate flavor.
Don’t forget to store any leftover dry ingredients for your Date Brownies in airtight containers—this keeps the cocoa from clumping and the whole wheat flour nice and fresh for the next baking session. And if you find yourself with extra soaked dates, freeze them in small portions; they thaw quickly and make a great base for future natural sweetener brownies or even morning oatmeal.
If you want to explore other wholesome date-sweetened treats, like cookies, check out Date-Sweetened Whole Wheat Double Chocolate Cookies. It gave me ideas for flipping this recipe into fun new treats that the family adores.
HOW TO MAKE – STEP-BY-STEP:
Let’s dive into making these Date Brownies together—you’ll see it’s pretty straightforward but with a few little tips that make all the difference when you’re aiming for chewy date chocolate brownies.
- Preheat your oven to 350°F (175°C) and grease an 8×8-inch baking pan or line it with parchment paper. This helps the brownies come out cleanly.
- Soak your dates if you haven’t already. Just cover them with hot water and let them sit for 10 minutes. Then drain really well, reserving a tablespoon or so of the soaking liquid.
- Blend soaked dates and coconut oil: In a food processor or blender, combine the soaked dates and coconut oil. Blend until you have a smooth, thick paste. This step is key for your moist date brownies and helps distribute the natural sweetener evenly throughout.
- Mix dry ingredients: In a large bowl, whisk together the whole wheat flour, cocoa powder, baking soda, and salt. This ensures even baking and that nice bittersweet chocolate flavor in your chewy date chocolate brownies.
- Combine eggs and vanilla: In another bowl, beat the eggs with the vanilla extract. Gradually stir in the date-coconut oil paste. Your mixture should look glossy and smooth here.
- Fold dry ingredients into wet: Slowly stir the flour mix into the wet mixture, folding everything just until combined. Don’t overmix or your whole wheat brownies might get tough instead of that perfect moist crunch we all want.
- Pour into pan and smooth: Spread the batter evenly in the prepared pan. I usually run a spatula across a few times to get a nice flat surface.
- Bake for 20-25 minutes: In my kitchen, Date Brownies usually take about 22 minutes to hit the perfect chewy middle. Start checking at 20 minutes by inserting a toothpick—if it comes out with just a few moist crumbs, you’re golden. They’ll smell like chocolate and caramel melding together.
- Cool completely before cutting: This is important! I learned the hard way that cutting Date Brownies too early makes them crumbly. Let them cool in the pan for at least an hour, or pop into the fridge for a bit if you’re impatient like me.
Don’t worry if your Date Brownies look a little undercooked on the edges right after baking; the resting time lets them set and develop that perfect moist date dessert texture. While they’re baking, I like to clean my prep station or prep a side dish to pair with the brownies.
If you want some extra ideas for cooking techniques or troubleshooting while making your chewy date chocolate brownies, The Baker Chick’s fudgy Date Brownies have some great insights that helped me refine my approach.
SERVING:
Our family loves enjoying these Date Brownies just as they are, but I’ve found a few ways to make the experience even more special. The kids especially go crazy when I warm a square slightly and serve it with a scoop of vanilla ice cream or a dollop of Greek yogurt—something about the contrast of warm and cold really highlights the moist date brownies.

Sometimes I like to pair them with fresh berries or a fruit compote, which cuts through the richness nicely, making it feel like a balanced healthy date dessert. Also, on weekends or holidays, we’ll add a sprinkle of chopped nuts or sea salt on top right before baking to give them a bit of crunch and flair.
I usually bake Date Brownies when I want a quick dessert that pleases a crowd, like family game nights, school bake sales, or last-minute guests stopping by. They also perfect as a power snack for after-school because they’re chewy date chocolate brownies that satisfy without the sugar crash.
When it comes to presentation, I find that cutting the brownies into small, bite-sized squares makes sharing easier. Arrange them on a pretty platter, maybe add some mint leaves or edible flowers for a little kitchen touch. If you’re looking for leftover ideas, I like turning any extra Date Brownies into a layered parfait with yogurt and fruit or even crumbled over a warm cereal bowl.
Seasonally, I’ve mixed in pumpkin spice or orange zest for holiday spins on the recipe, and those versions got rave reviews from friends and family—especially coming from eager kids at Halloween or Thanksgiving!
My friends always ask for this Date Brownies recipe at potlucks; it’s become my “secret wholesome treat” that gets surprisingly big smiles every time. If you want to see more delightful chocolate-based treats with a twist, you might enjoy my take on Strawberry Shortcake Brownies, which pairs beautifully as a springtime alternative.
FAQs:
Q1: Can I make Date Brownies vegan?
Absolutely! I’ve made these with flax or chia egg substitutes when friends had egg allergies. It takes a bit of adjusting with the liquid ratios, but you get those chewy date chocolate brownies and natural sweetness still shining through. You can swap coconut oil for vegan butter too.
Q2: How do I keep Date Brownies moist without adding sugar?
The key is the soaking and pureeing of dates, which releases natural sugars and moisture. Also, don’t skip that cooling step before cutting—they firm up so nicely when given the time. Using whole wheat flour adds a nice texture and moisture-keeping quality compared to white flour.
Q3: Can I use other flours for these whole wheat Date Brownies?
Yes, but remember that whole wheat flour gives a better body and flavor. I’ve tried white whole wheat and even spelt for a nuttier taste. If you use gluten-free flour, be sure to check the mix to maintain the chewy texture and adjust baking time slightly.
Q4: My Date Brownies came out dry—what could be wrong?
You may have overbaked or not soaked the dates enough. Also, make sure the coconut oil or butter is mixed well to keep the batter moist. I learned that skipping soaking is a rookie mistake—those dates must be soft!
Q5: How long do homemade Date Brownies last?
They keep well in an airtight container for up to 4 days at room temp or about a week in the fridge. They can also freeze beautifully for longer storage.
Q6: Can I add nuts or chocolate chips to my Date Brownies?
Totally! My family loves adding walnuts or some dark chocolate chips for extra texture. Just fold them in right before baking for best results.
Q7: Are these Date Brownies really a healthy date dessert?
In my experience, yes—because they use whole wheat flour and dates as a natural sweetener, they avoid refined sugars and the brownies stay moist and chewy without being overly sweet. Lots of blog readers told me they felt better about indulging after trying these, especially compared to regular brownies.
If you want more tips specifically for making whole wheat Date Brownies, that link hosts some great ideas to tweak your recipe or troubleshoot.
My Final Thoughts:
This Date Brownies recipe truly feels like a warm hug from my kitchen to yours. It has a special place in my heart because it represents that perfect balance of homemade goodness with wholesome ingredients, fit for any family’s busy life. My Date Brownies Pro Tips would definitely include:
- Always soak your dates for the best luscious, moist date brownies texture.
- Don’t overmix the batter; gentle folding keeps them tender.
- Let the brownies cool completely before cutting to avoid crumbly edges.
Over time, my family and I have experimented with variations like adding espresso powder for a mocha twist, incorporating toasted coconut flakes, or mixing in a little orange zest for a citrus bright note. My kids favor the classic chewy date chocolate brownies, while the adults enjoy the whole wheat brownies loaded with nuts and a hint of sea salt.
If you decide to make this recipe your own, trust me—it’s forgiving, fun, and full of flavor. From one home cook to another, I hope your Date Brownies turn out just as comforting and delicious as mine do here. I’d love for you to share your twists or stories too because food really connects us all. And for more brownies inspiration, you might enjoy checking out other recipes like the brown butter brownies or the Strawberry Shortcake Brownies for some fun variety.
There’s something so satisfying about pulling a warm pan of these Date Brownies out of the oven and knowing you’ve made a treat everyone will love—and feel good about eating. Give it a go, and I’m cheering you on every step of the way!
If you’re ready to try making your own moist date brownies, you’re in for a deliciously wholesome adventure. Happy baking!
Date Brownies
Deliciously fudgy date brownies made with natural sweetness from dates and rich chocolate flavor, perfect for a wholesome dessert or snack.
- Prep Time: 10 minutes
- Cook Time: 25 minutes
- Total Time: 35 minutes
- Yield: 9 servings
- Category: Dessert
- Method: Baked
- Cuisine: American
Ingredients
- 1 cup pitted dates
- 1/2 cup unsweetened applesauce
- 2 large eggs
- 1/4 cup coconut oil, melted
- 1/2 cup almond flour
- 1/4 cup cocoa powder
- 1/2 teaspoon baking soda
- 1/4 teaspoon salt
- 1 teaspoon vanilla extract
- 1/4 cup dark chocolate chips (optional)
Instructions
- Preheat oven to 350°F (175°C) and grease an 8×8 inch baking pan.
- In a food processor, blend the pitted dates until they form a sticky paste.
- In a large bowl, whisk together the applesauce, eggs, melted coconut oil, and vanilla extract.
- Add the date paste to the wet ingredients and mix until well combined.
- In a separate bowl, sift together the almond flour, cocoa powder, baking soda, and salt.
- Gradually fold the dry ingredients into the wet mixture until just combined.
- Stir in the dark chocolate chips if using.
- Pour the batter into the prepared baking pan and spread evenly.
- Bake for 20-25 minutes or until a toothpick inserted in the center comes out mostly clean.
- Allow the brownies to cool completely before slicing and serving.
Notes
For an extra indulgent treat, serve warm with a scoop of vanilla ice cream or a drizzle of almond butter.