
Let’s just say, my first attempt was a little…soupy. I hadn’t let the cream cheese soften enough, and the whole thing was a lumpy mess. Bless her heart, she ate it with a smile and said, “Honey, it’s the thought that counts!” But I was determined to get it right. After a little trial and error (and a lot of taste-testing!), I finally perfected this recipe, and it’s been a family staple ever since.
My kids practically demand it for every holiday and potluck. It’s so simple, even they can help make it. It fits perfectly into our busy family life because it’s a no-bake wonder, ready in minutes (after chilling, of course!). There’s nothing quite like the burst of sweet cherries and the creamy, dreamy texture of this classic cherry delight. It’s one of those dishes that just makes everything feel a little brighter. It’s a perfect easy cherry dessert, especially for summer gatherings. I’ve made it so many times, I can practically whip it up in my sleep. And trust me, once you try this classic cherry delight, you’ll be hooked too!
INGREDIENTS
Alright, let’s gather our goodies! Here’s what you’ll need to create this classic cherry delight:
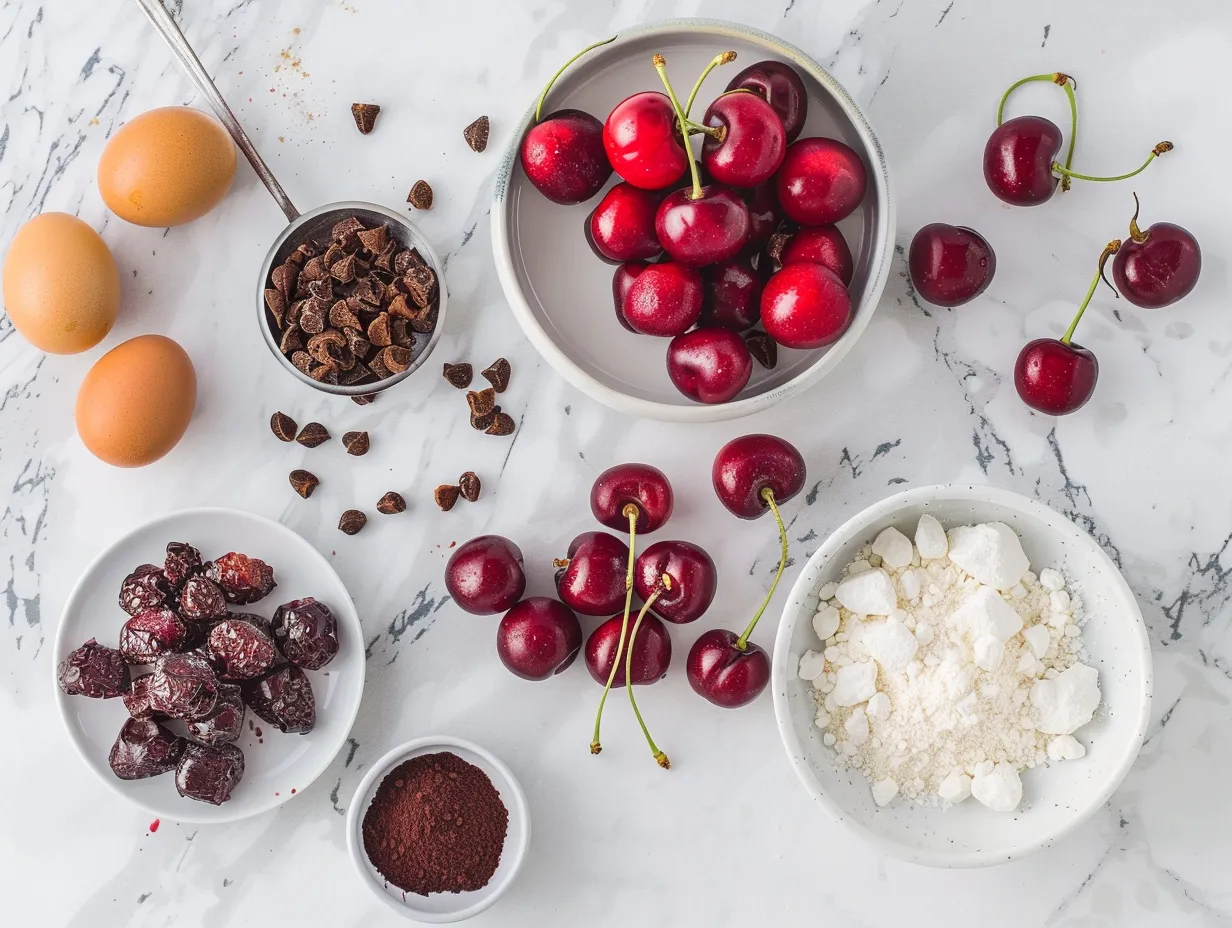
- 1 (8 ounce) package cream cheese, softened: I always use full-fat cream cheese for the richest, most decadent flavor. Trust me, it makes a difference in this classic cherry delight recipe.
- 1 (14 ounce) can sweetened condensed milk: This is the magic ingredient that gives it that creamy, sweet base.
- 1 (20 ounce) can crushed pineapple, drained: Make sure it’s well-drained, or your classic cherry delight might get a bit watery.
- 1 (21 ounce) can cherry pie filling: This is where the cherry magic happens! You can use any brand you like, but I prefer one with lots of plump, juicy cherries. A good cherry pie filling dessert relies on a quality filling.
- 1 (10 ounce) container frozen whipped topping, thawed (like Cool Whip): I’m a Cool Whip girl through and through. You can find this in the freezer section of most grocery stores. I sometimes use a whipped cream cherry dessert variation if I have extra time, but Cool Whip makes it easy! (Want to know more about Cool Whip? ). Cool Whip adds that airy, light texture that makes this dessert so irresistible. It’s a stabilized whipped cream, which means it holds its shape well, even after being refrigerated for a few days.
- 1 cup chopped pecans or walnuts (optional): For that extra crunch and nutty flavor. Consider toasting the nuts lightly in a dry pan for a deeper, more pronounced flavor. This step enhances their natural oils and adds a delightful warmth to your classic cherry delight.
- 1 (11 ounce) package vanilla wafers: These form the crust and add a lovely vanilla flavor that complements the cherries beautifully. When making classic cherry delight, you can find these in the cookie aisle.
Here’s a classic cherry delight trick I learned from my mom: let the cream cheese come to room temperature for at least an hour before you start. This will ensure it blends smoothly and you won’t end up with any lumps. Also, if you’re short on time, you can buy pre-chopped nuts. And a cost-saving tip? Stock up on cherry pie filling when it’s on sale, especially around the holidays. For storing leftover ingredients from your classic cherry delight adventure, cream cheese should be refrigerated, sweetened condensed milk should be refrigerated after opening, and nuts should be kept in an airtight container to prevent them from going stale.
HOW TO MAKE – STEP-BY-STEP
Okay, let’s get down to business! This is where the magic happens. Follow these steps, and you’ll be enjoying your own classic cherry delight in no time.
- Crush the vanilla wafers: In a large bowl, crush the vanilla wafers. You can use a food processor for a fine crumb, or simply put them in a zip-top bag and crush them with a rolling pin for a more rustic texture. I prefer the rolling pin method – it’s a great stress reliever! Pour the crushed wafers into the bottom of a 9×13 inch baking dish. For a more intense vanilla flavor, consider using vanilla extract when crushing the wafers. A teaspoon of vanilla extract mixed with the crushed wafers will add an extra layer of deliciousness to your classic cherry delight.
- Prepare the cream cheese mixture: In a large mixing bowl, beat the softened cream cheese with an electric mixer until smooth and creamy. Don’t worry if your classic cherry delight mixture isn’t perfectly smooth at first. Just keep beating it until it is. I learned the hard way with classic cherry delight that lumpy cream cheese doesn’t make for a good texture! If you find that the cream cheese is still a bit stubborn, try adding a tablespoon of milk or cream to help smooth it out.
- Add the sweetened condensed milk: Gradually pour in the sweetened condensed milk while continuing to beat with the mixer until well combined and smooth. This step is crucial for that signature creamy texture. Ensure that you scrape down the sides of the bowl periodically to incorporate all the sweetened condensed milk evenly.
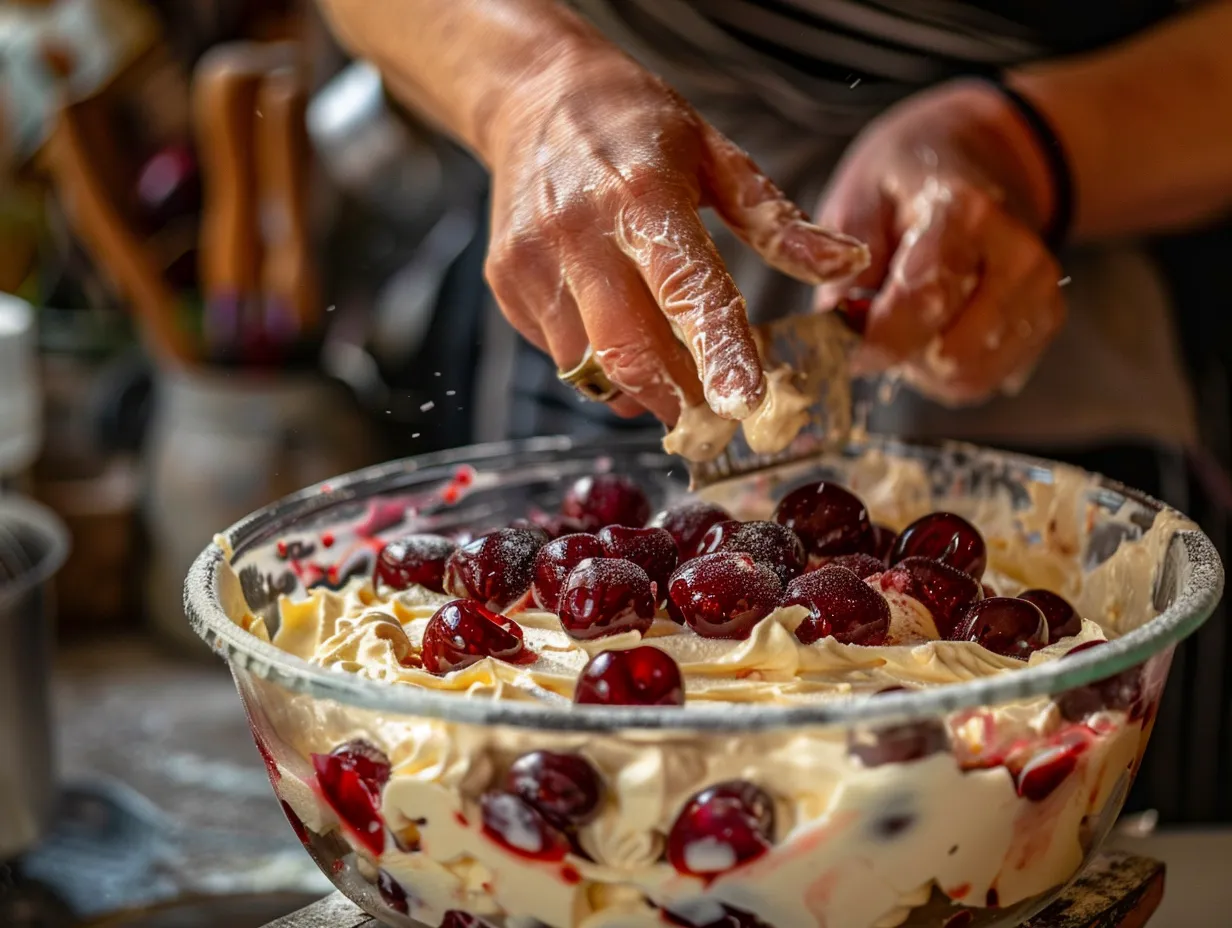
- Stir in the pineapple: Gently fold in the drained crushed pineapple until evenly distributed. This adds a lovely tropical twist to the classic cherry delight. Be careful not to overmix at this stage, as it can cause the cream cheese mixture to become thin.
- Spread the cream cheese mixture: Carefully spread the cream cheese mixture evenly over the crushed vanilla wafers in the baking dish. Use a spatula to ensure a smooth and even layer, which will provide a perfect base for the cherry pie filling.
- Top with cherry pie filling: Spoon the cherry pie filling evenly over the cream cheese layer. This is where that beautiful cherry color comes into play! If you want to add a bit more depth of flavor, consider mixing a teaspoon of almond extract into the cherry pie filling before spreading it over the cream cheese layer.
- Spread with whipped topping: Spread the thawed whipped topping evenly over the cherry pie filling. Be generous – it’s the best part! For an extra touch of elegance, you can use a piping bag to create decorative swirls with the whipped topping.
- Sprinkle with nuts (optional): If using, sprinkle the chopped pecans or walnuts over the whipped topping. This adds a delightful crunch and nutty flavor. Alternatively, consider using other toppings like shredded coconut, chocolate shavings, or a drizzle of caramel sauce.
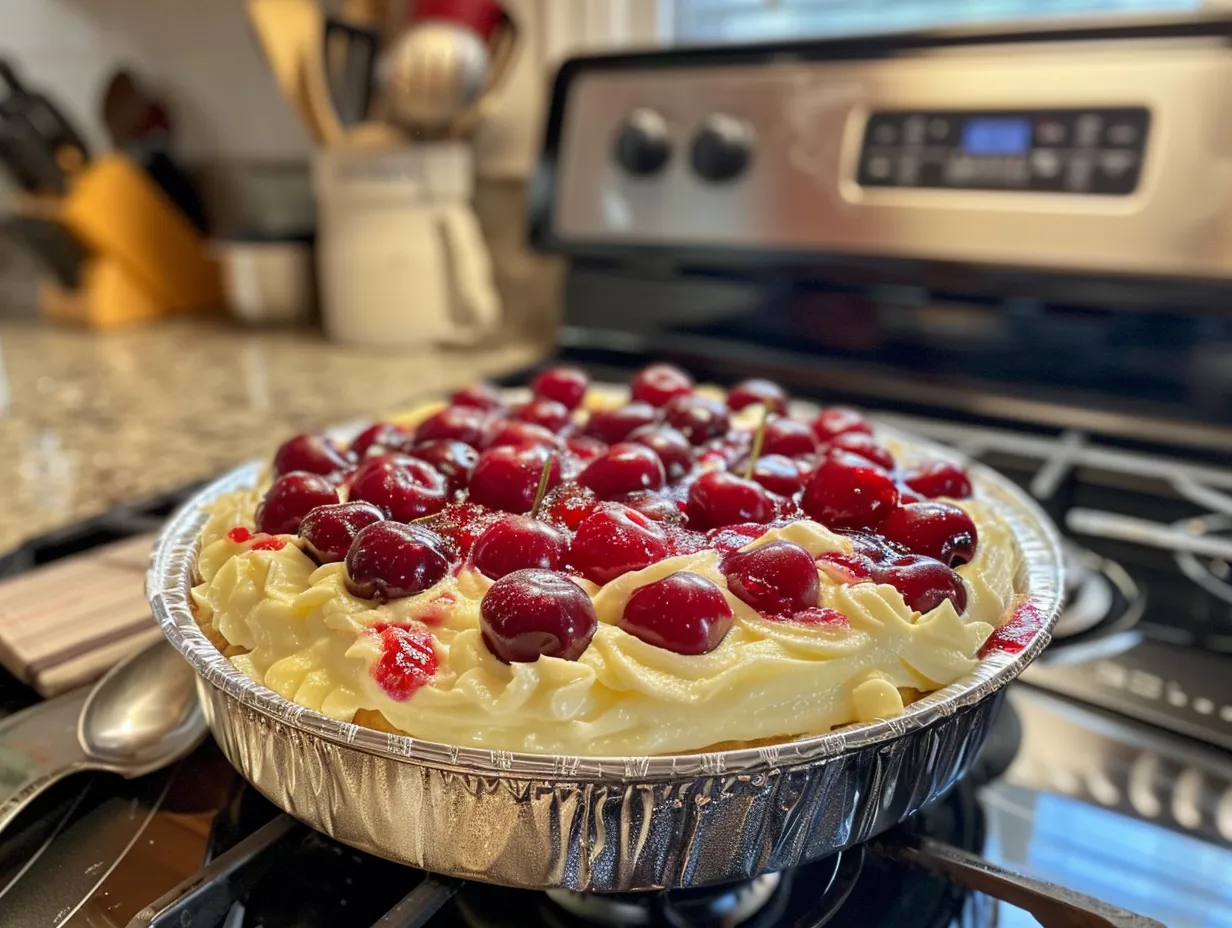
- Chill: Cover the dish with plastic wrap and refrigerate for at least 4 hours, or preferably overnight, to allow the flavors to meld together and the wafers to soften. In my kitchen, classic cherry delight usually takes about 6 hours to fully chill, but overnight is always best. This chilling time is crucial for the dessert to set properly and for the flavors to fully develop.
While the classic cherry delight is chilling, I usually clean up the kitchen and maybe sneak a little preview of a new blog post! Your classic cherry delight should smell like sweet cherries and vanilla when you take it out of the fridge.
SERVING
Okay, the moment we’ve all been waiting for! It’s time to serve your classic cherry delight. The kids love our classic cherry delight when I add a dollop of extra whipped cream and a cherry on top. To elevate the presentation, consider using a sprig of fresh mint or a dusting of powdered sugar.
This classic cherry delight pairs perfectly with a simple scoop of vanilla ice cream. The cold ice cream against the creamy dessert is just divine! It’s perfect for potlucks, holiday gatherings, or just a simple weeknight dessert. This classic cherry delight is perfect for Easter, Thanksgiving, or even just a summer barbecue. It’s such a versatile dessert!
For presentation, I like to sprinkle a few extra crushed vanilla wafers on top just before serving. If you have extra classic cherry delight, it’s delicious the next day (if it lasts that long!). It’s also great served with a side of fresh berries. My friends always ask for this classic cherry delight recipe, and I’m always happy to share it!
For seasonal variations, try adding a sprinkle of cinnamon in the fall or some lime zest in the summer. In the winter, consider adding a touch of nutmeg or ginger for a warm and cozy twist. These simple additions can transform your classic cherry delight into a year-round favorite.
FAQs
Okay, let’s tackle some common questions I get asked about classic cherry delight. I’ve been making this for years, so I’ve definitely learned a few things along the way!
Q: Can I use a different type of crust?
A: Absolutely! While vanilla wafers are the classic choice, you can use graham crackers, shortbread cookies, or even a chocolate wafer crust for a different flavor profile. You know what I do when my classic cherry delight is crustless? I bake a sheet cake instead and spread it over the cake!
Q: Can I use fresh cherries instead of cherry pie filling?
A: While you can, it’s not a direct substitution. Fresh cherries will need to be pitted, cooked down with sugar and a thickener (like cornstarch), and cooled before using. Honestly, the convenience of cherry pie filling is part of what makes this easy cherry dessert so appealing.
Q: Can I make this ahead of time?
A: Definitely! In fact, it’s best to make it at least 4 hours in advance to allow the flavors to meld. I often make it the night before and let it chill overnight. Just make sure it’s covered tightly to prevent it from drying out.
Q: My cream cheese mixture is lumpy. What did I do wrong?
A: The most common culprit is not letting the cream cheese soften enough. Make sure it’s at room temperature before you start mixing. You can also try beating it for a longer period of time until it’s smooth. You know what I do when my classic cherry delight cream cheese is lumpy? I add a teaspoon of lemon juice!
Q: Can I use sugar-free ingredients to make this healthier?
A: Yes, you can! Look for sugar-free cream cheese, sweetened condensed milk, and cherry pie filling. Just be aware that the taste and texture may be slightly different. My family prefers the original, but it’s definitely a good option for those watching their sugar intake.
Q: Can I freeze classic cherry delight?
A: While technically you can freeze it, the texture of the whipped topping may change slightly upon thawing. It might become a little watery. If you do freeze it, wrap it tightly in plastic wrap and then in foil.
Q: What if I don’t like nuts?
A: No problem! The nuts are completely optional. You can leave them out entirely or substitute them with something else, like shredded coconut or chocolate shavings. My mom doesn’t like nuts, so I always make her a classic cherry delight without them.
My Final Thoughts
This classic cherry delight recipe holds a special place in my heart because it’s more than just a dessert; it’s a connection to family, to memories, and to the simple joy of sharing something delicious. It’s the perfect no bake cherry delight! It’s a recipe I know I can always count on to bring a smile to everyone’s face.
Here are my classic cherry delight Pro Tips:
- Don’t overmix the cream cheese mixture. Overmixing can cause it to become thin and watery.
- Make sure the pineapple is well-drained. Excess moisture will make the dessert soggy.
- Chill for at least 4 hours, or preferably overnight. This allows the flavors to meld together and the wafers to soften.
I’ve tried several variations over the years. My husband loves a version with a layer of chocolate pudding in the middle. My daughter prefers it with a sprinkle of mini chocolate chips on top. My son is a purist and insists on the original recipe every time. Encourage your readers to try this link for another delicious cherry recipe.
I truly hope you give this classic cherry delight a try. It’s so easy to make, and it’s guaranteed to be a hit with your family and friends. I hope your classic cherry delight cooking experience will be filled with laughter, delicious aromas, and maybe even a few happy accidents along the way. Remember, cooking is all about experimenting and having fun! So go ahead, get in the kitchen, and make some memories with this classic cherry delight!
PrintClassic Cherry Delight: A Nostalgic Treat
This 3-step Cherry Delight is a super simple and delicious dessert that everyone will love! It’s perfect for potlucks, parties, or just a sweet treat at home.
- Prep Time: 5
- Total Time: 125
- Yield: 8
- Category: Dessert
- Method: No-Bake
- Cuisine: American
Ingredients
- 1 (14 ounce) can sweetened condensed milk
- 1 (20 ounce) can crushed pineapple, undrained
- 1 (21 ounce) can cherry pie filling
Instructions
- In a large bowl, combine the sweetened condensed milk and crushed pineapple.
- Fold in the cherry pie filling.
- Pour into a dish and refrigerate for at least 2 hours before serving.
Notes
For a creamier dessert, add 8 ounces of whipped topping before refrigerating. You can also top with graham cracker crumbs for added texture.