
Oh, sweet friend, pull up a chair, grab a warm mug, and let’s chat about something truly magical that has become a staple in my kitchen: my go-to chocolate chunk dutch oven bread. You know how some recipes just click? The ones that feel like you’ve unearthed a hidden treasure, transforming your kitchen into the coziest, most comforting spot on earth? Well, this chocolate chunk dutch oven bread is exactly that for me.
I still remember the first time I pulled a beautiful, crackly loaf of this chocolate chunk dutch oven bread out of the oven. The aroma was just… intoxicating. Rich, earthy bread notes mingling with sweet, melty chocolate – it was pure bliss. My whole family practically stampeded into the kitchen, drawn by the smell, eyes wide with anticipation.
That first bite? Oh, honey, it was a moment. Warm, soft, airy crumb studded with pockets of gooey chocolate that just melted on your tongue. It was a revelation, especially for a busy mom like me who often feels like she’s juggling too many balls in the air at once.
For years, I shied away from making homemade bread. It always felt so daunting, so complicated, like something only a seasoned baker with endless time could master. Kneading, proofing, punching down… it just seemed like too much when I was already trying to get dinner on the table, help with homework, and maybe, just maybe, steal five minutes to myself. I had a few “aha” moments that completely changed my perspective on bread baking, particularly with this chocolate chunk dutch oven bread.
My biggest breakthrough came when I stumbled upon the magic of no-knead bread. Suddenly, the idea of a beautiful, crusty loaf wasn’t a pipe dream but a simple, almost effortless reality. And when I thought, “What if I add chocolate to that?” – well, that’s when the real magic happened.
This chocolate chunk dutch oven bread became not just a recipe, but a testament to how simple things can bring the most joy. It fits perfectly into our busy life because most of the work is hands-off. You mix it the night before, let it do its thing, and then bake it up fresh whenever you’re ready. It’s perfect for a lazy weekend morning, a special treat for dessert, or just because you crave something truly comforting.
This isn’t just a recipe; it’s a little piece of comfort, a hug from your oven, and I absolutely can’t wait for you to try making your own chocolate chunk dutch oven bread.
INGREDIENTS:
Alright, let’s talk ingredients for this amazing chocolate chunk dutch oven bread. The beauty of this no-knead chocolate bread is its simplicity. You don’t need a pantry full of obscure items. In fact, you probably have most of these on hand already! This truly is a straightforward homemade chunk bread that delivers big on flavor with minimal fuss. When I’m gathering everything for my chocolate chunk dutch oven bread, I always use good quality ingredients because they really do make a difference in the final taste and texture.
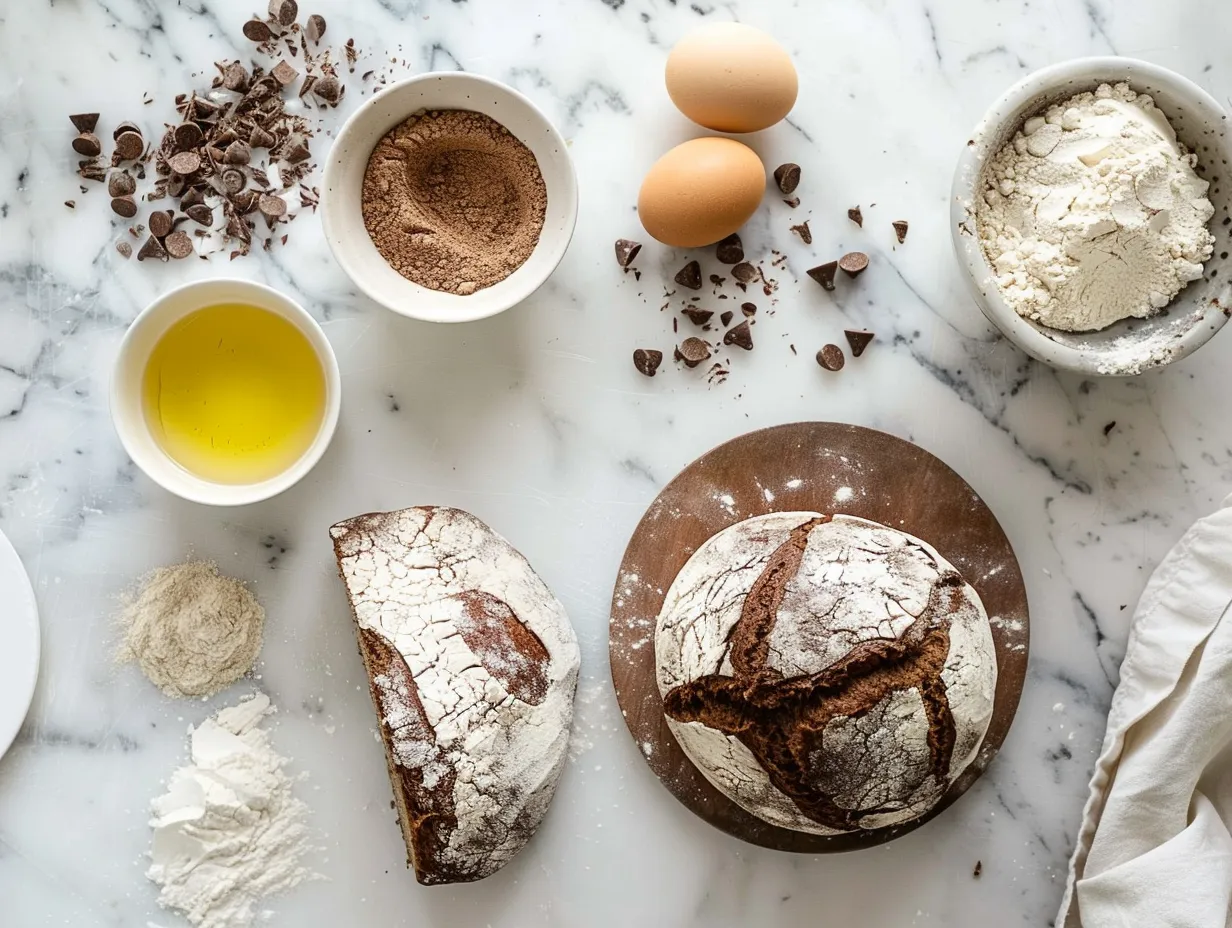
Here’s what you’ll need for your delicious chocolate chunk dutch oven bread:
- 3 cups (about 360g) all-purpose flour: I’ve experimented with bread flour, but honestly, good old all-purpose works beautifully for this chocolate chunk dutch oven bread and gives it that lovely, slightly chewy interior. When making chocolate chunk dutch oven bread, you can find this at any grocery store, no specialty trip required!
- 1 teaspoon instant or active dry yeast: Just a tiny bit! This is what helps give our artisan chocolate loaf its wonderful rise and airy crumb. If you’re using active dry yeast, make sure your water is the right temperature to wake it up.
- 1 teaspoon salt: Don’t skip the salt! It’s crucial for flavor and also helps control the yeast activity. My mom always told me that salt is the unsung hero of bread baking, and she was right. Here’s a chocolate chunk dutch oven bread trick I learned from my mom: always use a good quality coarse salt like Kosher or sea salt; it disperses better and gives a cleaner flavor than iodized table salt.
- 1 ½ cups (360ml) warm water (about 105-115°F / 40-46°C): This needs to be warm, not hot. Too hot and you’ll kill the yeast, too cold and it won’t activate. Think bathwater warm.
- 1 cup (about 170g) good quality chocolate chunks or chips: This is where the magic happens for our chocolate chunk dutch oven bread! I always use a mix of semi-sweet chocolate chunks and sometimes throw in a handful of dark chocolate chips for extra depth. For tips on choosing the best chocolate, you might find this King Arthur Baking guide helpful: The Best Chocolate Chips for Baking. When it comes to cost-saving tips for chocolate chunk dutch oven bread ingredients, sometimes buying larger bags of flour or chocolate when they’re on sale can save a few dollars in the long run. Plus, leftover chocolate chunks from your chocolate chunk dutch oven bread can be stored in an airtight container in a cool, dry place for months!
- Optional: 1-2 tablespoons granulated sugar: I sometimes add a little sugar if I want the yeast to get a super-fast start or if I’m using a darker chocolate and want a touch more sweetness in my rustic chocolate bread. It also helps with browning.
When I’m making this chocolate chunk dutch oven bread for my family, I often buy the big bags of flour and yeast from a warehouse club. For chocolate, I stock up when my favorite brands go on sale. These little ingredient prep shortcuts truly work for busy families like ours and mean you always have what you need for this delicious chocolate chunk dutch oven bread on hand.
HOW TO MAKE – STEP-BY-STEP:
Alright, honey, this is the fun part! Making this chocolate chunk dutch oven bread feels like alchemy, but it’s really just wonderfully simple. Don’t worry if your chocolate chunk dutch oven bread doesn’t look exactly like a bakery loaf the first time. Mine certainly didn’t! Bread baking is an art that comes with practice, and this cast iron bread recipe is incredibly forgiving.

Here’s how we get this gorgeous chocolate chunk dutch oven bread from simple ingredients to a warm, fragrant reality:
- Mix the Dry Ingredients (The Night Before, or at least 12 hours before baking): In a large bowl – seriously, go for a big one, because this dough will rise! – whisk together the flour, yeast, and salt. If you’re adding sugar, throw that in now too. Give it a good mix with a whisk or a spoon to make sure everything is evenly distributed for your homemade chunk bread.
- Add Water and Chocolate Chunks: Pour in the warm water. Now, here’s my personal tip: don’t just dump the chocolate in right away! I learned the hard way with chocolate chunk dutch oven bread that if you add them too soon, they can inhibit the yeast a bit and don’t get as evenly distributed. Mix the water and flour mixture with a wooden spoon or your hands until it just comes together into a shaggy, sticky dough. There’s no need to knead! Seriously, just mix until there are no dry spots of flour left. Then, gently fold in the chocolate chunks. You want them distributed, but don’t overmix.
- First Rise (The Long Nap): Cover the bowl tightly with plastic wrap. My favorite way to do this is to press the plastic wrap directly onto the surface of the dough to prevent a crust from forming, then wrap the bowl itself. Now, this is where the magic of this no-knead chocolate bread truly happens. Let the dough sit at room temperature for at least 12 hours, or up to 18 hours. I usually mix it up before bed, and it’s ready to go the next morning. In my kitchen, chocolate chunk dutch oven bread usually takes about 14 hours for this first rise, but it depends on the temperature of your kitchen. It should be bubbly and more than doubled in size. This long, slow fermentation is what gives the chocolate chunk dutch oven bread its incredible flavor and texture. For more on the science behind no-knead bread, I often refer to Kenji López-Alt’s insights at Serious Eats: The Food Lab’s Perfect No-Knead Bread.
- Prepare for Baking (The Warm-Up): About 30 minutes before you’re ready to bake your artisan chocolate loaf, place your empty Dutch oven (with the lid on!) into your cold oven. Preheat the oven to 450°F (232°C). This is crucial for getting that amazing crispy crust on your chocolate chunk dutch oven bread. While the oven and Dutch oven are heating, the kitchen fills with a comforting warmth. This is when I usually grab a cup of coffee and tidy up a bit!
- Shape the Dough (Gently!): Lightly flour a clean surface – I use my trusty silicone baking mat. Gently scrape the dough out of the bowl onto the floured surface. It will be very sticky and loose, don’t be alarmed! With floured hands, gently fold the edges of the dough toward the center a few times, forming a loose ball. Don’t worry about perfection; we’re just aiming for a somewhat round shape for your chocolate chunk dutch oven bread. You might need to flour your hands a few times, it’s a sticky job!
- Second Proof (The Short Nap): Transfer the dough ball, seam-side down, onto a piece of parchment paper. The parchment paper is a lifesaver for easily transferring the dough into the scorching hot Dutch oven. Loosely cover the dough with plastic wrap or a clean kitchen towel and let it rest for another 20-30 minutes while your Dutch oven finishes heating. This short rest allows the gluten to relax and the dough to puff up just a little more before baking.
- Bake It Up! (The Grand Finale): Once the oven is fully preheated and the Dutch oven is screaming hot, carefully remove the Dutch oven from the oven. It’s very hot, so please use oven mitts! Use the parchment paper to gently lift and transfer the dough into the hot Dutch oven. Pop the lid back on. Bake for 30 minutes with the lid on. This steaming environment inside the Dutch oven is what gives your rustic chocolate bread its incredible rise and chewy interior. While the chocolate chunk dutch oven bread is cooking, the house starts to smell absolutely divine.
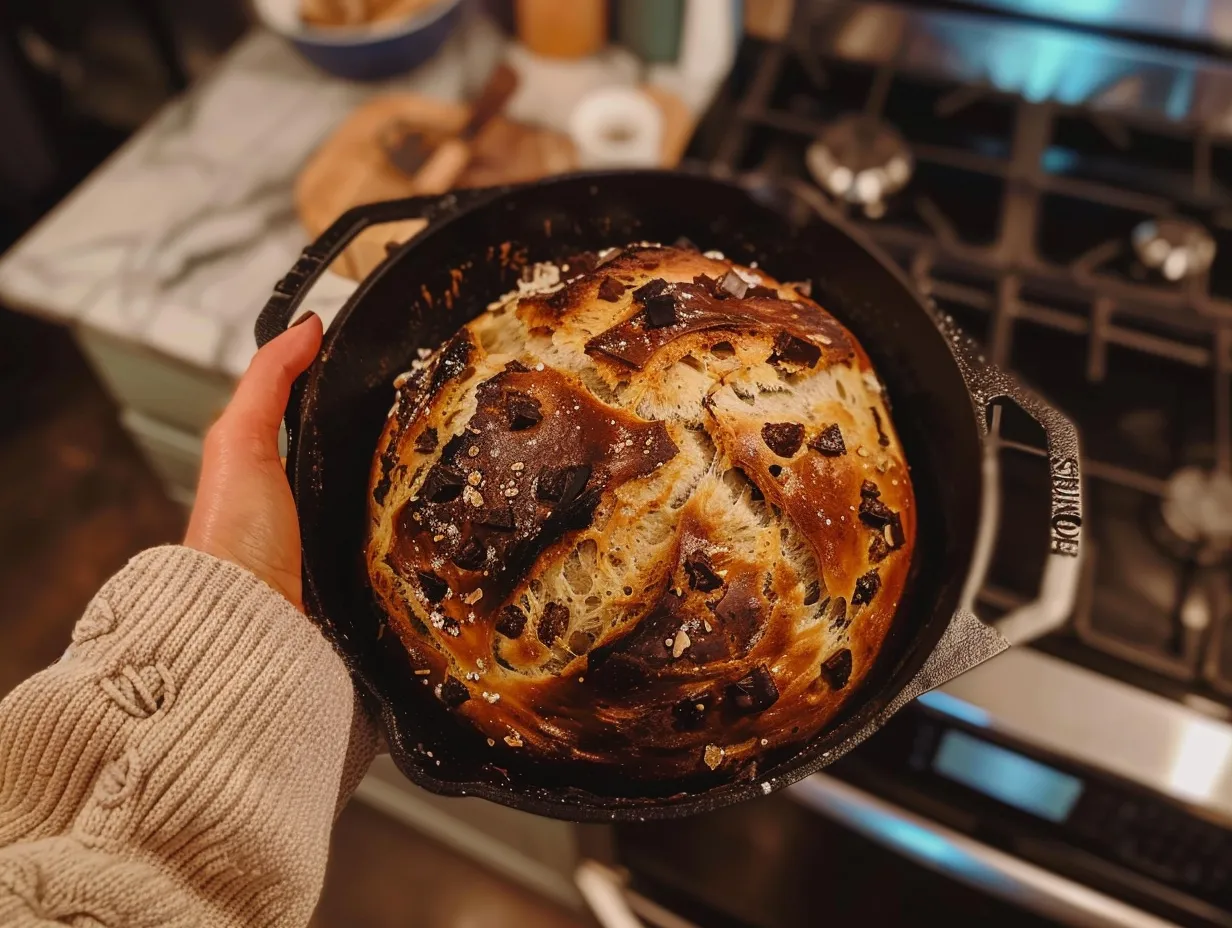
- Golden Brown Perfection: After 30 minutes, carefully remove the lid. The chocolate chunk dutch oven bread should have expanded beautifully and be looking pretty pale. Continue baking for another 15-20 minutes, or until the crust is a deep, golden brown and the chocolate chunks on the surface are gooey and caramelized. Your chocolate chunk dutch oven bread should smell like a chocolatey bakery dream. If you’re unsure, tap the bottom of the loaf – it should sound hollow.
- Cool Down (The Hardest Part!): Carefully remove the chocolate chunk dutch oven bread from the Dutch oven using the parchment paper and transfer it to a wire rack to cool completely. And I mean completely! I know, it’s agonizing. But cutting into hot bread can make it gummy. Let it cool for at least an hour, or even two, for the best texture and for the chocolate to set just enough. This is a family-tested shortcut: the kids are always trying to sneak a slice before it’s cool, but I promise, the wait is worth it for this incredible chocolate chunk dutch oven bread.
SERVING:
Oh, friend, this is where the joy truly comes full circle with our chocolate chunk dutch oven bread! There’s nothing quite like the moment that warm, fragrant loaf hits the cutting board, the crust crackles, and those melted chocolate chunks peek out. My family absolutely adores this chocolate chunk dutch oven bread! The kids love our chocolate chunk dutch oven bread when I slice it thick and serve it warm with a pat of good butter or a dollop of whipped cream for a special breakfast. Sometimes, they even ask for a sprinkle of sea salt on top to really bring out the chocolate flavor – smart cookies!
For me, there’s no better way to enjoy this chocolate chunk dutch oven bread than with a big mug of coffee in the morning. It’s just heavenly. It’s also fantastic as a simple, satisfying dessert after dinner. My go-to side dishes that pair with this chocolate chunk dutch oven bread are usually very simple. For breakfast, I might serve it alongside some fresh berries or a little bit of plain yogurt to balance the richness. If it’s for an afternoon treat, a glass of cold milk or a hot cup of tea is all you need.
This chocolate chunk dutch oven bread is perfect for so many occasions. It’s become my go-to for weekend brunches, especially when we have friends over. It looks so impressive, but it was really so easy! It’s also wonderful for holiday mornings, like Easter or Christmas, because you can prepare the dough the night before and just pop it in the oven while everyone is waking up. The smell alone is enough to get everyone out of bed! I’ve even brought this artisan chocolate loaf to potlucks, and it’s always the first thing to disappear. My friends always ask for this chocolate chunk dutch oven bread recipe, and I’m always happy to share this simple cast iron bread recipe.
As for presentation tips I’ve discovered for this homemade chunk bread, a simple dusting of powdered sugar just before serving makes it look extra special, especially if you’re bringing it to a gathering. Or, for a rustic touch, you can score the top with a sharp knife or razor blade right before baking – it helps guide the expansion and gives it that authentic bakery look.
If you have extra chocolate chunk dutch oven bread (which is a rare occurrence in my house!), it makes the most incredible French toast. Seriously, try it! Just slice it thick, dip it in your favorite egg wash, and griddle it up. For a seasonal variation, I sometimes add a touch of orange zest to the dough around the holidays – the orange and chocolate together in this rustic chocolate bread are just divine. Or for fall, a sprinkle of cinnamon or nutmeg can add a cozy warmth. This chocolate chunk dutch oven bread is truly versatile!
FAQs:
Okay, sweet friend, let’s tackle some of the questions I often get about this chocolate chunk dutch oven bread, both from my readers and from family members! We’ve all been there, standing in the kitchen, wondering if something’s gone wrong. Don’t worry, I’ve made my fair share of mistakes so you don’t have to! This no-knead chocolate bread is forgiving, but a few pointers can help.
Q1: My dough isn’t rising! What went wrong with my chocolate chunk dutch oven bread?Oh, this is a classic! The most common culprit is usually the yeast. Either your water was too hot and killed the yeast, or too cold and didn’t activate it. Yeast can also be old or inactive. You know what I do when my chocolate chunk dutch oven bread dough doesn’t rise after the first few hours? I give it a gentle nudge. If it’s still sluggish, sometimes adding just a tiny pinch more yeast mixed with a tablespoon of warm water and gently folding it in can help. Always check the expiration date on your yeast!
Q2: My chocolate chunks sank to the bottom. How do I keep them evenly distributed in my chocolate chunk dutch oven bread?This is a super common issue with homemade chunk bread! I’ve had this happen so many times. The trick is to add the chocolate chunks after you’ve mostly mixed the flour and water, and then fold them in gently. If the dough is too wet, or you overmix after adding the chocolate, they tend to sink. Also, some people lightly dust their chocolate chunks with a tiny bit of flour before adding them to the dough, which can help them “stick” within the dough structure.
Q3: Can I use different types of chocolate for this artisan chocolate loaf?Absolutely! This is where you can really make this chocolate chunk dutch oven bread your own. I’ve used milk chocolate, white chocolate, and even a mix of all three. My spouse loves it with dark chocolate chunks, while the kids always vote for semi-sweet. Just be aware that milk and white chocolate are sweeter and can melt more easily, sometimes creating larger gooey pockets. Don’t be afraid to experiment with your chocolate chunk dutch oven bread!
Q4: My crust isn’t as crispy as I’d like. Any tips for a better crust on my rustic chocolate bread?Ah, the crispy crust! This is often about heat and steam. Make sure your Dutch oven is super hot before you put the dough in. That initial blast of heat helps create steam inside the covered Dutch oven, which is key for a good crust. When you take the lid off, make sure you bake it long enough for that beautiful golden-brown color to develop.
Sometimes, baking for an extra 5-10 minutes, even after it looks done, can make a difference. My oven runs a little cool, so I often leave my chocolate chunk dutch oven bread in for the full 20 minutes lid-off.
Q5: Can I make this chocolate chunk dutch oven bread without a Dutch oven?While the Dutch oven is truly the star for getting that perfect crust and internal texture, you can adapt it! If you don’t have a Dutch oven, you can bake it on a preheated baking stone or a heavy baking sheet. To create the steam, place a pan of hot water on the bottom rack of your oven during the initial baking phase. It won’t be exactly the same as a cast iron bread recipe baked in a Dutch oven, but you’ll still get a delicious loaf of chocolate chunk dutch oven bread.
Q6: How do I store leftover chocolate chunk dutch oven bread?If you manage to have any left (a true miracle in my house!), store your cooled chocolate chunk dutch oven bread in an airtight container or a large zip-top bag at room temperature for up to 2-3 days. It can also be frozen for longer storage. I like to slice it before freezing so I can just grab a slice or two to toast as needed. Just wrap individual slices tightly in plastic wrap, then foil, and pop them in a freezer bag.
Q7: Can I add nuts or other ingredients to my chocolate chunk dutch oven bread?Oh, absolutely! This chocolate chunk dutch oven bread is just begging for your creative touch. I’ve added toasted pecans or walnuts along with the chocolate chunks before, and it was fantastic. Dried cranberries or cherries would also be lovely. Just keep the total “add-in” quantity to about a cup so you don’t overload the dough. Have fun experimenting with your chocolate chunk dutch oven bread!
My Final Thoughts:
You know, this chocolate chunk dutch oven bread holds such a special place in my heart. It’s more than just a recipe; it’s a testament to how simple ingredients, a little bit of patience, and a whole lot of love can create something truly extraordinary.
It’s the smell that fills my kitchen on a lazy Saturday morning, the sticky chocolate smiles on my kids’ faces, and the satisfying crunch of that perfect crust. It’s the kind of food that creates memories, that brings people together, and reminds us of the simple comforts of home. Every time I pull a loaf of this chocolate chunk dutch oven bread out of the oven, it feels like a little victory, a delicious win in the everyday chaos.
My chocolate chunk dutch oven bread Pro Tips
- Don’t Rush the Rise: Seriously, the longer the first rise (within reason, 12-18 hours is key), the more complex and delicious the flavor of your chocolate chunk dutch oven bread will be. That slow fermentation is a game-changer.
- Hot Dutch Oven is Non-Negotiable: Make sure that Dutch oven is screaming hot before the dough goes in. It’s crucial for getting that amazing crust and powerful oven spring on your chocolate chunk dutch oven bread.
- Embrace the Stickiness: This is a very wet dough, and that’s okay! It contributes to the open, airy crumb. Don’t add more flour than specified, and use plenty of flour on your hands and surface when shaping.
I’ve tried so many variations of this chocolate chunk dutch oven bread with my family. My spouse, who loves anything savory, prefers it with a sprinkle of flaky sea salt on top to really balance the sweetness. The kids, naturally, love it loaded with extra chocolate – sometimes I even use mini chocolate chips alongside the chunks for extra chocolatey goodness. And for me, I love it with a blend of dark and semi-sweet chocolate, maybe with a handful of dried cherries for a little tart bite. It’s a wonderful base recipe that you can truly make your own.
I truly hope you give this chocolate chunk dutch oven bread a try. Don’t be intimidated; if I can do it, you absolutely can too! Take your time, enjoy the process, and savor that incredible aroma that will fill your home. When you pull that warm, golden loaf of chocolate chunk dutch oven bread from the oven, I promise you’ll feel like a true baking champion. Happy baking, my friend!
3-Step Easy Chocolate Chunk Dutch Oven Bread

This incredibly easy chocolate chunk bread, made effortlessly in just three steps, yields a deliciously rustic loaf with a crispy crust and tender, chocolate-studded interior, perfect for any time of day.
- Prep Time: 10 minutes
- Cook Time: 45 minutes
- Total Time: 55 minutes
- Yield: 1 loaf (8-10 slices)
- Category: Dessert
- Method: Baked
- Cuisine: American
Ingredients
- 3 cups (360g) all-purpose flour
- 1 ½ teaspoons salt
- ½ teaspoon instant yeast
- 1 ½ cups (360ml) warm water
- 1 cup (170g) chocolate chunks or chips
- Optional: flaky sea salt for sprinkling
Instructions
- In a large bowl, whisk together the flour, salt, and instant yeast. Add the warm water and chocolate chunks, stirring with a wooden spoon or spatula until a shaggy, wet dough forms. Cover the bowl with plastic wrap and let it rise at room temperature for 8-18 hours, or until doubled in size and bubbly.
- Preheat your oven to 450°F (230°C) with a Dutch oven inside for at least 30 minutes. While the oven preheats, gently scrape the risen dough onto a lightly floured surface. Fold the edges of the dough towards the center a few times to create a rough ball.
- Carefully remove the hot Dutch oven from the oven. Gently transfer the dough seam-side up into the preheated Dutch oven. Cover with the lid and bake for 30 minutes. Remove the lid and continue baking for another 10-15 minutes, or until the crust is golden brown and the internal temperature reaches 200-210°F (93-99°C). Let cool on a wire rack before slicing.
Notes
Serve warm with a pat of butter, a scoop of vanilla ice cream, or simply enjoy on its own. A sprinkle of flaky sea salt on top before baking enhances the chocolate flavor.