I remember the first time I made this cheesy meatloaf bake. It was a weeknight, and I was desperately trying to find something that would satisfy my husband’s craving for comfort food and my kids’ need for, well, anything with cheese! I had some ground beef in the fridge and a vague memory of my grandma making something similar.
I threw it all together, crossed my fingers, and the rest, as they say, is history. The aroma that filled my kitchen that night was intoxicating – savory meat, melted cheese, and just a hint of sweetness from the ketchup. The kids devoured it, my husband went back for seconds, and I felt like I’d finally cracked the code to weeknight dinner success.
The best part? It wasn’t even hard! I had this monumental “aha” moment when I realized that baking everything together in one dish made cleanup a breeze. No more slaving over multiple pots and pans after a long day. This cheesy meatloaf bake became a regular in our rotation, and over the years, I’ve tweaked and perfected it into the recipe I’m sharing with you today.
It’s the ultimate family-friendly meal – hearty, satisfying, and oh-so-cheesy. It’s also a fantastic recipe for using up leftover bread, which is always a plus in my book. Plus, it’s super easy to adapt. Sometimes I throw in some extra veggies, and other times I top it with different kinds of cheese depending on what I have in the fridge.
This cheesy meatloaf bake dish fits perfectly into our busy family life because it’s easy to prep ahead of time. I can mix everything together in the morning and then just pop it in the oven when we get home from school and work. This is the kind of recipe that makes you feel good about feeding your family a home-cooked meal, even when you’re short on time. And honestly, who doesn’t love a good cheesy ground beef casserole?
Trust me, once you try this cheesy meatloaf bake, it’ll become a staple in your own kitchen too! Let’s get to the recipe!
Ingredients for Cheesy Meatloaf Bake
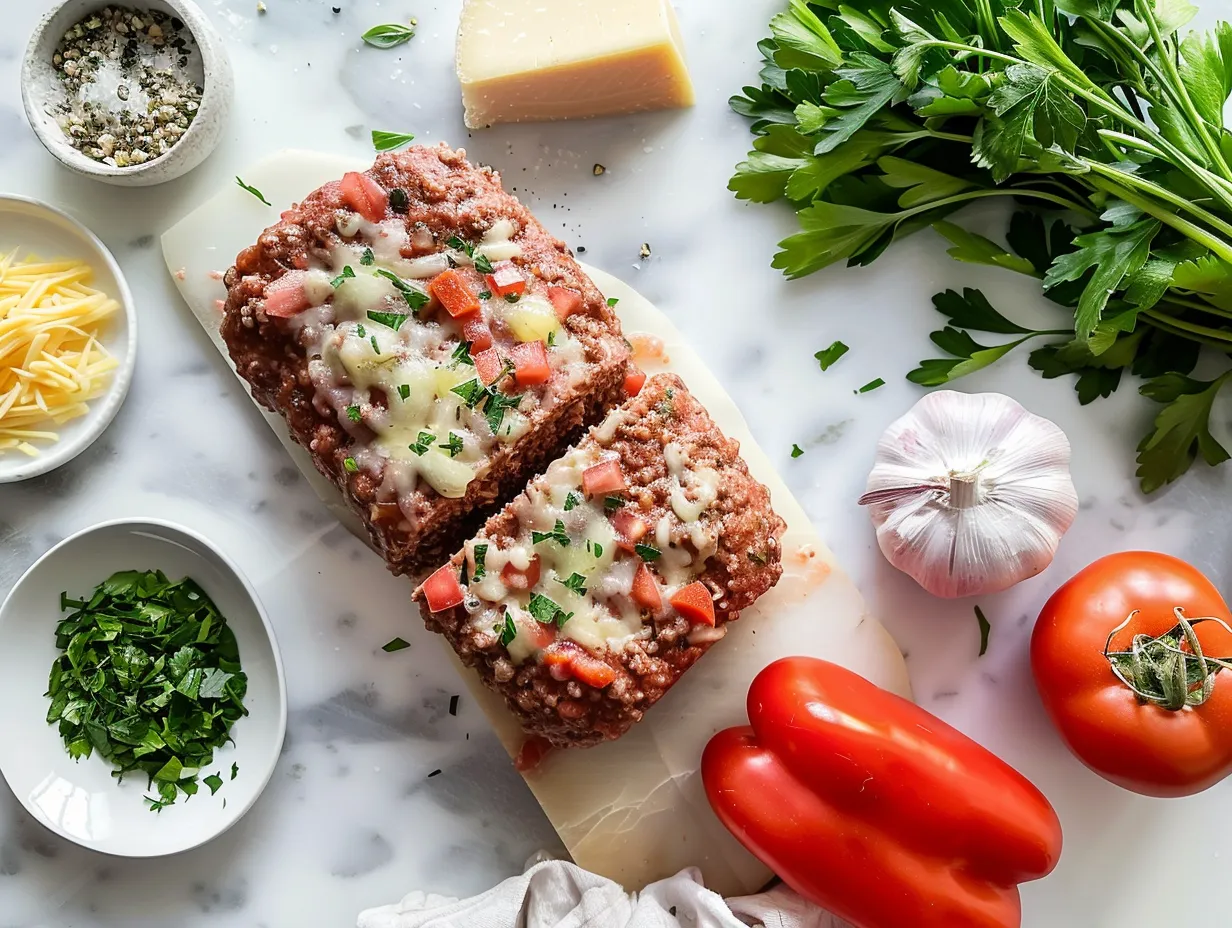
- 2 lbs Ground Beef (I prefer 80/20)
- 1 cup Bread Crumbs (Italian seasoned works great!)
- 1/2 cup Milk
- 1 large Egg
- 1/2 cup Ketchup (plus extra for topping)
- 1 tbsp Worcestershire Sauce
- 1 tsp Garlic Powder
- 1/2 tsp Onion Powder
- Salt and Pepper to taste
- 2 cups Shredded Cheddar Cheese (or your favorite)
I always use 80/20 ground beef for my cheesy meatloaf bake because it has the best flavor and moisture. The fat content in 80/20 helps to keep the meatloaf tender and juicy. Leaner ground beef can work, but you might want to add a little extra olive oil to the mixture to keep it from drying out. This will compensate for the lack of fat and prevent the meatloaf from becoming too dry. When making cheesy meatloaf bake, you can find Italian seasoned breadcrumbs in the breading aisle of most grocery stores. If you only have plain breadcrumbs, just add a little Italian seasoning blend to the mixture. A teaspoon or two should do the trick!
Here’s a cheesy meatloaf bake trick I learned from my mom: soak the breadcrumbs in the milk for a few minutes before adding them to the meat mixture. This helps to keep the meatloaf nice and moist. The breadcrumbs absorb the milk, creating a softer texture and preventing the meatloaf from drying out during baking. Speaking of shortcuts that work for busy families making cheesy meatloaf bake, I often use pre-shredded cheese to save time. And to save a little money, I like to buy ground beef in bulk when it’s on sale and freeze it in smaller portions. This is a great way to save both time and money!
For leftover ingredients after making a cheesy meatloaf bake, store any unused ground beef in the refrigerator for up to two days or in the freezer for longer storage. Properly stored ground beef can last for several months in the freezer. Keep leftover breadcrumbs in an airtight container at room temperature. This will prevent them from becoming stale or absorbing moisture.
How to Make Cheesy Meatloaf Bake – Step-by-Step
- Preheat your oven to 350°F (175°C). Grease a 9×13 inch baking dish.
- In a large bowl, combine the ground beef, bread crumbs, milk, egg, ketchup, Worcestershire sauce, garlic powder, onion powder, salt, and pepper. Don’t overmix it – just combine until everything is evenly distributed. I learned the hard way with cheesy meatloaf bake that overmixing makes it tough!
- Press the meat mixture evenly into the prepared baking dish. Don’t worry if your cheesy meatloaf bake isn’t perfectly shaped – it’s going to taste delicious either way!
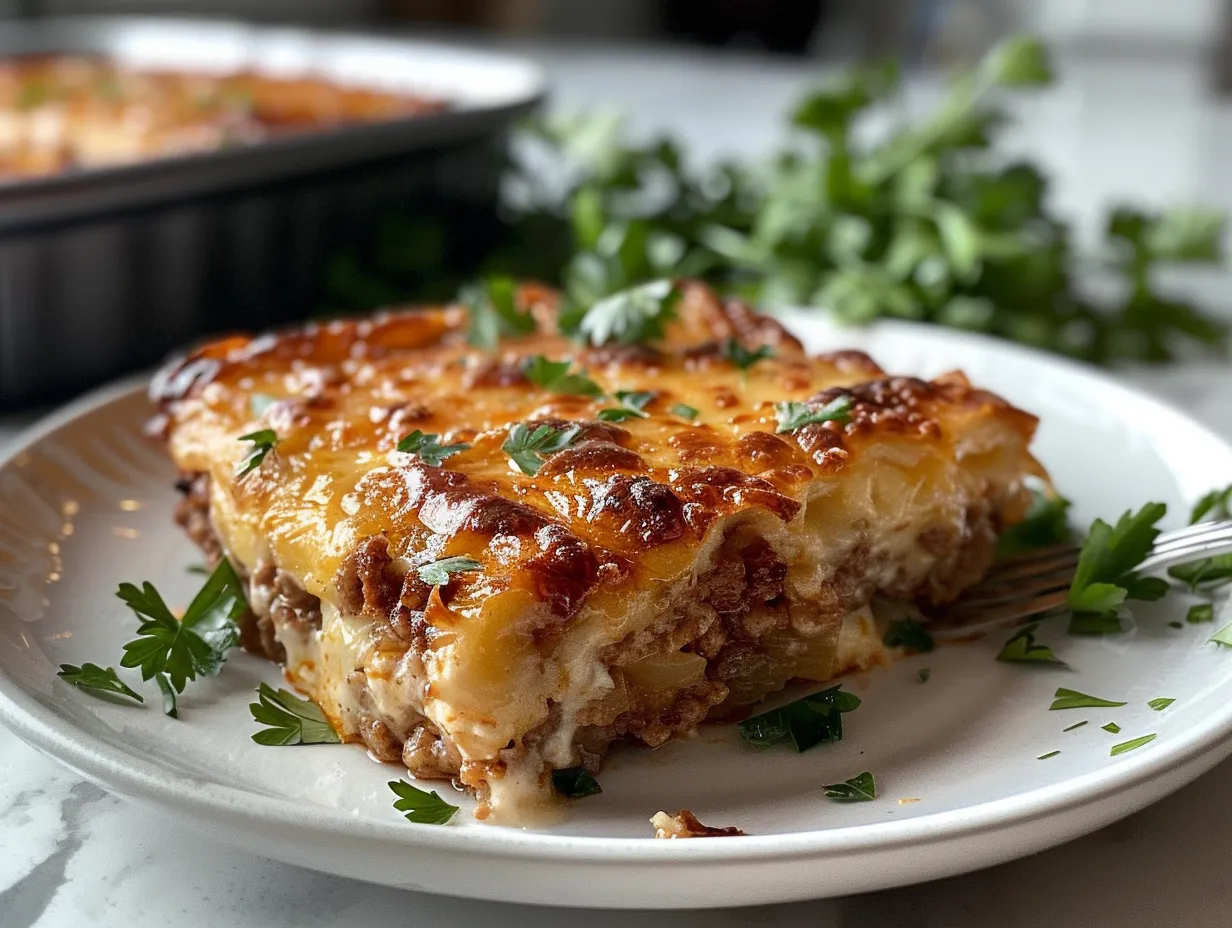
- Spread a thin layer of ketchup over the top of the meatloaf. This will give it a nice tangy flavor and help the cheese to melt evenly. In my kitchen, cheesy meatloaf bake usually takes about an hour.
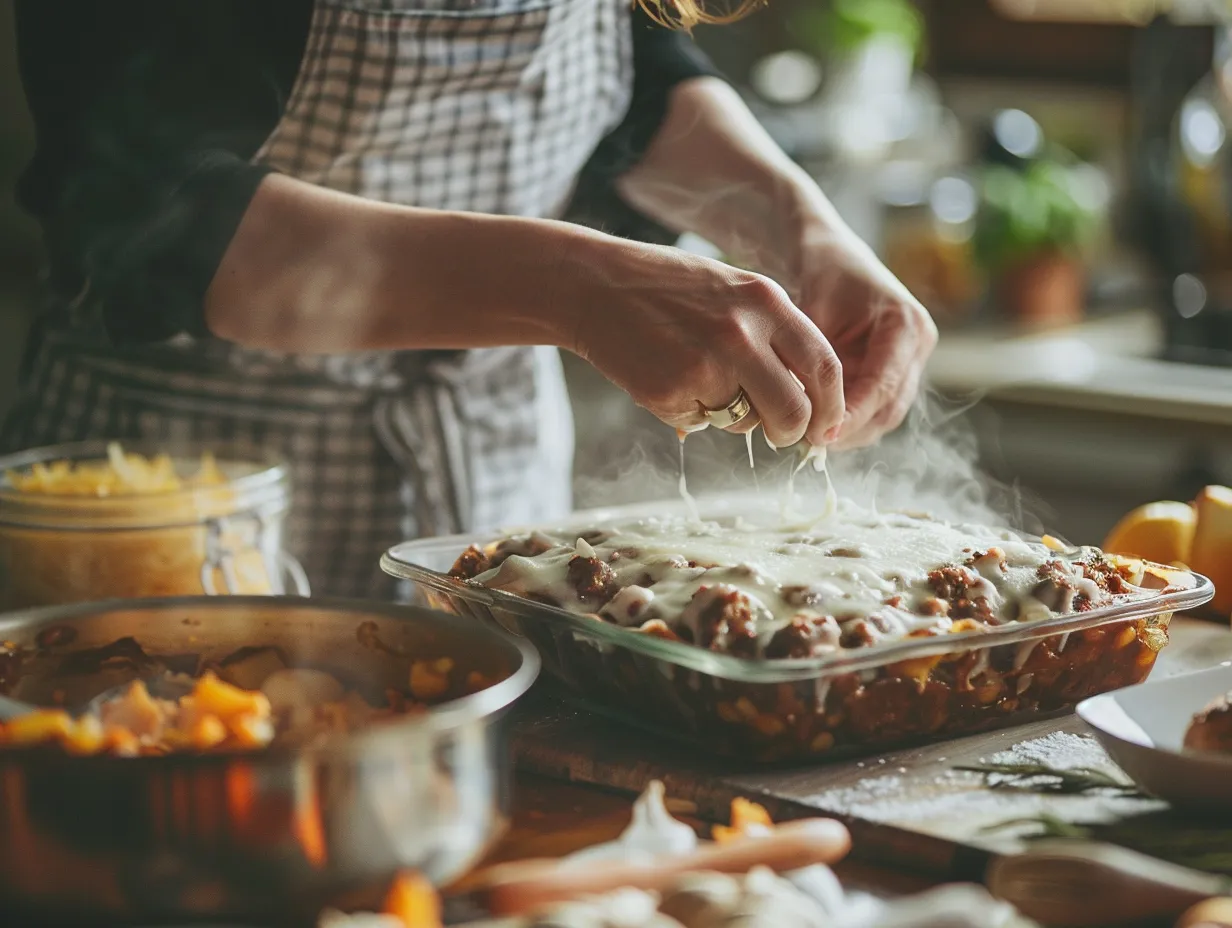
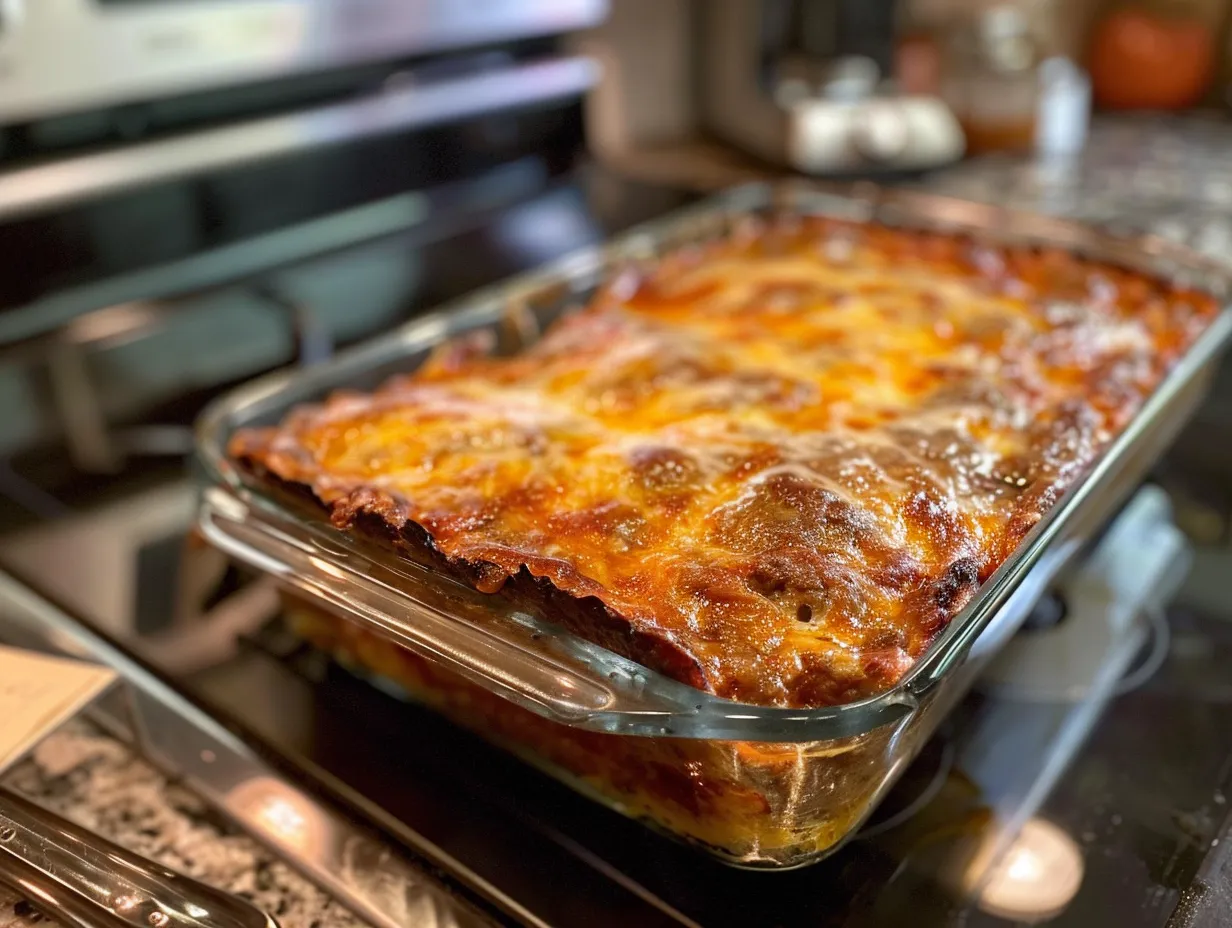
- Bake for 45 minutes, then remove from the oven and sprinkle the shredded cheese evenly over the top.
- Return the cheesy meatloaf bake to the oven and bake for another 15 minutes, or until the cheese is melted and bubbly and the meatloaf is cooked through. A meat thermometer inserted into the center should read 160°F (71°C). Don’t worry if the top gets a little browned – that just adds to the flavor!
- Let the cheesy meatloaf bake rest for 10 minutes before slicing and serving. This allows the juices to redistribute, making it even more moist and delicious.
While the cheesy meatloaf bake is cooking, I usually throw together a quick side salad or steam some vegetables. Sometimes, I’ll even make a batch of mashed potatoes to go with it. Preparing side dishes while the meatloaf is baking is a great way to save time and have a complete meal ready at the same time.
Your cheesy meatloaf bake should smell like savory meat, melted cheese, and a hint of ketchup. It’s a truly comforting aroma that always makes my family’s mouths water! One thing I do is ensure that ground beef is completely thawed out, as per USDA Food Safety and Inspection Service recommendations, before mixing it with the other ingredients. This ensures even cooking and prevents the meatloaf from being undercooked in the center.
Here’s a family-tested cheesy meatloaf bake shortcut: if you’re really short on time, you can skip the ketchup topping and just mix it right into the meat mixture. It won’t be quite as tangy, but it’ll still be delicious!
Serving Suggestions
The kids love our cheesy meatloaf bake when I serve it with a side of mashed potatoes and green beans. It’s the perfect comfort food meal that everyone enjoys. Creamy mashed potatoes and tender green beans complement the savory meatloaf perfectly. My go-to side dishes that pair with cheesy meatloaf bake are roasted vegetables, like broccoli or carrots, because they add a healthy element to the meal. Roasting brings out the natural sweetness of the vegetables and adds a nice texture contrast to the meatloaf. I also love to serve it with a simple side salad with a light vinaigrette. A fresh, crisp salad balances out the richness of the meatloaf.
This cheesy meatloaf bake is perfect for weeknight dinners, potlucks, or even a casual Sunday supper. It’s a versatile dish that’s sure to please a crowd. I’ve even made it for holiday gatherings, and it’s always a hit. For a cheesy meatloaf bake presentation tip, I like to garnish it with a sprinkle of fresh parsley before serving. It adds a pop of color and makes it look extra appealing.
If you have extra cheesy meatloaf bake, it’s great for sandwiches the next day. Just slice it up and put it on some toasted bread with your favorite toppings. Meatloaf sandwiches are a delicious and easy way to use up leftovers. You can also crumble it up and add it to pasta sauce for a hearty and flavorful meal. This is a great way to transform leftovers into a completely new dish. For seasonal cheesy meatloaf bake variations, try adding some chopped bell peppers and onions in the summer or some butternut squash in the fall. Experimenting with seasonal ingredients is a fun way to keep this dish fresh and exciting.
My friends always ask for this cheesy meatloaf bake recipe whenever I make it for them. It’s a crowd-pleaser that’s easy to make and always a hit.
Frequently Asked Questions
Q: Can I use a different type of cheese for this cheesy meatloaf bake?
A: Absolutely! You know what I do when my cheesy meatloaf bake needs a little something extra? I switch up the cheese! I’ve used mozzarella, provolone, pepper jack, and even a blend of cheddar and Monterey Jack. They all work great, so feel free to experiment and find your favorite. My family are huge fans of mozzarella, they are always asking for it to be added.
Q: Can I make this cheesy meatloaf bake ahead of time?
A: You bet! You can prepare the meat mixture and press it into the baking dish a day or two in advance. Just cover it tightly with plastic wrap and store it in the refrigerator. This is a great way to save time on busy weeknights. When you’re ready to bake it, add the ketchup and cheese and follow the recipe instructions. It is also a good idea to let it sit at room temperature for about 30 minutes before putting it in the oven to ensure even cooking.
Q: My cheesy meatloaf bake is always dry. What am I doing wrong?
A: Ah, the dreaded dry meatloaf! One thing I’ve learned is that the key to a moist cheesy meatloaf bake is to not overcook it. Use a meat thermometer to ensure it reaches 160°F (71°C), and then take it out of the oven immediately. Also, make sure you’re using enough milk and breadcrumbs in the meat mixture. These ingredients help to retain moisture and prevent the meatloaf from drying out.
Q: Can I add vegetables to this cheesy meatloaf bake?
A: Definitely! Adding veggies is a great way to sneak in some extra nutrients and flavor. I often add chopped onions, bell peppers, or carrots to my cheesy meatloaf bake. These vegetables add both flavor and moisture to the meatloaf. You can also add some spinach or zucchini if you’re feeling adventurous. I always make sure the vegetables are finely chopped so they cook evenly.
Q: Can I freeze this cheesy meatloaf bake?
A: Yes, you can freeze this cheesy meatloaf bake either before or after baking. If you’re freezing it before baking, wrap it tightly in plastic wrap and then in foil. This will prevent freezer burn and keep the meatloaf fresh. If you’re freezing it after baking, let it cool completely and then slice it into portions. Wrap each portion individually in plastic wrap and then in foil. It can be stored in the freezer for up to three months.
Q: Can I use ground turkey or chicken instead of ground beef for this cheesy meatloaf bake?
A: Absolutely! Ground turkey or chicken are great alternatives to ground beef in this cheesy meatloaf bake recipe. Just keep in mind that they tend to be drier than ground beef, so you may want to add a little extra olive oil or milk to the meat mixture to keep it moist. This will compensate for the lower fat content of the poultry.
Q: My cheese on top of the cheesy meatloaf bake is burning before the meat is cooked through. What should I do?
A: You know what I do when my cheese starts to brown too quickly on top of my cheesy meatloaf bake? I tent it with foil! Just loosely cover the baking dish with a piece of aluminum foil to protect the cheese from the heat. You can also try lowering the oven temperature by 25 degrees and baking it for a little longer. This will allow the meatloaf to cook through without burning the cheese.
Final Thoughts
This cheesy meatloaf bake recipe holds a special place in my heart because it’s a reminder of simpler times, of family dinners around the table, and of the joy of sharing good food with the people I love. It’s a recipe that’s been passed down through generations, and I’m so happy to be sharing it with you.
Cheesy Meatloaf Bake Pro Tips:
- Don’t overmix the meat mixture: Overmixing will result in a tough meatloaf.
- Use a meat thermometer: This is the best way to ensure that the meatloaf is cooked through without being overcooked.
- Let it rest before slicing: This allows the juices to redistribute, making it more moist and flavorful.
I’ve tried a few different cheesy meatloaf bake variations with my family over the years. One of our favorites is adding a layer of mashed potatoes on top of the meat mixture before adding the cheese. It’s like a shepherd’s pie and meatloaf all in one! I also love to add a little barbecue sauce to the ketchup topping for a smoky flavor. My husband loves it with pepper jack cheese for a spicy kick. We even sometimes make it like a cheesy beef and bread bake by adding toasted bread chunks to the base of the meatloaf. This adds a nice texture and flavor to the dish.
This easy cheesy meatloaf bake can be adopted so easily and made your own. Don’t be afraid to play with the ingredients and make it your own!
I hope you enjoy making this cheesy meatloaf bake as much as my family and I do. I truly believe it’s a recipe that will bring your family together and create lasting memories. Give this meatloaf with cheese topping a try and let me know what you think!
Let me know how your cheesy meatloaf bake turns out! I’m confident you’ll love it.
Print5 Amazing Baked Honey BBQ Popcorn Chicken

This baked honey BBQ popcorn chicken recipe is an easy and delicious way to enjoy a family favorite. Crispy, flavorful, and healthier than fried!
- Prep Time: 20 mins
- Cook Time: 20 mins
- Total Time: 40 mins
- Yield: 4 servings
- Category: Chicken
- Method: Baking
- Cuisine: American
Ingredients
- 1 lb boneless, skinless chicken breasts, cut into 1-inch pieces
- 1/2 cup buttermilk
- 1 cup panko bread crumbs
- 1/4 cup grated Parmesan cheese
- 1 tbsp smoked paprika
- 1 tsp garlic powder
- 1/2 tsp salt
- 1/4 tsp black pepper
- 1/2 cup BBQ sauce
- 2 tbsp honey
Instructions
- Preheat oven to 400°F (200°C). Line a baking sheet with parchment paper.
- In a bowl, soak chicken pieces in buttermilk for 15 minutes.
- In a separate bowl, combine panko bread crumbs, Parmesan cheese, smoked paprika, garlic powder, salt, and pepper.
- Dip each chicken piece into the bread crumb mixture, pressing to coat evenly. Place on the prepared baking sheet.
- Bake for 15-20 minutes, or until chicken is cooked through and golden brown.
- While the chicken is baking, whisk together BBQ sauce and honey in a small bowl.
- Once the chicken is done, brush with the honey BBQ sauce.
Notes
For extra crispy chicken, broil for the last 1-2 minutes, watching carefully to prevent burning. Serve immediately with your favorite dipping sauces.