
Honestly, fried hand pies have saved me on so many busy weeknights. They’re so versatile – you can fill them with just about anything! Plus, the kids absolutely adore them. I love that they’re portable and satisfying, making them perfect for picnics, potlucks, or just a cozy night in. There’s just something so comforting about biting into a warm, crispy fried hand pie, filled with your favorite flavors. The best part is the process. There’s a learning curve, but it’s so rewarding. I especially love using seasonal fruit! The first time I had success with these, it was with some fresh apples and cinnamon during the fall. I felt like I could take on the world!
I’ve made countless batches of these fried hand pies over the years, tweaking and perfecting the recipe until it’s just right. Now, I’m ready to share all my secrets with you! Trust me, once you try this fried hand pies recipe, you’ll be hooked too. Let’s get cooking!
Ingredients
Okay, let’s gather our supplies! This is where the magic begins. Remember, the quality of your ingredients makes a big difference, especially when making fried hand pies. When selecting your ingredients, consider organic options for a richer flavor and to minimize exposure to pesticides. Fresh, high-quality ingredients truly elevate the taste of your hand pies.

- All-Purpose Flour: 3 cups. I always use unbleached all-purpose flour for my fried hand pies. It gives them a lovely texture.
- Salt: 1 teaspoon. Just a pinch to enhance the flavors.
- Cold Butter: 1 cup (2 sticks), unsalted and cut into small cubes. This is KEY. The colder the butter, the flakier your crust will be. I sometimes even put it in the freezer for 10 minutes before using!
- Ice Water: ½ – ¾ cup. Add this gradually until the dough comes together.
- Your Choice of Filling: This is where you get to be creative! I’ll list some suggestions below.
- Oil for Frying: Vegetable oil, canola oil, or peanut oil. I prefer vegetable oil because it’s neutral and doesn’t impart any unwanted flavors, plus it tends to be more affordable than other options.
- Egg: 1, beaten (for egg wash – optional).
For filling options, here are some of my favorites for both sweet fried hand pies and savory fried hand pies:
- Sweet: Apple pie filling, cherry pie filling, blueberry jam, Nutella.
- Savory: Cooked ground beef with taco seasoning, shredded chicken with BBQ sauce, spinach and feta cheese.
When making fried hand pies, you can find most of these ingredients at any grocery store. If you’re looking for specialty pie fillings, check out your local farmers market or a gourmet food store. My mom always said the secret to a good crust is cold butter and not overworking the dough.
She was right! Here’s a trick I learned from my mom: use a pastry blender or a food processor to cut the butter into the flour. It makes the process so much easier and faster! For a cost-saving tip, buy flour and sugar in bulk. They last a long time and you’ll always have them on hand. Leftover pie filling can be stored in an airtight container in the fridge for a few days, or frozen for later use.
How to Make – Step-by-Step
Alright, let’s get down to business! Don’t be intimidated; making fried hand pies is easier than you think. Just follow these steps and you’ll be enjoying delicious, crispy fried hand pies in no time.
- Make the Dough: In a large bowl, whisk together the flour and salt. Cut in the cold butter using a pastry blender or your fingertips until the mixture resembles coarse crumbs.
- Add the Water: Gradually add the ice water, a tablespoon at a time, mixing until the dough just comes together. Don’t overmix! The dough should be slightly shaggy.
- Chill the Dough: Wrap the dough in plastic wrap and flatten it into a disc. Refrigerate for at least 30 minutes, or up to 2 hours. This is crucial for a flaky crust.
- Prepare the Filling: While the dough is chilling, prepare your desired filling. Make sure it’s cooled completely before filling the fried hand pies. I learned the hard way with fried hand pies that warm filling will melt the butter in the dough, resulting in a greasy mess.
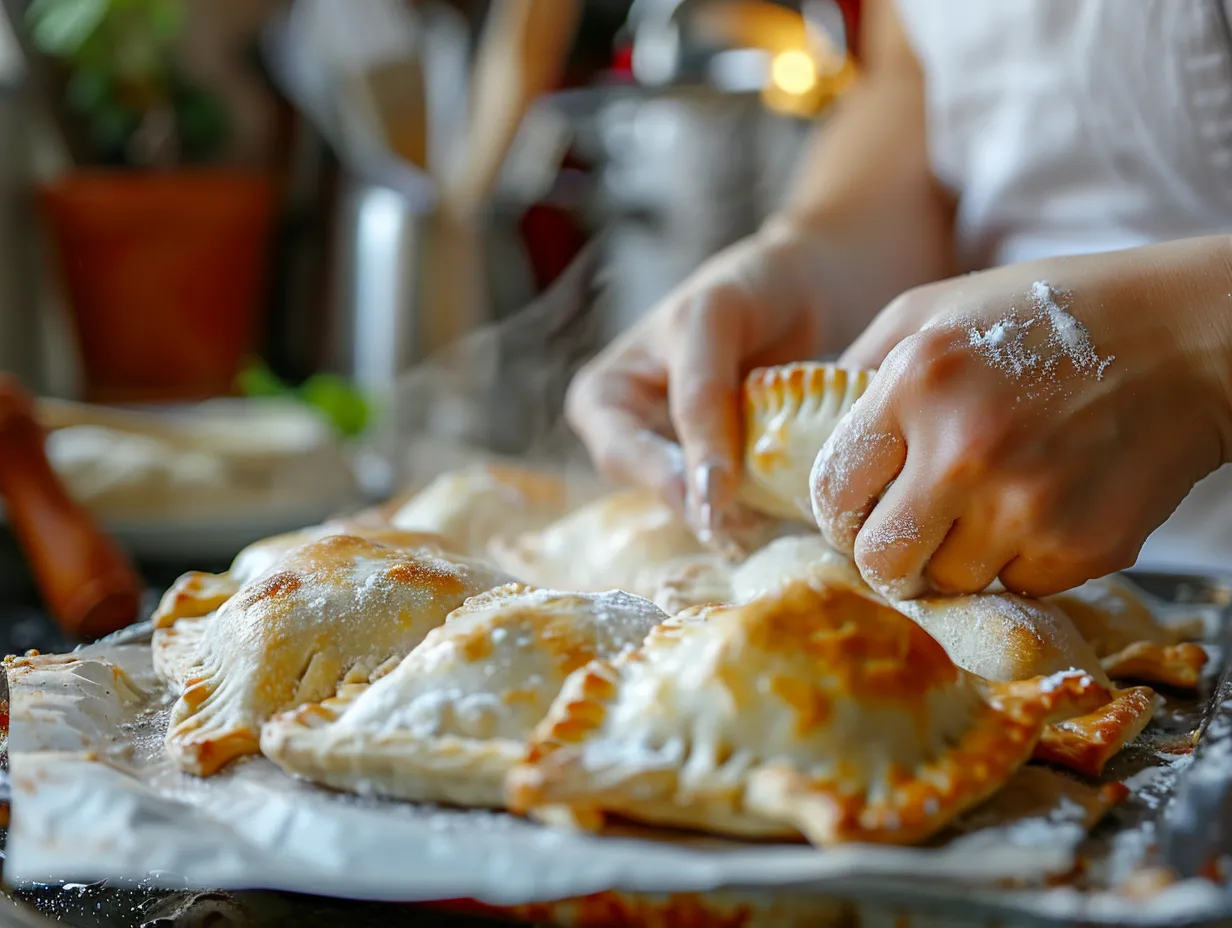
- Roll Out the Dough: On a lightly floured surface, roll out the dough to about 1/8-inch thickness. Use a cookie cutter or a knife to cut out circles or squares. I usually aim for about 4-inch circles for easy handling.
- Fill the Pies: Place a spoonful of filling in the center of each circle. Don’t overfill! About 1-2 tablespoons is perfect.
- Seal the Pies: Fold the dough over the filling to form a half-moon shape. Crimp the edges with a fork to seal tightly. This prevents the filling from leaking out during frying.
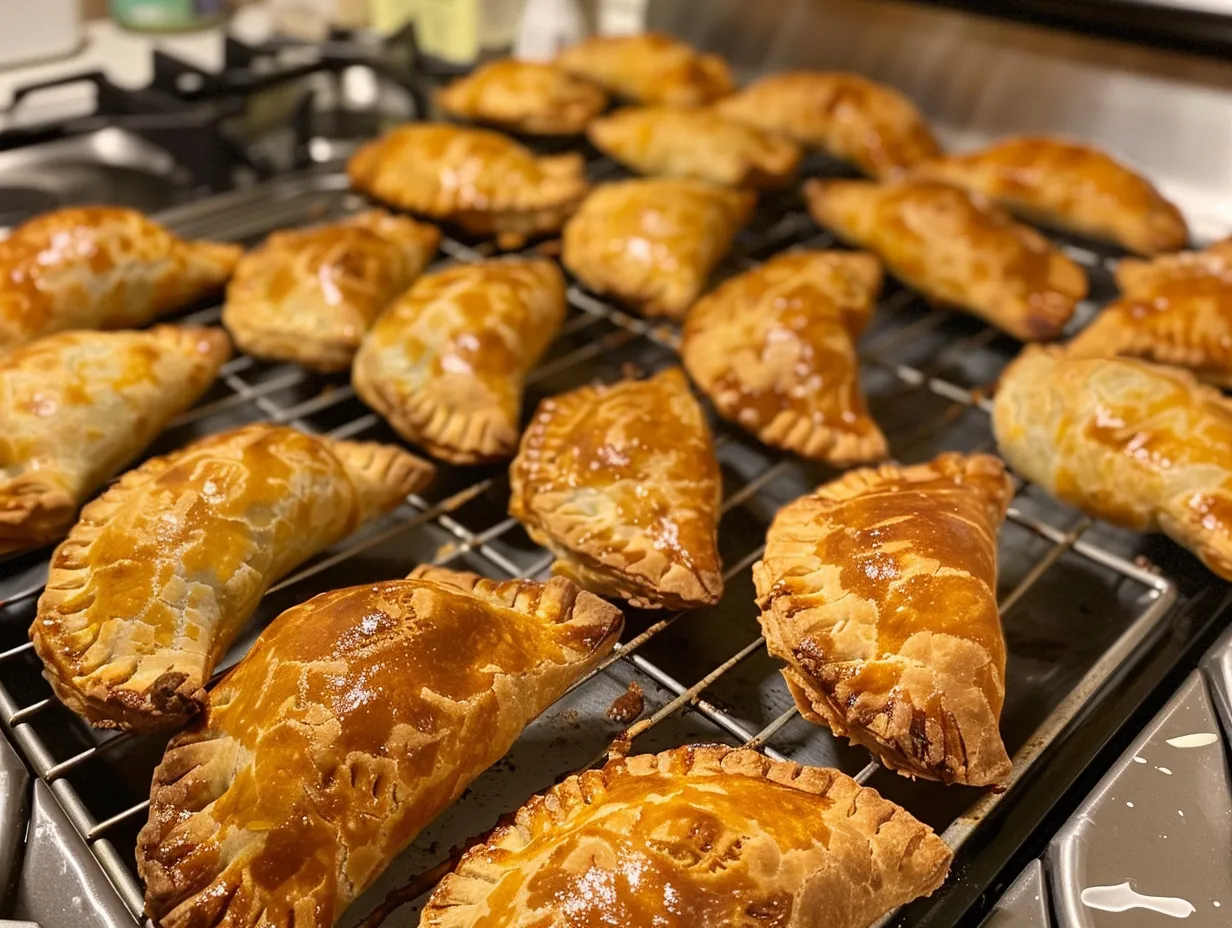
- Fry the Pies: Heat about 2 inches of oil in a large pot or deep fryer to 350°F (175°C). Carefully drop the fried hand pies into the hot oil, a few at a time, and fry for 2-3 minutes per side, or until golden brown and crispy. In my kitchen, fried hand pies usually takes around 6-8 minutes to cook completely. Ensure not to overcrowd the pot. This maintains the oil temperature, resulting in even cooking and prevents the pies from sticking together.
- Drain and Cool: Remove the fried hand pies from the oil with a slotted spoon and place them on a wire rack lined with paper towels to drain excess oil. Let them cool slightly before serving. While the fried hand pies is cooking, I usually prepare a simple powdered sugar glaze or a dipping sauce. It adds a nice touch! Your fried hand pies should smell like warm butter and whatever delicious filling you’ve chosen. Don’t worry if your fried hand pies aren’t perfectly shaped – that’s part of their charm! As long as they taste good, that’s all that matters. A family-tested shortcut: use pre-made pie crust to save time! It works great in a pinch. And if you want to make mini fried hand pies that are bite sized, use a smaller cookie cutter!
Serving
Okay, the moment we’ve all been waiting for – serving time! This is where you get to enjoy the fruits (pun intended!) of your labor.
My family enjoys these fried hand pies when I serve them warm with a scoop of vanilla ice cream. The contrast of the warm, crispy pie and the cold, creamy ice cream is heavenly! The kids love our fried hand pies when I pack them in their lunchboxes for a special treat. They’re always a hit!
Some great side dishes that pair with fried hand pies are:
- For sweet fried hand pies: A dollop of whipped cream, a sprinkle of powdered sugar, or a drizzle of chocolate sauce.
- For savory fried hand pies: A side of coleslaw, a simple green salad, or some air-fried potato wedges.
This fried hand pies is perfect for potlucks, picnics, or any casual gathering. They’re also a great dessert option for holiday meals. For presentation tips, I like to arrange the fried hand pies on a platter and dust them with powdered sugar or drizzle them with glaze. It makes them look extra fancy! If you have extra fried hand pies, store them in an airtight container at room temperature for up to 2 days.
You can reheat them in the oven or microwave, but they’re best enjoyed fresh. I love to get creative with seasonal variations. In the fall, I make apple and pumpkin fried hand pies. In the summer, I use fresh berries and peaches. My friends always ask for this fried hand pies recipe whenever I bring them to parties. They’re always a crowd-pleaser!
Fried Hand Pies: FAQs
Alright, let’s tackle some of those burning questions you might have about making fried hand pies. I’ve been there, trust me! These are all questions I’ve been asked by readers, friends, and family over the years.
Q: My dough is too sticky. What did I do wrong?
A: Ah, the dreaded sticky dough! You know what I do when my fried hand pies dough is too sticky? It usually means you added too much water. Don’t worry, it’s an easy fix! Just add a little more flour, a tablespoon at a time, until the dough comes together. Also, make sure your butter is cold enough. If it starts to melt, the dough will become sticky. Always add water gradually rather than all at once. This will give you better control over the dough’s consistency.
Q: My filling is leaking out during frying. How can I prevent this?
A: Leaky filling can be a bummer. Make sure you’re not overfilling the fried hand pies. Also, crimp the edges really well with a fork to create a tight seal. If you’re using a particularly juicy filling, you can add a little cornstarch to it to help thicken it up. Consider also chilling the filled hand pies for a short period before frying. This helps the dough and filling to firm up, reducing the likelihood of leaks.
Q: Can I bake these instead of frying them?
A: Yes, you can! If you prefer to bake your fried hand pies, bake them at 375°F (190°C) for 15-20 minutes, or until golden brown. They won’t be as crispy as fried ones, but they’ll still be delicious. Brush the tops with an egg wash before baking to achieve a beautiful golden-brown color. You can also sprinkle some sugar on top for added sweetness and a slight crunch.
Q: What kind of oil is best for frying?
A: I prefer to use vegetable oil or canola oil because they have a neutral flavor and a high smoke point. Peanut oil is also a good option, but be aware of allergies. I once tried using olive oil and it was a DISASTER. The flavor was all wrong! Make sure your oil is at the correct temperature before frying to ensure even cooking and prevent the hand pies from becoming greasy. Use a thermometer to monitor the oil temperature.
Q: How can I make these ahead of time?
A: You can make the dough ahead of time and store it in the refrigerator for up to 2 days. You can also assemble the fried hand pies ahead of time and freeze them. Just be sure to freeze them on a baking sheet first, then transfer them to a freezer bag. When you’re ready to fry them, thaw them slightly and fry as directed. This is a great way to save time when you’re expecting guests or preparing for a special occasion.
Q: Can I use different fillings?
A: Absolutely! That’s the beauty of fried hand pies – you can use any filling you like! Get creative and experiment with different flavors. Savory fillings like cooked ground beef, shredded chicken, or spinach and feta cheese are also delicious. Consider using seasonal ingredients for unique and flavorful combinations. From spiced pumpkin in the fall to fresh berries in the summer, the possibilities are endless.
Q: My fried hand pies are burning on the outside but the inside is still cold.
A: That’s a sign the oil is too hot! Adjust your stove temperature to ensure they are golden brown and cooked to perfection. Lowering the temperature will allow the inside to cook through without burning the outside. Be patient and allow the hand pies to cook slowly for the best results.
Q: Can I use an Air Fryer?
A: Yes! Air frying works great. Lightly spray with cooking oil and air fry at 375 until golden brown. Air frying offers a healthier alternative to deep frying, as it requires less oil. Be sure to flip the hand pies halfway through the cooking process to ensure even browning.
Q: Can I add a glaze?
A: Absolutely! Here’s a quick glaze:
- 1 cup confectioners’ sugar
- 2-3 tablespoons milk or water
- 1/2 teaspoon vanilla extract (optional)
In a small bowl, whisk together the confectioners’ sugar and milk (or water) until smooth. Add vanilla extract, if desired. Adjust the amount of liquid to reach your desired consistency.Drizzle the glaze over the cooled fried hand pies. Enjoy!
My Final Thoughts on Fried Hand Pies
These fried hand pies hold a special place in my heart because they remind me of my childhood. My grandmother used to make them for us, and they were always a special treat. Now, I love carrying on that tradition with my own family.
Here are my fried hand pies Pro Tips:
- Keep everything cold! Cold butter, cold water, cold filling – it all contributes to a flaky crust.
- Don’t overmix the dough! Overmixing will develop the gluten and make the crust tough.
- Seal the edges tightly! This will prevent the filling from leaking out during frying.
Some fried hand pies variations I’ve tried with my family include:
- Chocolate Hazelnut: Filled with Nutella and chopped hazelnuts. My son loves this version!
- Spicy Chorizo: Filled with cooked chorizo, potatoes, and a touch of chili powder. My husband’s favorite!
- Savory fillings like onion beef fried rice.
I encourage you to make this fried hand pies recipe your own. Don’t be afraid to experiment with different fillings and flavors. The most important thing is to have fun and enjoy the process! I hope you and your family love these fried hand pies as much as we do. Remember, even if your first batch isn’t perfect, don’t give up! Keep practicing, and you’ll be a fried hand pies master in no time. Happy frying! Now go get your fried hand pies on!
PrintEasy Fried Hand Pies Recipe

These fried hand pies are amazing!
- Prep Time: 15
- Cook Time: 10
- Total Time: 25
- Yield: 9
- Category: Dessert
- Method: Frying
- Cuisine: American
Ingredients
- 1 cup flour
- 1/2 cup sugar
- 1/4 cup butter
- Filling of your choice
Instructions
- Mix flour and sugar
- Cut in butter
- Add filling
- Fry until golden brown
Notes
Serve warm with ice cream.