This recipe is all about simplicity and flavor. With minimal steps and no oven required, you can whip up this decadent pie in no time. It’s the perfect dessert for hot summer days, potlucks, or whenever you crave a little slice of tropical paradise. The rich flavors and creamy texture will have everyone asking for seconds.
Ready to experience the magic? Try this creamy key lime pie tonight—you won’t believe how simple it is to create such a stunning dessert! It’s time to ditch the complicated recipes and embrace the ease and deliciousness of this no-bake wonder. You’ll find yourself making this delightful pie again and again.
Ingredients:
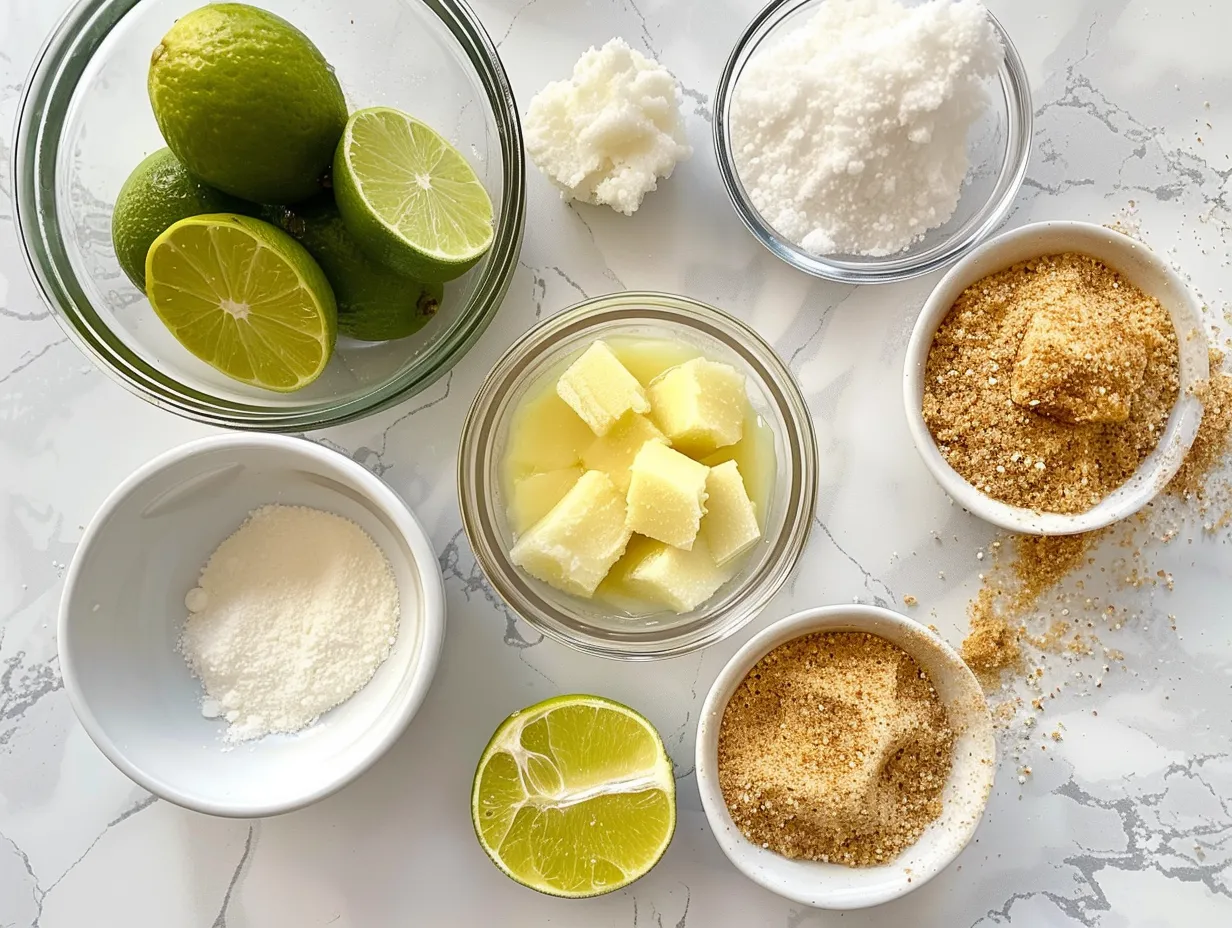
- (1 ½ cups) Graham Cracker Crumbs: Finely crushed, about 12 full sheets.
- (½ cup) Unsalted Butter: Melted to bind the crust.
- (¼ cup) Granulated Sugar: For a touch of sweetness in the crust.
- (2 (14-ounce) cans) Sweetened Condensed Milk: The base for the creamy filling.
- (1 cup) Key Lime Juice: Freshly squeezed for the best flavor.
- (1 tbsp) Key Lime Zest: Adds an extra burst of citrus.
- (8 oz) Cream Cheese: Softened to room temperature.
- Optional: Whipped Cream: For topping, either homemade or store-bought.
Tips:
- For extra richness, stir in 2 tablespoons of cream cheese for a smoother texture.
- Ensure your cream cheese is fully softened to avoid lumps in the filling.
Step-by-Step Instructions:
- Prepare the Graham Cracker Crust: In a medium bowl, combine the graham cracker crumbs, melted butter, and granulated sugar. Mix well until all the crumbs are moistened.
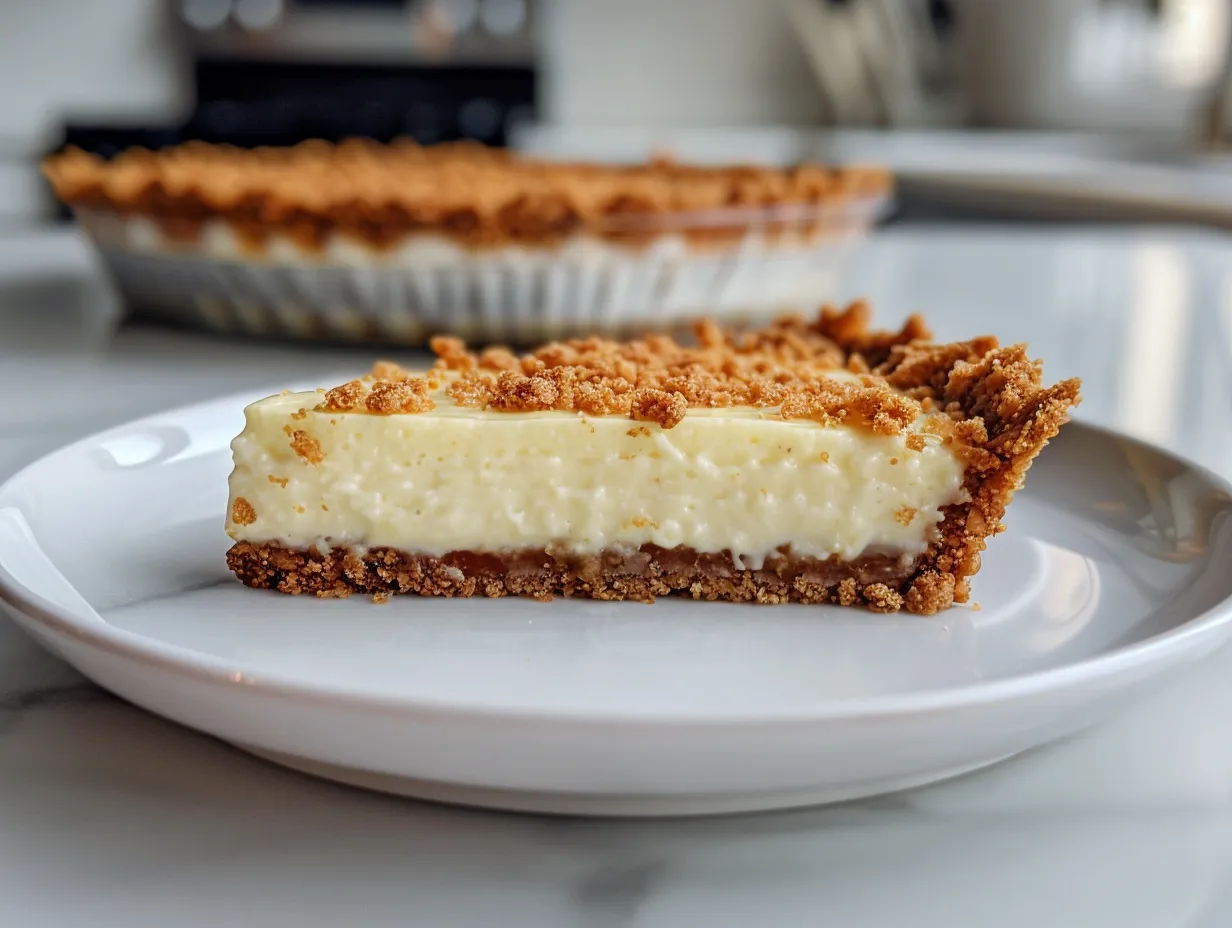
- Press the Crust into the Pan: Press the mixture evenly into the bottom of a 9-inch pie pan. Use the back of a spoon or a measuring cup to firmly pack the crumbs. This ensures the crust holds its shape. Consider using a pie pan with a removable bottom for easier serving. The even distribution and firm packing are crucial for preventing the crust from crumbling later.
- Chill the Crust: Place the pie pan in the refrigerator and chill for at least 30 minutes. This helps the crust to set and become firm. For an even firmer crust, you can chill it for up to an hour. The cold temperature solidifies the butter, binding the crumbs together.
- Make the Key Lime Filling: In a large bowl, beat the softened cream cheese until smooth and creamy. This is crucial to prevent lumps in your final product. Use an electric mixer for best results, and scrape down the sides of the bowl occasionally to ensure even mixing. The smoother the cream cheese, the silkier your filling will be.
- Add Sweetened Condensed Milk: Gradually add the sweetened condensed milk to the cream cheese, mixing until well combined. Ensure there are no lumps for a perfectly smooth filling. Adding it gradually helps prevent the mixture from becoming too liquid too quickly, ensuring a consistent texture.
- Incorporate Key Lime Juice and Zest: Add the fresh key lime juice and key lime zest to the mixture. Mix until everything is well combined and the filling is smooth. The acid in the lime juice will help to thicken the filling. Freshly squeezed key lime juice is essential for that authentic, tangy flavor.
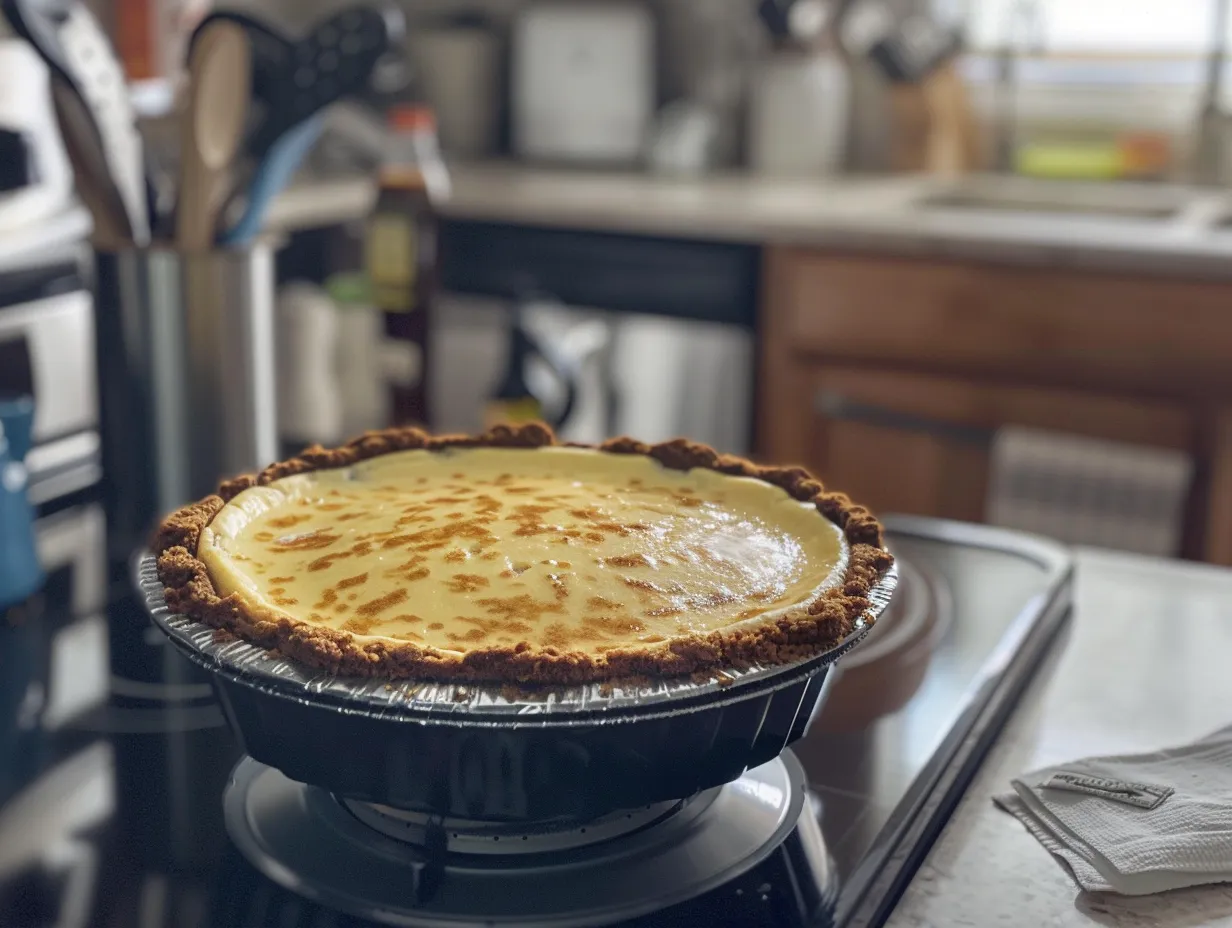
- Pour Filling into Crust: Pour the key lime filling into the chilled graham cracker crust, spreading evenly. Use a spatula to ensure the filling reaches all edges of the crust. An even layer of filling guarantees a uniform taste in every slice.
- Chill the Pie: Cover the pie with plastic wrap and refrigerate for at least 4 hours, or preferably overnight. This allows the filling to set completely and the flavors to meld together. Chilling overnight is highly recommended, as it allows the flavors to fully develop and the filling to reach its optimal consistency.
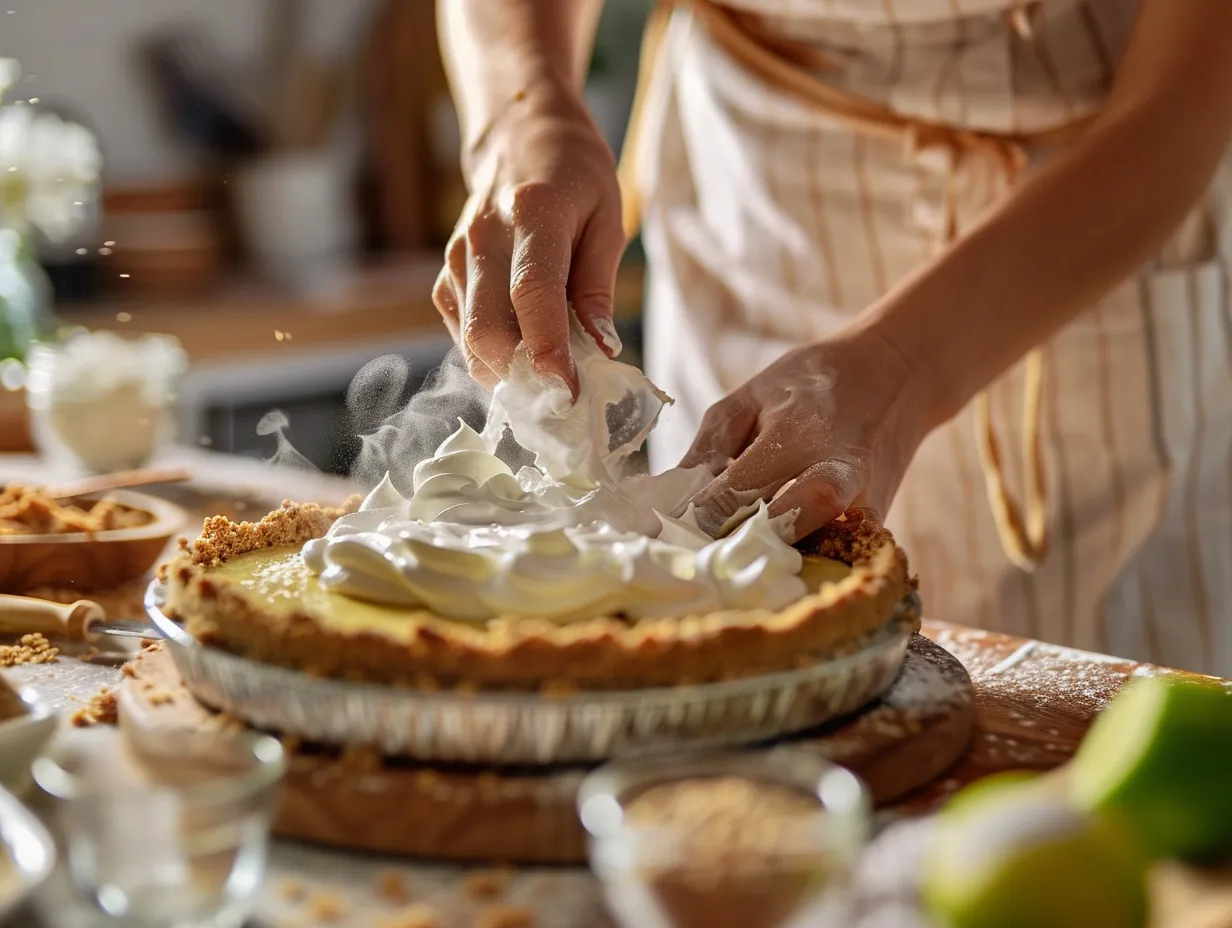
- Garnish and Serve: Before serving, garnish with whipped cream and additional key lime zest, if desired. Slice and enjoy this creamy, tangy dessert. A sprinkle of key lime zest not only adds a pop of color but also intensifies the citrus aroma, enhancing the overall sensory experience.
Serving Ideas:
This creamy key lime pie is a versatile dessert that can be enjoyed in numerous ways. Its bright, citrusy flavor makes it a perfect ending to a variety of meals, from casual barbecues to elegant dinner parties. Here are a few serving suggestions to elevate your key lime pie experience:
Classic Pairing:
Serve a slice of key lime pie with a dollop of freshly made whipped cream. The lightness of the whipped cream complements the tangy richness of the pie, creating a delightful contrast in textures and flavors. For an extra touch, sprinkle a bit of key lime zest on top of the whipped cream to enhance the citrus aroma. Consider adding a hint of vanilla extract to your whipped cream for an even more decadent experience. The vanilla complements the citrus notes beautifully.
Tropical Platter:
Create a tropical-themed dessert platter by pairing the key lime pie with slices of fresh mango, pineapple, and kiwi. The combination of the creamy pie and the juicy, sweet fruits offers a refreshing and vibrant culinary experience. Arrange the slices artfully around the pie on a large plate for an appealing presentation. A drizzle of honey or agave nectar over the fruit can add an extra layer of sweetness and enhance the tropical flavors.
Cocktail Hour:
Offer miniature key lime pie tarts alongside tropical cocktails like margaritas or mojitos. The tangy and sweet flavors of the pie harmonize perfectly with the zesty and refreshing cocktails, making it an ideal pairing for a relaxed gathering. Consider garnishing the cocktails with lime wedges and mint sprigs to complement the pie’s flavors. To take this pairing to the next level, consider rimming your margarita glasses with a mixture of sugar and lime zest.
Coffee Companion:
Serve a slice of key lime pie with a cup of strong, dark roast coffee. The boldness of the coffee cuts through the richness of the pie, balancing the sweetness and creating a harmonious flavor profile. It’s a perfect treat for an afternoon pick-me-up or an after-dinner indulgence. Experiment with different coffee blends to find the perfect match for your key lime pie. A Sumatran or French roast often works well.
Elegant Plating:
For a more sophisticated presentation, plate a slice of key lime pie with a drizzle of raspberry sauce and a scattering of toasted coconut flakes. The tartness of the raspberry sauce adds a layer of complexity to the dessert, while the toasted coconut flakes provide a delightful crunch and tropical aroma. This elegant plating technique is perfect for special occasions and dinner parties. A few fresh raspberries alongside the sauce can elevate the presentation even further.
No matter how you choose to serve it, this creamy key lime pie is sure to be a hit. Its effortless preparation and irresistible flavor make it a go-to dessert for any occasion.
FAQs:
Q: Can I use regular limes instead of key limes?
A: While key limes are preferred for their unique, intense flavor, regular limes can be used as a substitute. However, keep in mind that the taste will be slightly different. Key limes are more tart and aromatic compared to regular limes. If using regular limes, consider adding a bit more zest to mimic the key lime flavor. You might also want to add a touch of extra lime juice to achieve a similar level of tartness.
Q: How do I store leftover key lime pie?
A: To store leftover key lime pie, cover it tightly with plastic wrap or place it in an airtight container. Store it in the refrigerator for up to 3-4 days. The pie is best enjoyed when it’s cold, as this helps maintain its texture and flavor. Avoid leaving the pie at room temperature for extended periods, as the filling can become soft and lose its shape. Proper storage is essential to maintain the pie’s creamy texture and prevent it from absorbing other flavors in the refrigerator.
Q: Can I freeze key lime pie?
A: Yes, you can freeze key lime pie, but the texture may change slightly upon thawing. To freeze, wrap the pie tightly in plastic wrap, then wrap it again in aluminum foil. This will help prevent freezer burn. Freeze for up to 2-3 months. When ready to serve, thaw the pie in the refrigerator overnight. Be aware that the crust may become slightly soggy after thawing. To minimize sogginess, consider placing a paper towel beneath the pie while it thaws to absorb excess moisture.
Q: What can I do if my key lime pie filling is too runny?
A: If your key lime pie filling is too runny, it could be due to several factors. Ensure that you are using the correct ratio of ingredients, particularly the lime juice to sweetened condensed milk. Also, make sure that your cream cheese is properly softened. If the filling is still too runny, you can try adding a tablespoon of cornstarch to the mixture before chilling. This will help to thicken the filling as it sets. Mix the cornstarch with a small amount of cold water before adding it to the filling to prevent clumping.
Q: Can I make this pie with a pre-made graham cracker crust?
A: Absolutely! Using a pre-made graham cracker crust is a convenient way to save time. Simply purchase a pre-made crust from the grocery store and follow the recipe instructions for the filling. Pour the filling into the pre-made crust and chill as directed. This is a great option for those who are short on time but still want to enjoy a delicious key lime pie. When selecting a pre-made crust, check the expiration date to ensure it’s fresh and hasn’t become stale.
Q: Why is my graham cracker crust soggy?
A: A soggy graham cracker crust can be caused by a few issues. First, ensure that the melted butter is evenly distributed throughout the graham cracker crumbs. Second, press the crust firmly into the pie pan to create a solid base. Chilling the crust before adding the filling can also help it to set and prevent it from becoming soggy. Finally, avoid adding too much butter, as this can make the crust greasy and prone to sogginess. Consider blind-baking the crust for 10-12 minutes at 350°F (175°C) for an extra-crisp texture if you have the time.
Conclusion:
This no-bake creamy key lime pie is a delightful dessert that’s perfect for any occasion. Its simplicity and incredible flavor make it a go-to recipe for both novice and experienced bakers. The combination of a buttery graham cracker crust and a tangy, creamy filling is simply irresistible.
This recipe offers a refreshing twist on traditional key lime pie, eliminating the need for an oven and streamlining the preparation process. The result is a stunning dessert that’s sure to impress your family and friends. Whether you’re hosting a summer barbecue or simply craving a sweet treat, this creamy key lime pie is the perfect choice.
Pro Tips: For an extra burst of flavor, add a teaspoon of key lime extract to the filling. To prevent the crust from sticking, lightly grease the pie pan before pressing in the graham cracker crumbs.
Variations:
- Chocolate Crust: Substitute the graham cracker crust with an Oreo cookie crust for a chocolatey twist. Simply crush Oreo cookies and mix with melted butter.
- Coconut Topping: Sprinkle toasted coconut flakes over the whipped cream for added texture and tropical flavor.
Enjoy the process of creating this wonderful dessert, and savor every bite of its creamy, tangy goodness. You will love this recipe !
PrintCreamy Key Lime Pie with Graham Cracker Crust (No Oven)

This no-bake Key Lime Pie recipe is incredibly easy and requires only 5 simple steps! Perfect for a quick and delicious dessert.
- Prep Time: 15
- Total Time: 135
- Yield: 8 servings
- Category: Dessert
- Method: No-Bake
- Cuisine: American
Ingredients
- 1 (14 ounce) can sweetened condensed milk
- 1/2 cup Key lime juice
- 1 teaspoon lime zest
- 1 (9 inch) graham cracker pie crust
- Whipped cream, for topping
Instructions
- In a mixing bowl, combine sweetened condensed milk, Key lime juice, and lime zest.
- Pour mixture into graham cracker pie crust.
- Refrigerate for at least 2 hours, or until firm.
- Garnish with whipped cream.
- Serve and enjoy!
Notes
For a tangier flavor, add an extra tablespoon of Key lime juice. You can also use regular limes if Key limes are not available.